The structure of the templates used for the automotive industry is like so:
In the workflow a main ‘Agent’ template is selected. This ‘Agent’ is specific for each client. The fixed workflow selects the agent based on the Client found inside the input XML file. The name of the agent template is generally: ‘Agent_<Client>.itpl’ e.g. Agent_vw_eu.itpl.
The main agent template selects a specific subtemplate based on the type and additional subtemplates might also be included here.
The main agent templates are stored in these subdirectories inside {INTERFORMNG_HOME]/resources/templates/std/<Client> e.g.
C:\ProgramData\resources\templates\std\vw_eu\, which are always triggered by the InterFormNG workflow.
The main client template refers to a special template, that you can change if needed. The template is placed in the directory: /mod/<Client>/CustomAgent_<Client>.itpl, where <Client> is the name of the current client. The special CustomAgent_<Client>.itpl file is shipped with the initial installation of InterFormNG, but not changed in future upgrades. This makes it possible to include special changes in this template (which is placed in the /mod directory without causing a problem after a future upgrade of the automotive package.
The various subtemplates refer to the common template, /std/global/LanguageSelector, which sets the language of the output depending on the LanguageCode of the input XML file.
Any templates inside the /std directory must remain unchanged by you as a customer, as future updates will overwrite existing templates.
Even though the standard, automotive templates are all fixed, and should not be changed, it is still possible to make your own, local changes to any part of the output.
The CustomAgent_<Client> templates
One example is the template /mod/<Client>/CustomAgent_<Client>.itpl files. Here you can add changes if you e.g. want to specify a special way to select the output printer (or output media e.g. PDF or email), or if you want to add support for additional types or subtypes apart from the ones, that are delivered as a part of the standard package. The template can be freely changed, but should be done with the shipped file as basis, which looks like this:
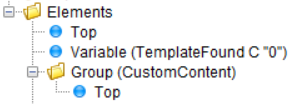
The two elements in the template should be kept, even if you change the template. The two elements are these:
Firstly a variable, TemplateFound is defined locally:
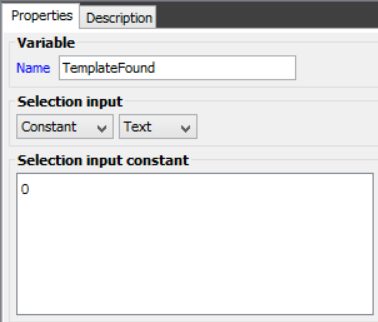
The definition of the variable is important, if you want to add support for any new type or subtype for the specific client. The variable can be used for sending back a signal to standard automotive processor:
If TemplateFound is ‘0' (zero):
The physical output has not been defined in this CustomAgent, so we would want the normal, standard output to be printed. This can e.g. be used if you have only selected the printer in the CustomAgent template.
If TemplateFound is ‘1' (one):
The physical output has been defined in this CustomAgent, so the normal, standard output should NOT be generated. This should be used, if a type and/or subtype has been handled, and print out has been specified in the CustomAgent template.
The value of TemplateFound, that you want to return, must be inserted inside the next element: CustomContents, so it will have no effect, if you change the current value of TemplateFound with this place in the template.
As mentioned, the second and also last element of the CustomAgent, is the CustomContent group. It is very important to keep the name of the group as shipped.
This is important to note: Only elements placed inside the CustomContents folder will be called during processing.
If you want to implement a variable to trigger which printer to use, then you can add this at this point e.g. like so:
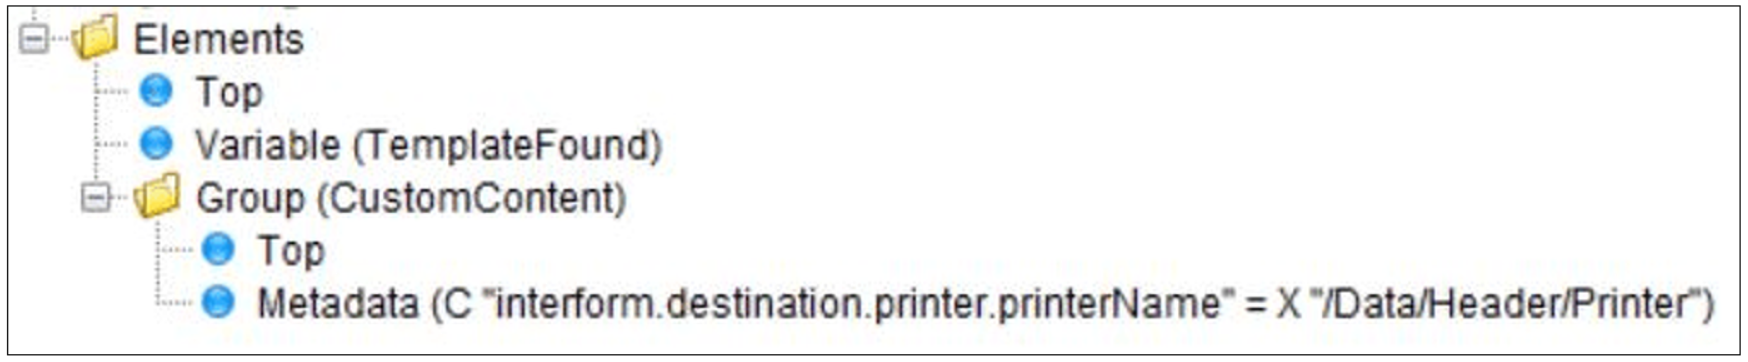
The above retrieve the printer name from the input XML file, and tell InterFormNG to print out on this printer.
If you want to specify an output for a type (and/or subtype), that is not included in the current Automotive package, then you can also include a condition to select those:
Inside the condition you should include a page element, the complete design (which e.g. could be an altered copy of another subtype), and the variable, TemplateFound should be set to 1:
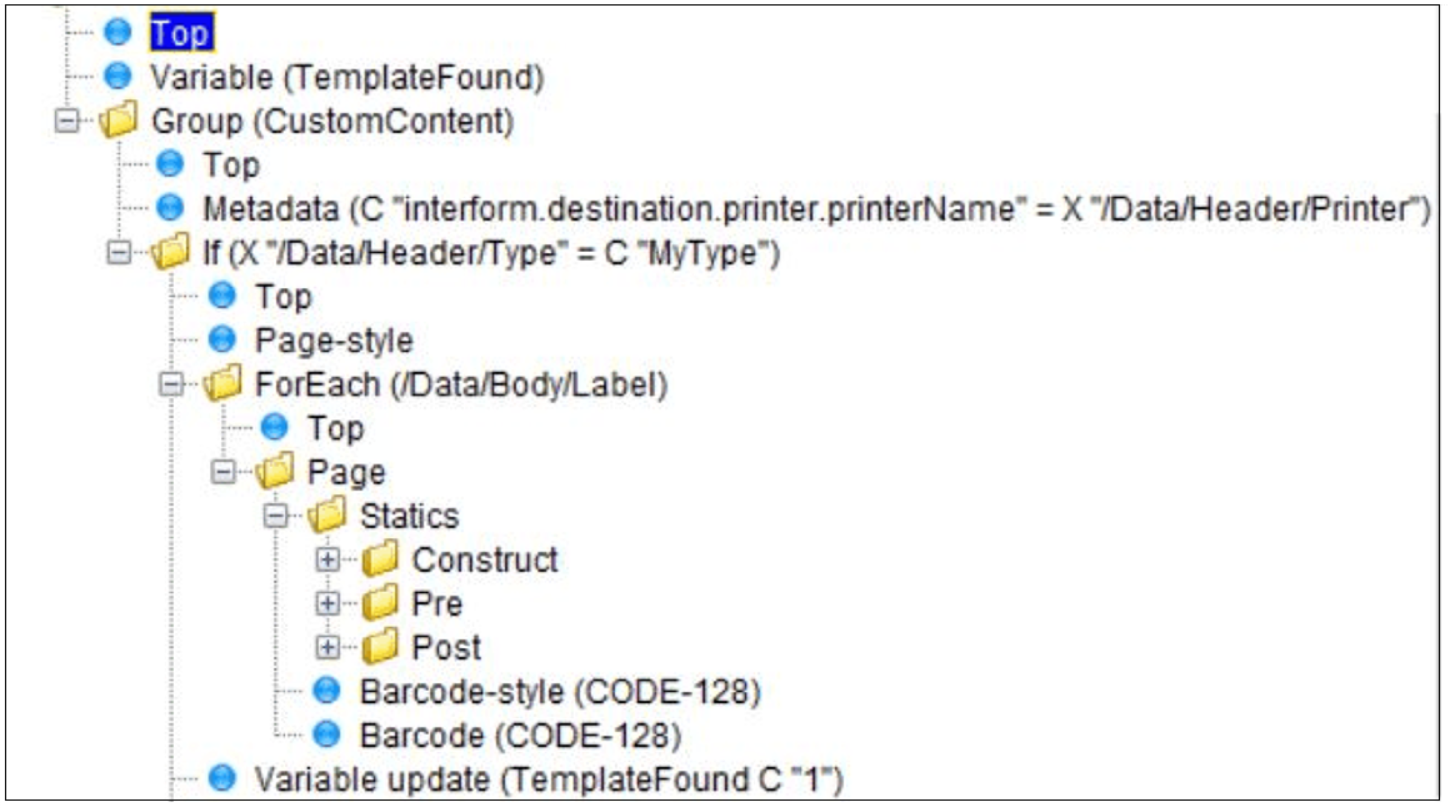
Inside the CustomContent group we now do this:
1.Select the printer based on the printer specification found in the input XML file.
2.Test, if the Type inside the input file is ‘MyType’ if so, then the rest of the template is executed.
3.We set the size of the output label via the Page-style.
4.We insert a ForEach loop for all label nodes found in the input XML file.
5.We define a Page element to insert the physical elements. (New page for each label).
6.We setup the attributes of the barcode (e.g. size).
7.We insert the actual Code128 barcode.
8.We signal to InterFormNG, that the output has been handled and no further processing is needed.
You can also consider to copy existing templates for other types and subtypes to the /mod directory, alter the contents, and call them from the CustomAgent template.
Overriding to changed version of a standard label
If you want to change any of the standard labels, then you first need to remember, that changing the standard templates is unsupported and can cause problems, e.g. when a future standard template overwrites your local changes.
So how can you then change the standard labels? The standard structure of the templates are actually prepared for this. In each reference to a subtemplate an override directory is referenced:
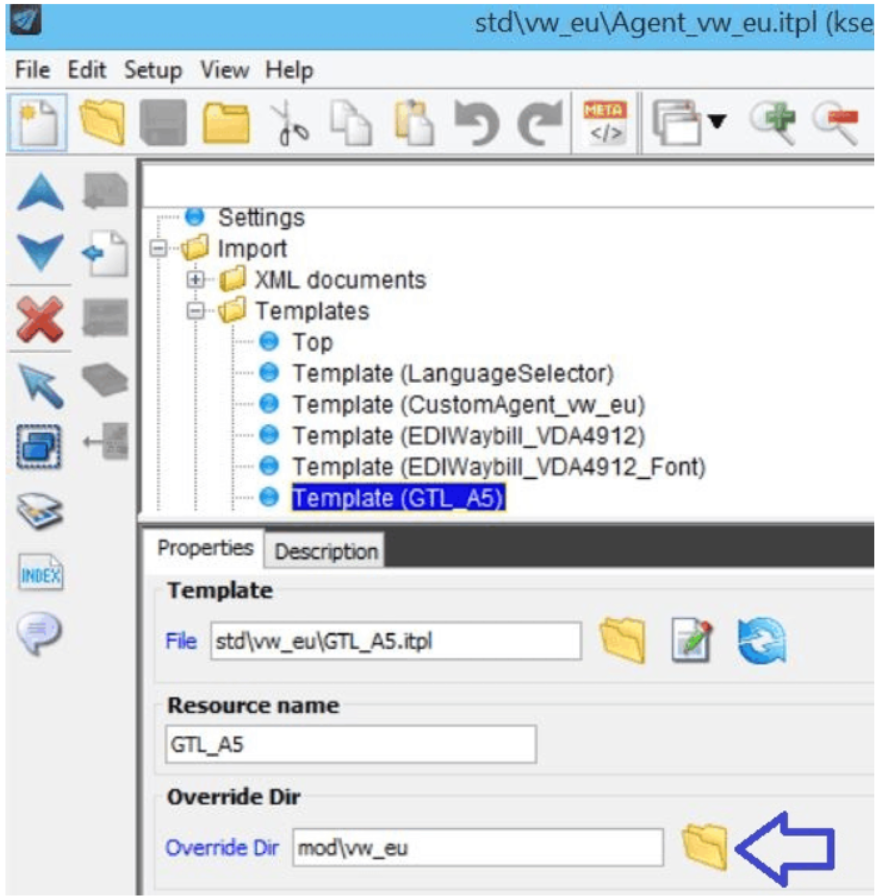
The reference to an Override Dir (override directory) means, that if a template with the same name as we are here referring to (GLT_A5.itpl) is also found in the mod/vw_eu directory, then the modified version in mod/vw_eu is used instead of the one, that we would normally use (inside the std/vw_eu directory), so if we copy the original template from the std/vw_eu directory to the mod/vw_eu directory, then the changes in the mod version will be used in InterFormNG.