Work with conditioned overlays in the Designer
Refer to this video for a description:
Other usages of the command is included in this video:
When working with conditioned overlays with the graphical designer, you can actually do advanced changes very easily:
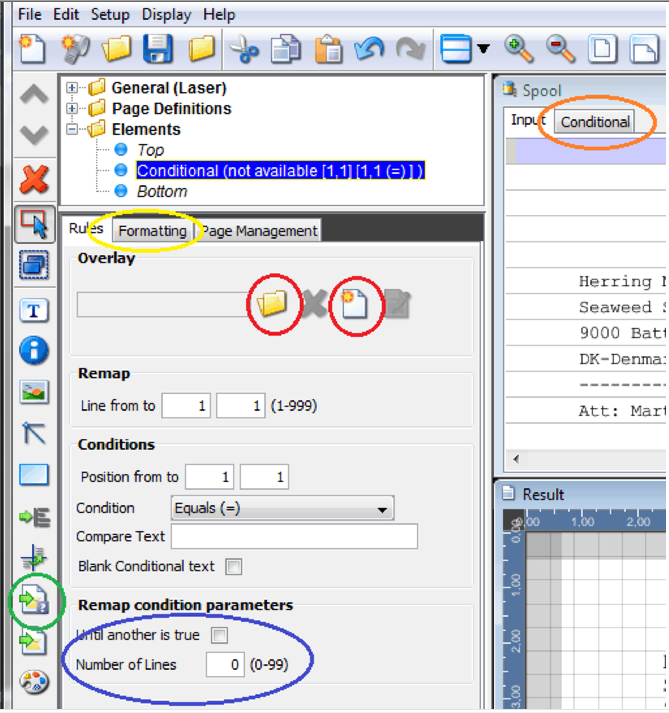
You insert a reference to a conditioned overlay, but first clicking this icon on the left:

(Marked with a green circle above).
Next you decide how to insert how the conditioned overlay is to be placed (relatively or absolute) via the ‘Formatting’ tab (marked in a yellow circle). Here you can also move the complete conditioned overlay up or down (with with add/subtract and a vertical distance to use).
If you want to transfer spooled file data to the conditioned overlay, you need to either activate the ‘Until another is true’ (same as *VAR in the green screen) or state a ‘Number of Lines’ to remap - both options are marked with the blue circle above.
You also need to select or create a conditioned overlay. This is done by clicking either of the icons marked with red circles above
either this:

- or this:

To mark out the condition for the overlay you use the mouse and hold down the left mouse key to mark out the lines to search for the condition. Hold down the right mouse key to drag over the positions to compare with the text above.
Now you can open the conditioned overlay for edit with the icon:

If you now click the ‘Conditional’ - marked with an orange circle above, you can now remap or tabulate spooled file data in the normal manner:
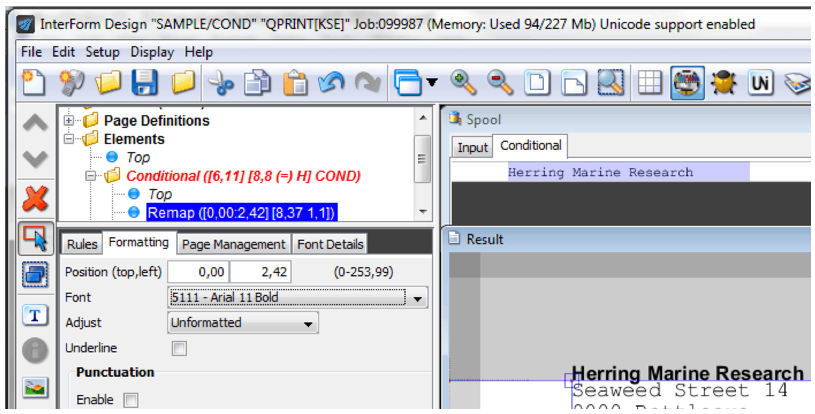
You may notice, that the top of the Result view sometimes turns gray when you start editing the conditioned overlay, the reason is, that the grey area is unreachable as the bottom of the grey area is actually the top of the conditioned overlay (0 from the top). If you want to insert something higher in the conditioned overlay, then you will need to move the complete conditioned overlay upwards via the ‘Formatting’ tab shown on the previous image.
Also notice that the conditioned overlay is written in bold, red and italic, when it is open for edit. When you are done editing the overlay you click this icon:

(Close overlay)
- or you select ‘File’ and ‘Close overlay’, and you will return to editing the main overlay.
If you experience problems with conditioned overlays, then this video might help: