The eSignAnyWhere integration makes it possible to request a signature on a PDF via the eSignAnyWhere service from Namiral. To use this functionality you first need to create an account on the eSignAnyWhere web site.
Note that this functionality requires a license for the module "eSignAnyWhere".
Settings
When you have an account with eSignAnyWhere you can configure the API server settings.
In InterFormNG2 tenant settings, go to the section “eSignAnyWhere”.
As name, set the identifier that you want to reference these settings by in the workflow.
As API server URL, set the URL of the eSignAnyWhere API server.
For access token you need to create an API token in the settings on the eSignAnyWhere web site under “Api Tokens and Apps”. Copy-paste the generated token here.
Base URL for callbacks is optional and only needed if you want to be able to create a workflow that is executed when the signing process is complete. In a simple network setup, the callback URL is simply the domain or IP of InterFormNG2 including protocol, for instance https://18.100.45.32. However, note that if you are using the eSignAnyWhere cloud solution, then it only supports callbacks with HTTPS protocol and only on port 443. If you want the callback to go directly to InterFormNG, then InterFormNG must be installed to use port 443 and use HTTPS protocol.
Firewall opening
To use eSignAnyWhere you need to open port 443 on the firewall for outbound requests to the eSignAnyWhere API server.
To also allow callbacks from eSignAnyWhere to pass through, you need to open port 443 on the firewall so that inbound requests from the eSignAnyWhere service can pass through to InterFormNG2.
Design for eSignAnyWhere integration
The main challenge with integrating eSignAnyWhere is setting up the envelope configuration in InterFormNG2, since the eSignAnyWhere service offers a lot of complex configuration options for this.
To solve this without having to re-create the eSignAnyWhere designer in InterFormNG2, we make use of the eSignAnyWhere developer mode to design an envelope and export it in JSON format. InterFormNG2 will then use the JSON file to create envelopes.
Creating the envelope template
To create the envelope template, a user with “Developer” role on eSignAnyWhere must use the designer to create an envelope with the desired design and send it for signing.
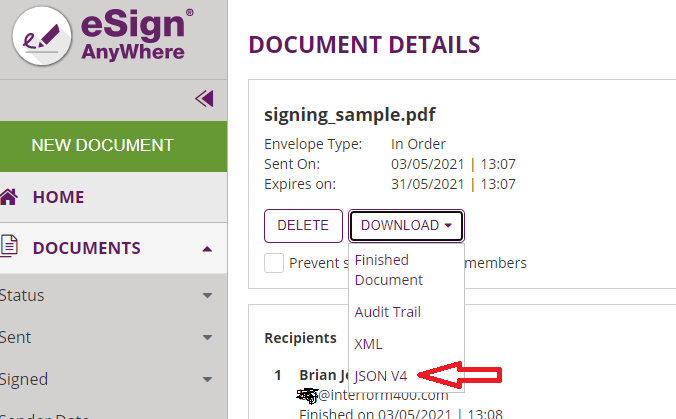
Once signing is complete, download the envelope as JSON:

Next, open the JSON template in a text editor and modify it by replacing the fixed values with template fields as necessary:
For instance in the recipients element, you probably want to replace the recipient details with template fields. The template fields should have the format ##FieldName##. For instance:
…
"Recipients": [
{
"Email": "##RecipientEmail##",
"FirstName": "##RecipientFirstName##",
"LastName": "##RecipientLastName##",
"LanguageCode": "en",
"EmailBodyExtra": "",
…
Do this for all values that should be configurable in the InterFormNG2 workflow.
If you want to use callbacks, then you also need to insert a template field for the callback URL in the field "CallbackUrl". This should always be "##CallbackUrl##". Like this:
...
"CallbackUrl": "##CallbackUrl##",
...
It will be automatically replaced with the real callback value. If you do not want to use callbacks, then the CallbackUrl field should be left blank.
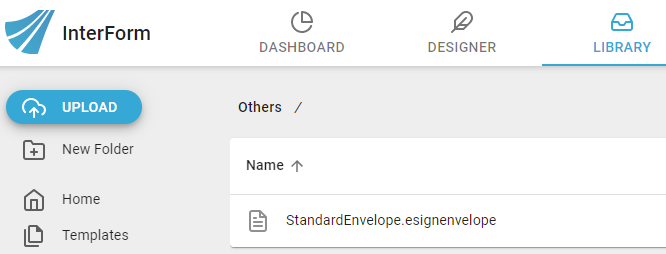
Next, rename the file to have extension “.esignenvelope” and upload it in the “Others” Library folder in InterFormNG2. Using this extension allows the system to recognize it as an eSignEnvelope and list it as an option in the workflow configuration.

Workflow Setup
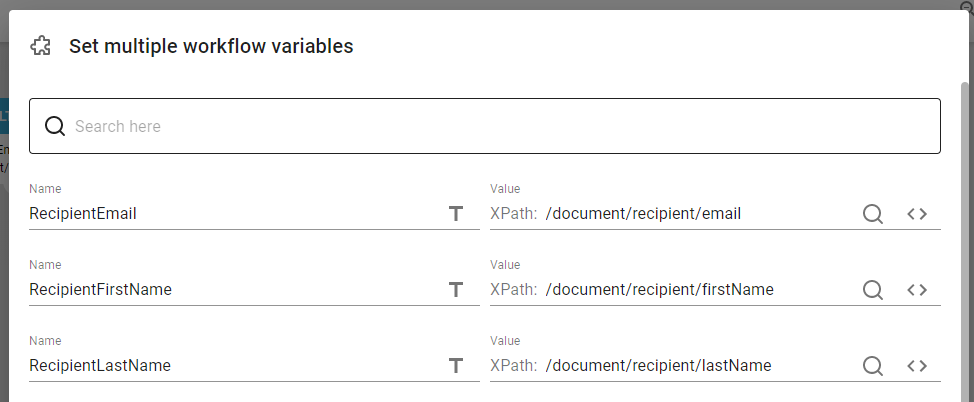
Now create the workflow In InterFormNG2. For the template fields in the envelope to be replaced with actual values, create workflow variables with the same names as the template fields, and map them to values from the workflow input XML (note that the ##CallbackUrl## template field is handled automatically and does not need a mapping to a variable).

Create the PDF from an InterFormNG2 template and then send it for signing using the template that was uploaded in the library using the component “Sign with eSignAnyWhere”.
In this component set “eSignAnyWhere server” to the server that was configured in settings. Set “Envelope template” to the path of a template that is stored in the “Other” library folder. If the files is saved in the library with “.esignevelope” extension, then it can be selected from a drop-down.
Set “Output filename” to the filename you want the signable PDF to have. When receiving the final PDF after the signing process, it will come as an attachment with this name.
Set “name of receiving workflow” to the name of the workflow that will be called when the signing process is complete. This can be selected from a drop-down if that workflow is already created.
Callback parameter 1, 2 and 3 can be set to any short text that you would like to receive again in the receiving workflow. Note that these are technically parameters on the callback URL, so using very long strings may cause problems.