You have access to the Library tab in InterFormNG2, if you are signed on to a tenant:

The library is the place to go, if you want to install new (or delete) resources in InterFormNG2. The only alternative are the tenant export and import.
You should install the resources via the web-interface only - do not copy resources into the directories directly via e.g. file explorer.
The library covers all the resources:
1.Templates. These are the forms (or templates as they are called), that are edited in the designer.
2.Images. Images, that are to be used in the image element in the designer. Not all images must be installed in InterFormNG2, as URL links to dynamic images can also be used.
3.Documents. Input documents (xml files or spooled files), that are used as a sample document in the designer.
4.Fonts. The fonts (True Type Fonts), that can be used in the templates.
5.Styles. Text styles for the tenant, that sets the font attributes. The styles can then be used in the text element in the designer.
6.Mail templates. Here you can prepare the contents of outgoing emails with .vm files. Emails can e.g. be sent with the Create PDF email workflow component.
7.Transforms. Here you place .xslt, .xent and .xsd files to either transform XML files, to add extra information from an external database (SQL) and to validate XML files against an XSD. You can activate these in the workflow components: Transform or split, XSL Transformation and Validate XML against XSD.
8.Translations. Translation files to enable e.g. multi-language templates. These can be used in the translate element in the designer and the built-in ng:translate function.
9.Components. Components can be used as sub-templates in the designer in the component element.
10.Validation rules. The rules for rule-based validation can be used to validate documents in XML format.
11.Others. You can use this for other resources e.g. digital certificates, that are used for digitally signing PDF files.
12.Multiple repositories including support for Github.
13.ModuleFile. This is a directory, that is not visible in the web interface. This is used internally by InterFormNG2 for temporary work files.
14..meta folders and .meta files. These folders and files are not visible in the web interface. The .meta folders contains a file for each resource in the actual directory are generated internally by InterFormNG2 and contains various information about the matching resources. The .meta folder and files can be deleted without any issues, but they will be recreated by InterFormNG2 when needed.
This section also includes description of these actions in the Library:
1.Upload of resources to InterFormNG2.
2.Sub-folders in the Library.
3.Create a sub-folder in the Library.
4.Delete a sub-folder in the Library.
5.Rename a sub-folder (or other objects) in the Library.
6.Actions for multiple objects.
7.View options in the Library - including which columns to show on the overview.
Upload of resources
If you want to install/upload a new or a changed resource, then you install/upload it via the web interface. If you just copy the resource into the related folder via e.g. File explorer, then the InterFormNG2 will not be able to 'see' the new resource. So always use the blue Upload icon on the upper right in the library to install/upload resources. It is also possible to delete, install and use resources in the workflow.
The procedure to upload resources is also covered in this video:
Sub-folders for library resources
All of the resources except the fonts and styles can be put into sub-folders.
Create a sub-folder for resources
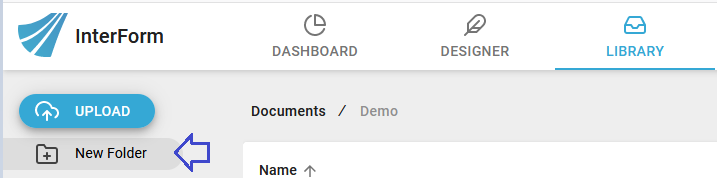
To create a sub-folder for a specific resource you simply select the resource type in the library, select the main folder (if you want to create the folder inside another folder) here:

and then click the New Folder icon on the left:
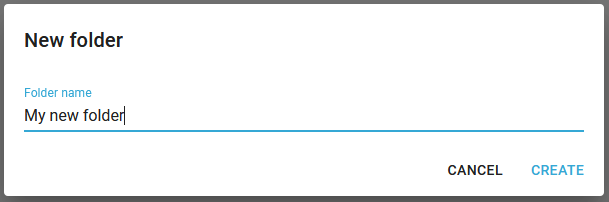
- and type in the name of the new folder in the pop up window:
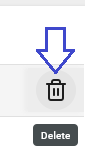
Delete a sub-folder of the Library
If you want to delete a sub-folder in the library, then you simple place the mouse of the folder. On the very right you will see the icon below. Click the icon to delete the folder (or file):
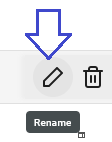
Rename a sub-folder of the Library
It is possible (but not recommended as no references to the resources inside are updated) to rename a sub-folder and other resources in the Library from the web-interface. In order to do that you should select the main folder in the Library and then click on the pencil icon to the right of the folder, that you want to rename:
Now this warning window will pop up:
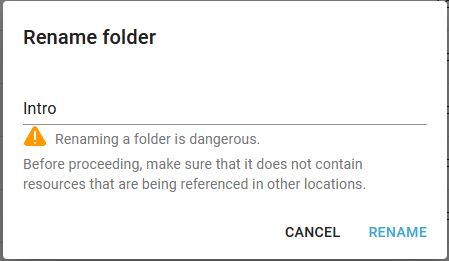
You should only proceed, if you are 100% sure, that the resources inside of this folder are not used by any other elements in InterFormNG2. If you are sure, you can simply type the new name of the folder and click Rename.
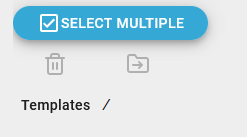
Actions for multiple objects
Some of the actions in the in Library can be executed for multiple selected objects (or for all). This can be helpful, if you want to move or delete many resources at a time.
In order to do this you first select the folder with the objects, that you want to delete or move and then you can select the select multiple icon on the top:
Now you can select all or some of the objects:
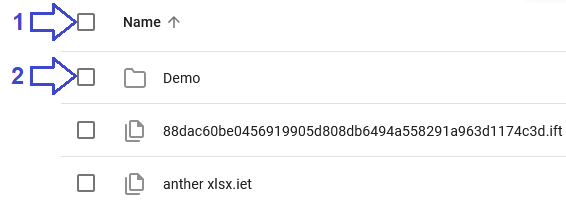
If you click the checkbox marked with 1, then you select all object. Click the checkbox again to de-select all the objects.
You can select/de-select each object by clicking the checkbox next to the object like indicated with 2 on the image above.
After you have selected the object you can use the action above the list to either delete or move the objects to another folder.
View options in the Library
When you view various object lists in the Library, then you may notice the icons on the upper right:

Refresh the object list
The first icon from the left refreshed the object list.
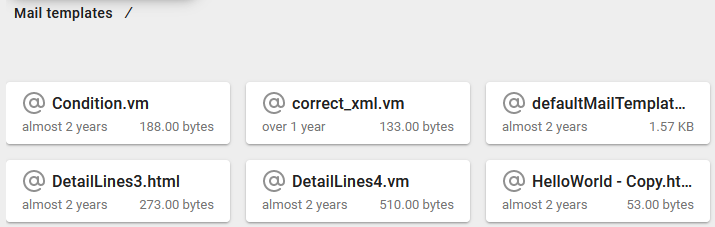
List object as tiles
If you select the second icon, then the objects are listed as tiles like below:
Detailed list
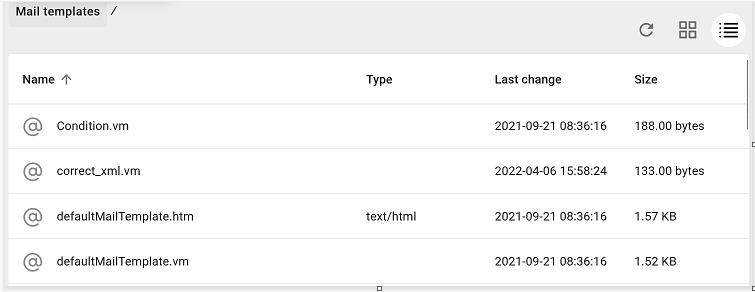
With the third icon the objects are listed as a detailed list like below:
Select which columns to show in the Library overview
You can choose which columns, that are to be displayed in the Library via this option on the top left:
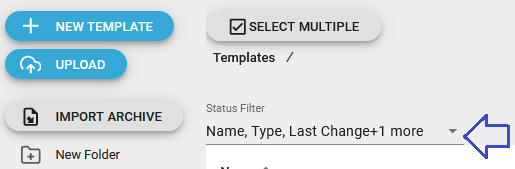
If you click this line, then you will see this list of columns to choose from:

This includes:
Type
The type of object e.g. folder, interform/template image/jpeg etc.
Size
Lists the size of each element in the list.
Last change
The timestamp when this object was last changed.
Last used
The timestamp when this object was last used.
Search for objects
In the list of objects in the Library you can choose to search for objects with this option:
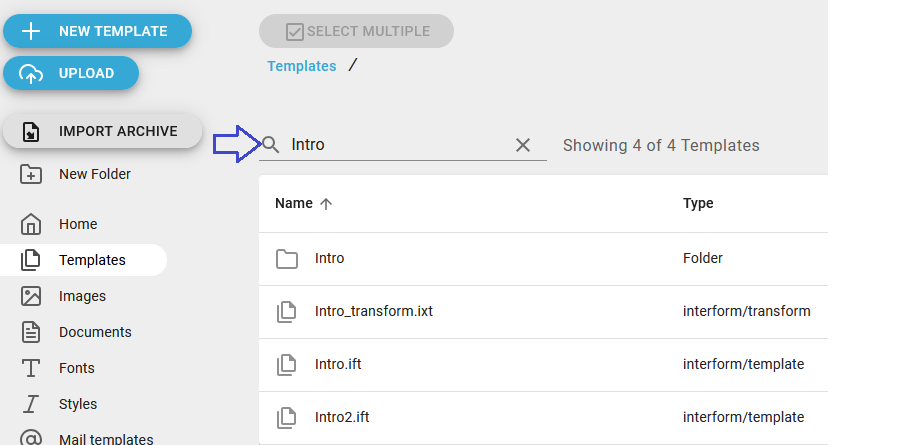
When you type a search text then only objects and folders, that contains that text are listed below. The search is only done on the folders and objects, that are currently shown. If you e.g. have an object in sub-folder, that match this search, then this object will not be shown.
Edit file contents
Several of the files, that are loaded into the Library as text based and it is possible to edit the contents of these files directly in InterFormNG2.
This is possible for these object types: Documents, Mail templates, Transforms, Validation rules and Others foer which a simple, generic text editor is available. Even Translation files can be edited directly, but a specific editor for that is included.
Please note, that this is a simple text editor. It does not verify the syntax of the file, so you need to ensure yourself, that the file is still valid after you have made your changes.
You can open and edit the object types mentioned above by simply double clicking on the object. Then you will see this:
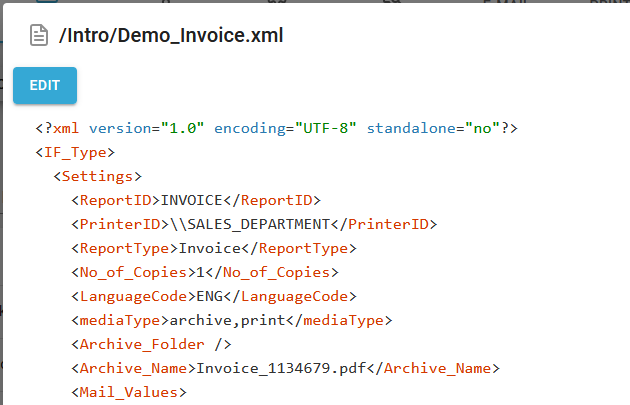
You can start editing the file, if you click the EDIT icon on the top left. Then the window looks like below:
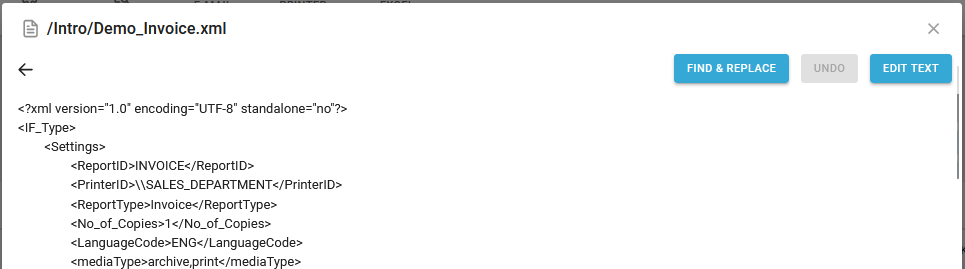
In the top right you can see the two actions available:
Find & replace
If you click the Find & replace icon on the top, the top left corner of the editor changes into this:
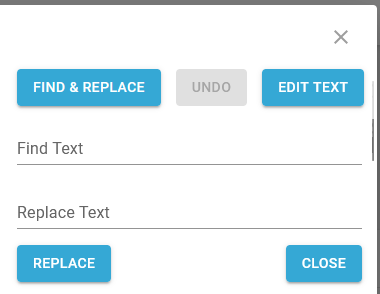
Here you have these entry fields and icons:
Find Text
Here you can type a text, that you want to search for and replace. All occurrences of this text will be replaced if you later click the Replace icon. The search is not case sensitive.
Replace Text
The text written here is the text, that are to replace all occurrences of the Find text above.
Replace
When you click this icon, then all occurrences of Find text are replaced with the Replace text. In the bottom right a pop-up window will let you know how many texts, that was replaced.
Edit text
If you click this icon, then you jump to the edit text option.
Close
If you regret and do not want to do a search & replace, then you can click this icon to cancel the choice and get back.
In the bottom right you have these icons:

The changes to the file are not saved until you click the save icon. If you click the cancel icon without saving the last changes you are asked if the changes should be discarded.
Undo the changes
After you have run a search and replace the undo icon is enabled:
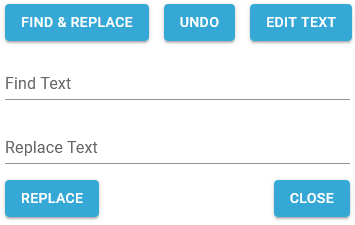
If you click the undo icon the last search and replace run is rolled back.
Edit text
If you click Edit text in the file editor, then you will see a screen like below:
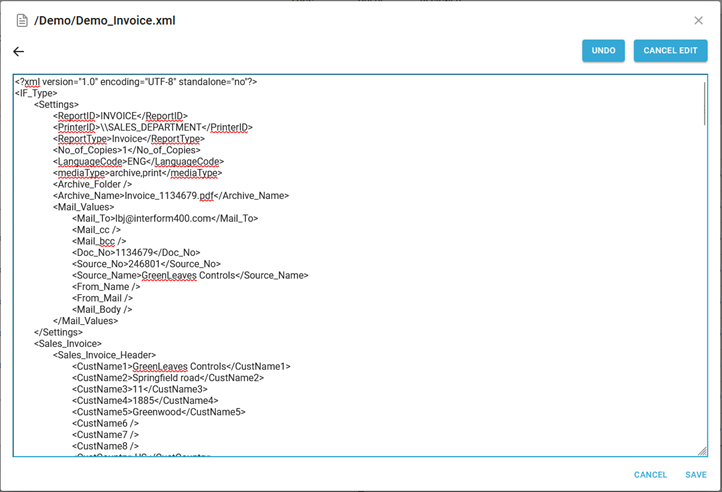
On the right you see a slider, which you can use to see the lower part of the file.
To edit the file you simply replace, delete or add the text by typing/deleting.
You can even place the cursor inside the edit window and hold down left <CTRL> while pressing the 'A' key to select all the text and you can then click <CTRL> and 'C' to copy the text into the clipboard and paste it into your favorite editor and here the changes here and then copy the text back when you are done.
Please note, that this is a simple text editor. It does not verify the syntax of the file, so you need to ensure yourself, that the file is still valid.
Undo
The undo icon in the top rolls back the last change in the editor.
Save
Remember to click the Save icon on the bottom right, when you want to save changes to the file. No actual changes are done until the save icon has been clicked.
Cancel
If you click the Cancel icon the text editor is closed, but not before asking if InterFormNG2 should discard changes if there are any unsaved changes.