If you want to insert any kind of text in InterFormNG2, then you should use the text element. You can insert a new text element if you click on this icon:

The data, that you can output as text are these types:
1.A text constant.
2.Drag nodes from an input XML file.
3.An XPath expression and/or a variable.
4.A translation text.
After that you can set these attributes for the text:
1.Set attributes like font and font size, bold, italic, underline and color.
2.Set text alignment.
3.Change the reference point for the text.
4.Set dimensions for a text.
5.Set the wrap/cut option for a text.
6.How to rotate a text.
7.Refer to a global style or a local text style to set a common combination of font attributes for all/some of your documents.
8.Setup a numeric format for the text element.
9.Format the text element in a specific date format.
10.How to use html commands in a text to dynamically format a text.
11.Configure a link (URL) for a text to be used in PDF output.
12.Configure a text as an editable text, which can be used in Webforms.
13.How to force a vertical flow (disposition) for a blank text.
14.Dynamic switch between normal and bold in the middle of a text.
How to insert a text constant
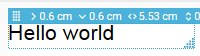
The easiest thing is to insert a text constant. To do that you first select the container (page, container or cell) in which the text should be inserted, and then press the text icon shown above. Now you can start typing the fixed text immediately.
How to insert a text from an input file
If you want to insert text from an input XML file, then you have two options:
1.Drag the input node to the result view.
2.Insert a text element and change the text properties.
The first option is covered here. The second option is covered in the XPath expression session below.
To drag a node from the input XML file you need to click this icon:
If no XML file has been opened yet, a blue icon 'CHOOSE SAMPLE DATA FILE' is shown. Click this icon to select an input file from the documents in the Library. Click the file and the contents is now shown:
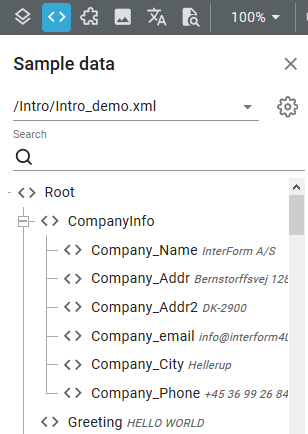
To output a node you simply drag the node to the result window.
When you are done, you can switch back to the template element list by clicking the Layout icon in the top left corner:
Use an XPath expression or variable in the text
To use an XPath expression or a variable in a text element you first need to insert a text element, that you can change. Then you can double click on the text to edit the properties:
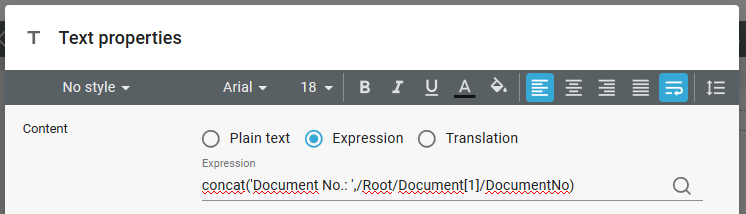
To use an expression instead of a fixed text you click the Expression option above. If you already had a text in the contents, then this text will now be delimited with "" to ensure, that it is a valid XPath expression. To refer to the sample input (XML or spooled) file you can click the magnifying glass and click on the node/text, that you want to insert in the expression.
If you want to refer to a variable you can either type it directly in the XPath expression with a preceding $, or you can click the magnifying glass and click the variables tab:
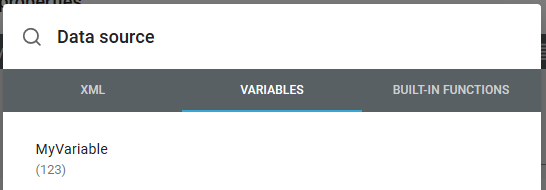
The window above shows a variable called, MyVariable with the current value of 123. To include the variable in the XPath expression you just need to click it.
Set the text font and font size, bold, italic, underline and color
To set the simple text attributes you have two options:
1.You can set them up on the text properties by first double clicking a text element.
2.You can select one or more text elements and make the change in the header of the designer for all the selected texts.
(Please notice, that the bold/italic options are ignored, if you activate the html option on the text.)
The second option is shown below, but it is similar, if you change them on the text properties.
The header of the designer shows these icons, when you have selected one or more texts:

Below the leftmost half of these icons are explained from left to right:
The first icon shows the font, that is currently selected.

To select another font (from the installed fonts), you click the arrow. This shows a drop down list of all fonts. Select the new font, that you want to use.
The list shows the fonts installed in the library.
The font size can be selected in two ways:
1.Via the drop down list, where you click the downwards arrow:

2.You are not limited to the drop down list of the available font sizes. You can actually edit the font size number and enter any size - even with a decimal point like e.g. 18.6:

When you enter a very specific font size you should consider to verify the result in the output formats for which you intend to use the font as the size is rounded of a bit in e.g. PCL printing (to the nearest multiplum of 0.24).
You can enable or disable bold of the selected text(s) with this icon:

To enable or disable italic for one or more texts you press this icon:

To underline texts you press the icon below. Press it again to remove the underline:

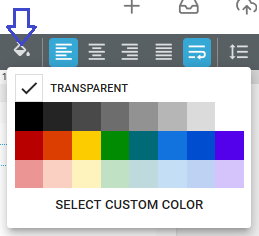
You can set the color or the selected text(s) with this icon. The current color is shown in the line below the A.

You can add new colors (shown in the bottom of the screen shot above) by clicking the SELECT CUSTOM COLOR icon on the pop up screen:
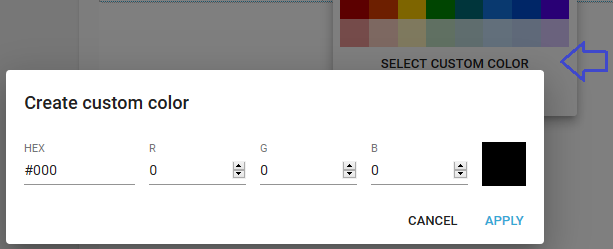
Here you can define the Red (R), Green (G) and Blue (B) components of the color in either hexadecimal or decimal.
It is possible to select a background or filling color for the selected texts with this icon:
When you click this icon the pop up window above is shown. In this way you can e.g. print in reverse i.e. white text inside a black box, if you select the font color above to be white and the filling to be black.
The area that is colored by this filling is determined by the dimensions of the text.
Text alignment
The designer includes 7 specific text alignment options as listed below:
(Other alignment options are covered here.)
1.Special text alignment within the designated area.This is always used for texts except the fixed positioned texts mentioned below.
2.Alignment relative to reference point. This is used only if: a) The text is placed in a fixed position and b) The text has dynamic dimensions.
3.Suggested alignment while dragging a fixed text element.
4.Newspaper layout is also an option.
7.It is possible to align multiple, fixed positioned texts (and other elements) in both the vertical and horizontal direction.
Text alignment is also covered in this video:
Special text alignment within the designated area
On the first alignment type is described below:
When you have selected one or more text elements, then you see these alignment options on the top right of the designer:
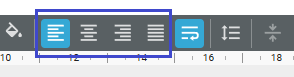
With the setting above the texts are left aligned.
The alignment of the text are done within (relative to) the dimensions of the text elements. You can see the text area/dimensions as a blue, dotted frame, if you click a text:
Above you can see, that the text is left aligned, as it is placed in the leftmost side of the designated area.
The other alignment options are shown with an example below:
Centering:


Right adjust:

Justify (fixed left and right margin):

Text aligment relative to reference point
If you insert a text in a fixed position and with dynamic dimensions or maximum width, then the text is placed relatively to the selected position. You need to preview the merged result to see the final position for texts, that are not left aligned.
Example:
If you consider these two texts aaaaaaa and bbbbbb below:
(I have also added a vertical line as an aid)
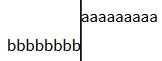
They both have the same position from the left and that position is the same as for the vertical line:
(The fixed position option is marked above).
The position from the left is 8.414 cm, but 'aaaaaa' is using left alignment, and 'bbbbbbb' is right aligned relatively to this reference hence the positions in the final output above.
Suggested alignment while dragging a fixed placed text element
You can let InterFormNG2 help you to align fixed text elements, if you hold down the <CTRL> key while you drag a fixed placed text element in the result view of the designer. If the active text element aligns with another fixed text element inside the same container, then the text element will 'stick' to the position, that aligns with another text element and the other element is marked with a dashed red box around it. If you drag beyond this position you can still ignore the suggested alignment e.g. to align with another text element.
Text in newspaper layout
The video below explains how you can setup InterFormNG2 to present your texts in a newspaper layout:
Vertical alignment of the text
A text can be vertically aligned in three ways:
1.Within a table, if the text is inserted with a dynamic position within a cell.
2.The text can also be inserted with a vertical alignment relative to a fixed position. This is described below.
3.Multiple fixed positioned texts can be vertically aligned with each other as described in this section.
It is possible to vertically align a text (or to position the text relative to a fixed position in the vertical direction). This is only possible, if the text has a fixed position and the option Use text baseline as reference (described below) should also be disabled.
If these prerequisites have been met, then you can align the text vertically around the fixed reference point.
The vertical alignment can only be set by opening the properties of the text element - not from the main view.
You can see the vertical alignment options here on the top right of the properties list:

If we insert a horizontal line in the same position from the top, then we can see the effect of the vertical alignment:
Top alignment

With the top alignment the top of the text is aligned with the position from the top:

Center alignment

With the center alignment the middle of the text is aligned with the position from the top:

Bottom alignment

With the bottom alignment the bottom of the text is aligned with the position from the top:

Decimal point alignment
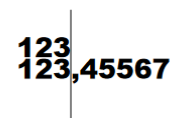
Decimal point alignment is a description of an alignment of a number, where the number is aligned based on the decimal point like shown below:
This can e.g. be interesting, if you want to present a column with quantities and the unit of measure might vary a lot from e.g. a tiny fraction (with a lot of decimals) of a tonne to a simple integer number.
If the number is always to be printed with 2 decimals, then you might be able to simply right-align the text as the numbers for most fonts are the same width - but not for all fonts. The section below is a more generic solution.
Prerequisites for decimal point alignment
The description below can be used, if these prerequisites for a valid number of the input data are noticed:
1.The input data cannot contain any no comma.
2.No thousand separator is allowed - neither dot, comma or a space.
3.If there is a decimal point, then it is represented with a dot.
4.If the number is negative, then the minus sign is the first character from the left.
There a few options, that can complicate things a bit:
1.Perhaps the number should be presented in a format depending on the locale (in a format based on the preferred format of a specific country), so that the decimal point in the output should perhaps sometimes be a dot and sometimes a comma.
2.Perhaps there should be a thousand separator in the output.
3.Perhaps we want to display all decimals or always present the value with two fixed decimals.
In order to present the data in the requested way we need to divide the output into two parts:
1.The integer part (the part of the number, that is to the left of the decimal point).
2.The decimal part (the decimal point and any decimals to the right of it).
In the example below the numeric input data is referenced as the variable, $nbr.
The integer part
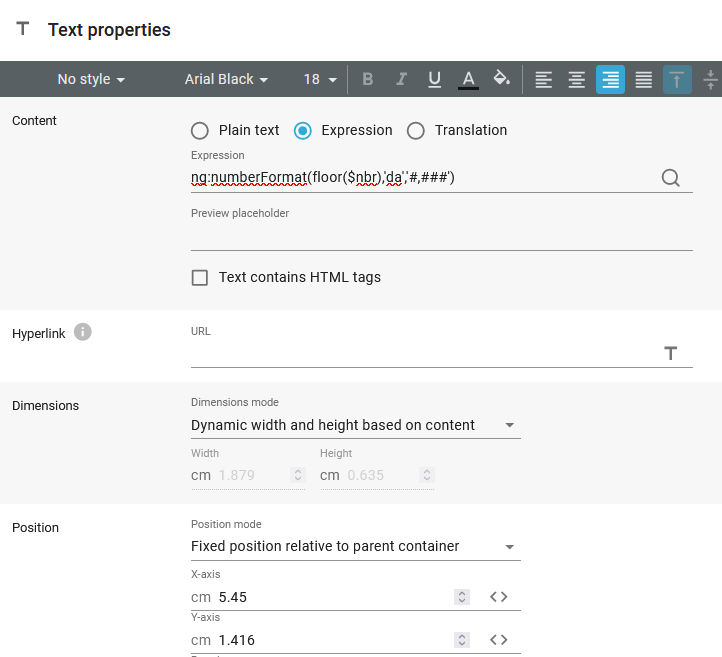
The first, integer part we should right align along the reference position.
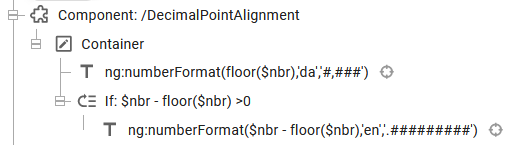
We can identify the integer part with the function, floor($nbr). This returns rounds of the number down to the nearest integer, cutting off any potential decimals. This is then used in the ng:numberFormat function to present the integer data in the format we want:
ng:numberFormat(floor($nbr),'en','#,###')
The second parameter is identifying the locale which defines which character to use for the thousand separator - if this is used in the last parameter (this is specified as a comma in the last parameter). The last parameter sets up how the integer part is to be presented. In this case we have activate a thousand separator.
Please notice, that you should not include any formatting of the decimal part in the third parameter of the ng:numberFormat function.
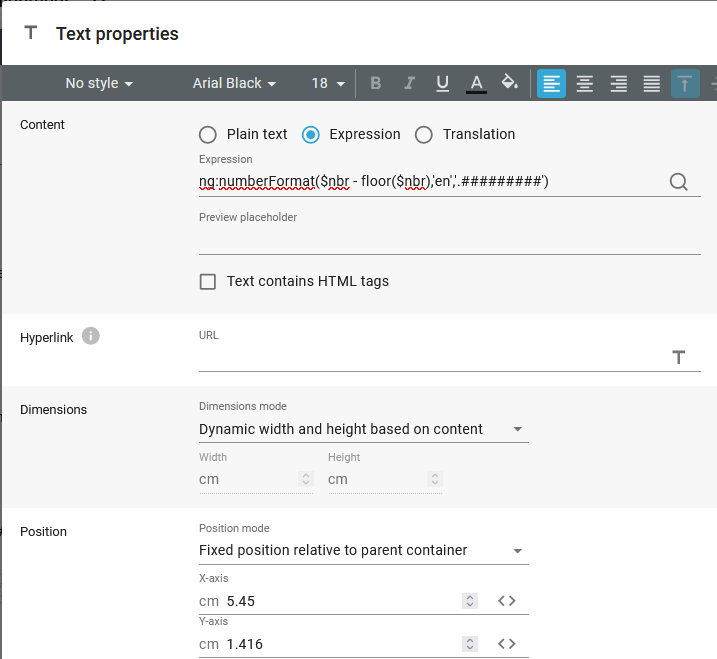
The decimal part
The rightmost part of the number (including a potential decimal point) is to be left aligned along the same X-position as the integer part. In this example we do not want any fixed decimals, so first we need find out, if any decimals are to be output and we can do that with this condition:
$nbr - floor($nbr) != 0
(Please notice, that you need to insert spaces around the minus sign, as the minus sign could be a part of a function or variable name).
So if something has been removed with the floor() function, then this condition will be true and the decimals are to be included.
This is one way the decimals can be output (including a decimal point or decimal comma):
ng:numberFormat($nbr - floor($nbr),'en','.#########')
The first parameter of the ng:numberFormat function is $nbr - floor($nbr) which returns the decimal fraction of the number.
The second parameter is the locale, which tells InterFormNG2 how the dot in the last parameter is to be presented.
The last parameter defines how many decimals, that we want in the output. If you e.g. want to always print it as two decimals, then you could change this into '.00'.
Based on the descriptions above we can setup this component to present a number in the requested way:
The first text is here right-aligned with the same X-position as the second text (that is left-aligned):
Integer part:
Decimal part:
Text reference point
If you place a text in a fixed position (contrary to a relative position), then you can not only state a position (relative to the container in which it is inserted), but you can also choose, if you want to use the baseline as a reference or not. The difference is explained below:
As default a text is placed with the baseline as reference. That means e.g. that multiple texts in different sizes will be placed on the same baseline like so:

The baseline is activated on this property on the texts:
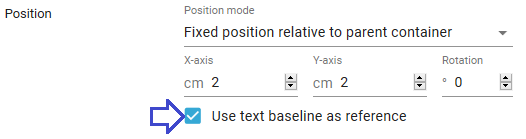
(And only active, if the position is Fixed as shown above)
If you instead disable the option 'Use text baseline as reference', then the upper left corner of the text is used as a reference. That means, that with the same texts as shown above, the text move as shown below, if we disable this for both texts:

(So as you can see the texts are moved down, below the line which is in the same position).
Dimensions of a text
The dimensions of a text can set under the text properties:

The dimensions of a text has these effects:
1.If you insert a text with a dynamic position, then other elements to the right or below the text are moved depending on the size of the text.
2.Alignment of the text is within the area setup as the dimensions.
3.If you fill the text with a color the area setup as the dimensions will be colored.
4.It is possible to make the text wrap around and become multiple lines, if the text width cannot contain the complete text line.
5.It is possible to cut the text at the specified width of the text element.
The 5 dimension options are:
1.Dynamic width and height based on content.
2.Max width, dynamic height based on content.
3.Fixed width, dynamic height based on content.
They are all explained below:
Dynamic width and height based on content
If you use this setting, then the width and height of the text element is flexible:
The width will be the full width of the container in which the text is inserted. If the text contains so many characters, that there is not room in width for the full line, then the wrap option of the text decides, if the text will be wrapped around to multiple lines or cut off at the available width.
The height of the text is the height of the characters of the text.
If the height of the text is higher than a container with fixed dimensions allows, then the text will ignore the fixed height of the container.
Max width, dynamic height based on content
If you use a text in a horizontal flow, then it can be useful to set a maximum width of a text instead of just a fixed width. The height of the text is in this case dynamic and depending on the wrap option on the text element the result might be a multi-line output.
Unlike the Fixed width option the max. width will respect the width of the parent container - if the text has a dynamic position: If the parent container is not as wide as the max. width stated, then the text will be limited by the parent container.
Fixed width, dynamic height based on content
With this setting you have a fixed, maximum width for the text. If the text is too wide, then the behaviour depends on the wrap option of the text:
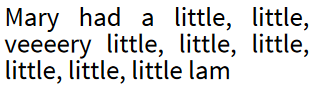
If the wrap option is disabled, then the text is cut of on each line to the fixed width.
If the wrap option is enabled, and the text is too wide, then words of the text are moved to a new line. Still if a word is too wide for the fixed width, then the word is cut off at the specified length.
If you use a text in a horizontal flow, then it can be useful to set a maximum width of a text instead of just a fixed width. The height of the text is in this case fixed and depending on the wrap option on the text element the result might be a multi-line output.
If you set a fixed width and height for at text element, then the text behaves in the horizontal direction like described for the fixed width and dynamic height above.
For the vertical direction the result depends on if the fixed height is larger than the required height for the full text or not:
If the fixed height is less than the required height for the text, then the full text is still (currently) rendered in the final output, but subsequent elements, that are placed relatively to this text are still using the smaller, fixed height, so you will likely experience that the text is overlapped with the next elements, that should have been positioned below the text.
If the fixed height is equal to or larger than the height of the text, then the text area is expanded and subsequent elements, that are placed relatively to the text are moved extra down according to the larger height.
Wrap and/or cut setting for a text
It is possible to limit the width of a text - either by setting a fixed width on the text dimensions or for a dynamic width of a text, the width can be limited by the width of the container in which the text is placed.
If there is not enough room in the width for a text, then there are two options:
1.Cut off the text at the available width.
2.Wrap around the text and distribute the text across multiple lines. (Words are not divided if they are longer than the available width, but cut off at the specified width).
To select between these two options for one or more selected texts, you press this icon in the top right of the designer:
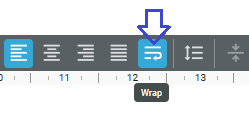
If this icon is blue the wrap option is active.
How to rotate a text
It is possible to rotate a text. You can do that in two ways:
1.By rotating the container in which the text is placed.
2.By rotating the text itself as explained below.
Rotations of containers and texts are accumulated, if they are placed within each other.
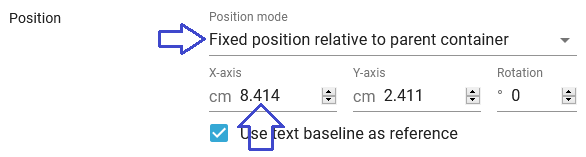
To rotate a text without rotating the container in which the text is placed, you first double click on the text element to view the properties and then change the Position mode to 'Fixed position relative to parent container', then you can change the rotation as marked below.
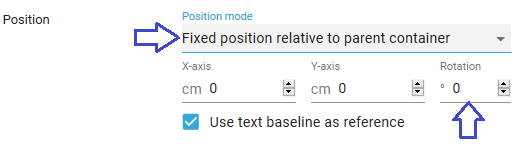
It is recommended to stick with rotations, that are multiples of 90 i.e. 90,180,270 to ensure that the rotation is supported by the printer.
Please note, that by changing the position mode the subsequent elements that are positioned relative will move upwards.
Use a global style to set font attributes for a text
Instead of setting the font name, font size, bold, italic and any other font attribute for each font, you can instead define multiple font styles and refer to them across all your documents.
This makes it easier to define a new text with the preferred setting, and it is also easier, if you later want to change the font settings for many documents in the easiest way possible.
You define the font styles in the Library, but you can also define local, dynamic styles with the text style element. Local text style elements are shown first in the drop down list of the styles below.
You can refer to a style after you have selected one or multiple texts in the designer. You can also refer to a style on the text properties.
To refer to a style you click on this icon (to the left of the font name):
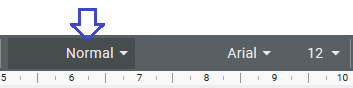
When you click this icon you can see a drop down list of all the available styles. Click the style, that you want to use.
After you have selected a style you can still change all font attributes, but then the text element will loose the reference to the common style.
Use dynamic formatting of texts with html commands
If you have a large multi-line text, that is to have different formatting depending on the sections, then you should consider the special html option on the text element:
Please notice, that the font attribute settings bold and italic are ignored, when you activate this as this is then something, that should be activated via an html option as described in this section.
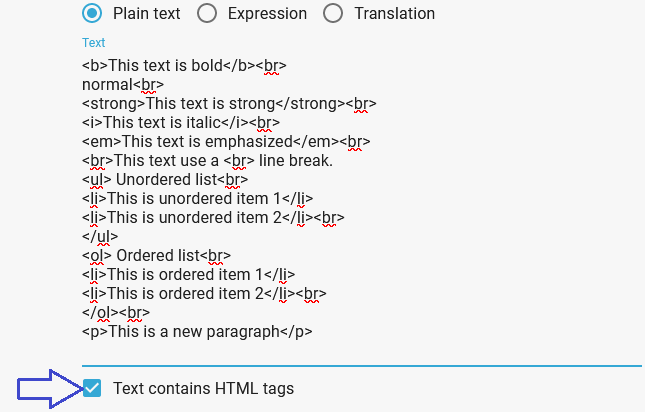
With the HTML option activated you can freely change the formatting of the words in the middle of a text with some html tags. In the example above all the supported html tags are used:
Bold <b>
Switch the formatting of the text into bold with the tag, <b> and stop the bold option with </b>.
Line break <br>
Use this to insert a line break (new line).
Italic <i>
Switch the text formatting into italic and switch it back with </i>.
Emphasized <em>
Use the <em> tag to emphasize a section. Use </em> to stop mark the end of the section.
Unordered list <ul>
Use the <ul> to mark the start of an unordered list and </ul> to mark the end of the unordered list. Within the list you can add list items with the <li> tag.
List item <li>
A list item to be inserted within either an unordered or ordered list. </li> marks the end of the list item.
Ordered list <ol>
Use the <ol> to mark the start of an ordered list and </ol> to mark the end of the ordered list. Within the list you can add list items with the <li> tag as above.
Paragraph <p>
Use the <p> tag to mark a paragraph. The </p> marks the end.
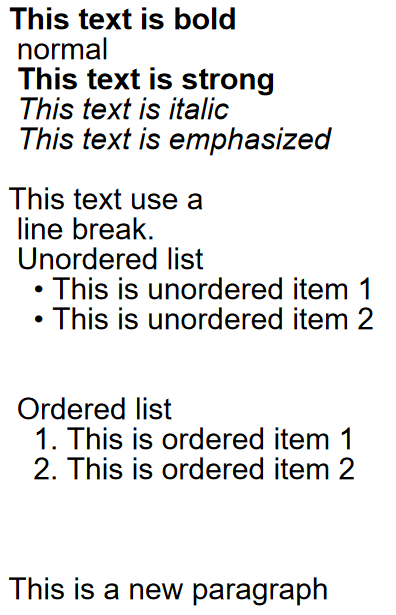
With the setup above the output will look like this:
Limitations of the html option
•The bullet list uses unicode character 0x2022 as bullet. This character must exist in the used font in order for the bullet to be displayed.
•If an "li" element text wraps to the next line, the next line(s) is not indented.
•The "Justify" alignment has no effect on HTML formatted elements (will work as left aligned). Left, right and center alignments work.
•"Underline" has no effect on HTML formatted elements.
•The "bold" and "italic" options on the text element have no effect when using HTML formatting.
•" " works just like a normal space character (i.e. it is NOT non-breaking).
•When HTML is used in an XML document, the < and > characters in the HTML tags must be encoded as < and >
•To get the characters < and > displayed as part of the text, they have to be encoded as Less than(<): < or <
Greater than(>): > or >
Configure a link (URL) for a text
If you use a template to generate PDF output, then you can assign a link for a Text, so that a user can click the text in the PDF. The link/URL is defined here in the text element:
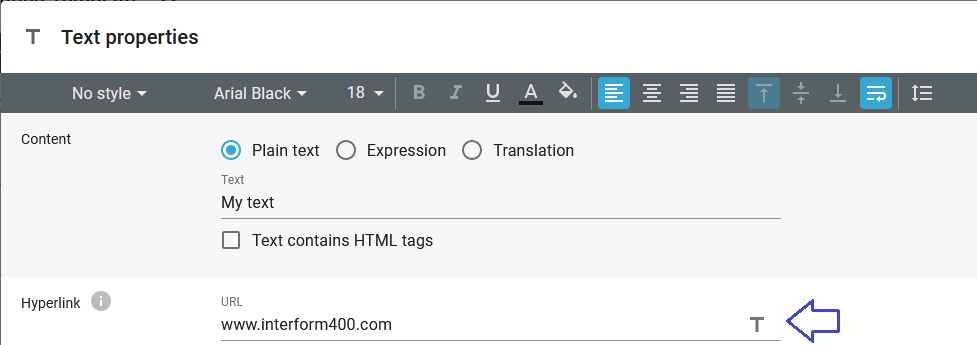
If you want to build a dynamic link with XPath, then you can click the T-icon to change from a fixed value into an XPath expression.
Editable text in a webform
With the Webforms module you can open up text elements for which the form can prompt a user for a value. Such editable text elements are defined as a normal text element, where the properties of the editable texts are defined in the bottom as below:
If you use this option, then the text written as Contents on the top of the text element is shown to the end user, when the webform runs. If you e.g. select this in the top of the text element:

Then this is shown in the webform free text field before the user enters a text.
The settings here are:
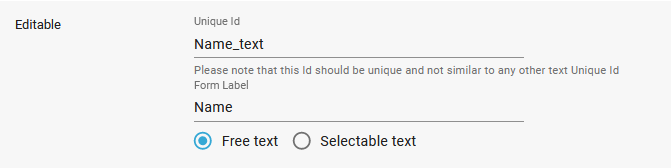
Unique Id
The unique id field is mandatory in order for the field to be editable. This field must contain a text string that is valid as an XML element name. As a minimum it should be validated that the text does not contain space, <, >, & or /. Preferably it should also be validated that the unique id is not used for any other text field in the template.
Form Label
The form label field is optional. If present, this will be used as the field label in the webform. If not present, the unique id will be used as label.
Free text
Select this, if you want to define a free text element i.e. the user can freely type any text in this input field on the webform, when it is activated.
Selectable text
If you choose this option instead of free text, then the screen will look like this:
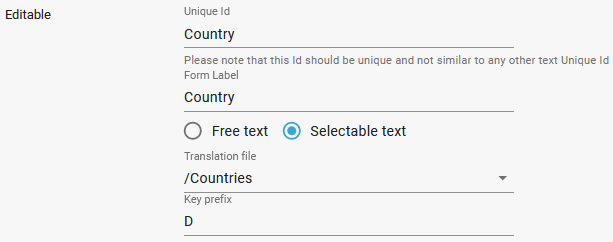
Translation file
This is a reference to the translation file, that contains the texts, from which the user is allowed to choose from. If a translation is used for the default text for this text element, the editable text will use the same locale and otherwise the template locale is used.
Prefix
Only key elements, that starts with this prefix are listed on the drop down list. Currently (in version 3.2.0) you need to select a prefix to avoid a null pointer exception error, when the template is processed, but this will change in a future version.
Vertical flow for a blank text
If you insert a blank text (a text with no characters or only blanks) with a dynamic position, then the vertical flow will not move down and represent the blank text. So with this setup:
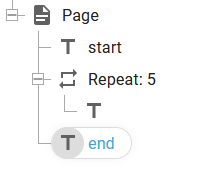
The output looks like this:

The reason is that the blank text in the repeat has no height - even if it contains spaces.
There are two ways to make a vertical displacement for each blank text:
1.The recommended solution is to concatenate the text with a new line character. The easiest way to do that is to concatenate the blank text (which could be a variable or an expression, that extracts information from the input file) with a new line character. You can do that with this expression:
concat($MyVariable, '
')
Where '$MyVariable' represents the variable data, that you want to output. You can insert the new line by editing the text delimited by the '' and just hit Enter in the middle.
You can also insert this as:
concat($MyVariable, ng:hexToUtf8('0A'))
- where the ng:hexToUtf8 function is used for transforming the Hex value 0A (which is the hexadecimal value for Line Feed) into the Line feed character.
2.You can set a fixed height for the text inside the repeat loop:

The problems/limitations with this is, that the text height is now fixed and does not reflect the font size and also the text height does not adapt to a longer text, that might be wrapped around to multiple output lines in the output.
Dynamic switch between normal and bold in the middle of a text
If you want to dynamically between a normal font and a bold font in the middle of a text, then you can consider the suggestions below:
2.Enable the option Text contains HTML tags and use <b> and </b> to enable/disable bold.
Use a container with a horizontal flow direction (row)
If you prefer to use a container, then you can setup this solution in this way:
Insert a container with horizontal flow (row). You set that via the icon below:
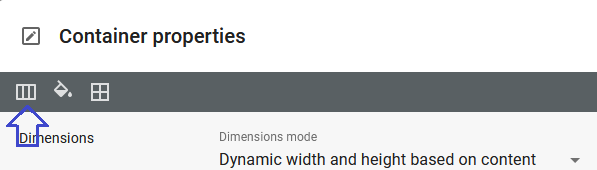
With this setting the texts are inserted next to each other in the horizontal direction. You can however force a line break in the text if needed.
If we insert multiple texts like below:
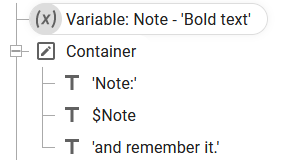
Then the output will look like this:

(Where only the value of the variable, $Note is written in bold).
Enable the option Text contains HTML tags and use <b> and </b> to enable/disable bold
The alternative to the option above is to enable the option Text contains HTML tags on the text element and then use the supported html tags e.g. <b> and </b> to switch between the bold and normal font dynamically like below:
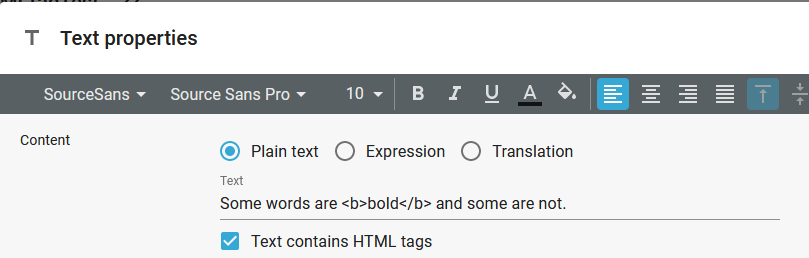
This result in this output:
