If you want to create PDF output in InterFormNG2, then you need to setup a workflow in InterFormNG2 to do that.
If you want to use the PDF inside of an email, then you should consider to check out the email output options first, as the normal create PDF email workflow component will also create a PDF file as an attachment.
In short you have two functions to merge an input file with a template to generate a PDF file:
1.If you simply want to create a simple PDF file in the local file system and nothing else, then you should consider the create PDF file component.
2.If you want to do anything with the PDF file, then you need to use the create PDF document component instead.
The difference between create PDF file and create PDF document is:
This will simply create an output PDF file and then the workflow is done with the output PDF file and the workflow will forget all about the PDF. The payload of the workflow is after the function the XML file, that was the input for the component.
This feature is covered in this video:
This will merge the input file with a template. The output is a PDF (file), but the output is only stored in the payload of the workflow. It is not saved to an output file before you tell the workflow to do that e.g. with the To filesystem component or any of the other file output options.
So with the create PDF document you have much more functions available to change the PDF, before you output the file:
1.Append a PDF: This require a license, that includes the Advanced PDF module. With this you can append/merge/concat the PDF file with another PDF file. The other PDF file can e.g. be some Terms and Conditions or PDF file, that is found via dynamic path.
2.To InterSigning: This require a license, that includes the InterSigning module. With this you can add a written signature to a PDF before the PDF is output to a file.
3.PDF digitally sign: This require a license, that includes the Advanced PDF module. With this component you can add a digital signature to a PDF file (in the payload), before it is saved.
4.PDF Protect/restrict: This require a license, that includes the Advanced PDF module. Use this component to encrypt, password protect and optional restrict the PDF file actions.
5.You can add an electronic written signature with the eSignAnywhere module.
6.You can add bookmarks to the output PDF file.
7.You can create an PDF file with fillable input fields with the form field element in the designer.
8.An additional "Back page" for e.g. Terms and conditions is covered by the Multicast and merge workflow component.
9.You can reduce the PDF file size, by not embedding standard fonts, that are known by the PDF viewer (this is not recommended as the PDF files are not PDF/A compliant and the displayed result may vary).
10.A related PDF function is the ability to convert a PDF file into an XML/Text/Spooled file i.e. extract the text from an input PDF file. This is possible with the workflow component: PDF to SPLF.
11.You can scale and rotate a PDF file with the workflow component, PDF scale and rotate.
12.If you want to add meta data/keyword into a PDF file, then you can add them by assign a value to one of the PDF predefined variables or Advanced PDF predefined variables.
13.Conversion of a PDF into one or multiple image(s) can be done with the two workflow components: PDF page to image and PDF to images XML.
14.You can add a hyperlink for both text elements and images in the template.
15.You can extract meta data information from a PDF file with the workflow component, PDF metadata to XML.
16.You can use the embed element in the designer to embed another file inside the pdf file.
The PDF output can be distributed in all of the file output options.
Reduce the PDF file size - reduce images and embedded fonts
If you want to reduce the size of the output PDF files, then you can consider (first of all) to include smaller images and also consider to set the predefined variable, pdf.resizeImagesDPI to set the resolution of the images in the PDF output. If you e.g. insert a 10Mb image, then the PDF file will normally also be 10Mb larger - unless you set a DPI with this variable.
You can also reduce the resolution, but you may also consider to reduce the number of embedded fonts.
If you choose to remove some embedded fonts you should remember this regarding such PDF files:
1.The PDF files are not PDF/A compliant, so they should NOT be used for long term archiving.
2.The viewed result may depend on the actual PDF viewer, that you are using.
3.Some characters outside the Latin 1 character set may look wrong - depending on the PDF viewer.
So in general this is not recommended.
If you want to exclude some fonts from being embedded (e.g. Arial, Times New Roman and Courier), then you first should set the value of the workflow variable, pdf.noStandardFontEmbed to true. This will disable the standard font embedding.
If this is disabled, then the first run will create a PDFStandardFonts.properties file inside the translation folder in the library, where InterFormNG2 have tried to guess the correct replacements of standard fonts.
The allowed replacement names for standard fonts are:
TIMES_ROMAN
TIMES_BOLD
TIMES_ITALIC
TIMES_BOLD_ITALIC
HELVETICA
HELVETICA_BOLD
HELVETICA_OBLIQUE
HELVETICA_BOLD_OBLIQUE
COURIER Courier
COURIER_BOLD
COURIER_OBLIQUE
COURIER_BOLD_OBLIQUE
SYMBOL
ZAPF_DINGBATS
The contents of the PDFStandardFonts.properties file may look like this:
TimesNewRomanPSMT=TIMES_ROMAN
CourierNewPSMT=COURIER
Arial-BoldItalicMT=HELVETICA_BOLD_OBLIQUE
SourceSansPro-Regular=TIMES_ROMAN
SourceSansPro-ExtraLight=TIMES_ROMAN
SourceSansPro-Black=TIMES_ROMAN
CourierNewPS-BoldItalicMT=COURIER_BOLD_OBLIQUE
SourceSansPro-LightIt=TIMES_OBLIQUE
CourierNewPS-ItalicMT=COURIER_OBLIQUE
SourceSansPro-SemiboldIt=TIMES_BOLD_OBLIQUE
Arial-BoldMT=HELVETICA_BOLD
SHEALTHONSLAB=
CourierNewPS-BoldMT=COURIER_BOLD
Arial-Black=HELVETICA
SourceSansPro-It=TIMES_OBLIQUE
SourceSansPro-Bold=TIMES_BOLD
EngraversMT=
ArialMT=HELVETICA
Arial-ItalicMT=HELVETICA_OBLIQUE
SourceSansPro-Light=TIMES_ROMAN
SourceSansPro-Semibold=TIMES_BOLD
SourceSansPro-ExtraLightIt=TIMES_OBLIQUE
SourceSansPro-BoldIt=TIMES_BOLD_OBLIQUE
SourceSansPro-BlackIt=TIMES_OBLIQUE
The text on the left is the name of the font and the text on the right is the standard font to used for this specific font.
Here is an example of a workflow, that enables this function:

The workflow variable is set like below:

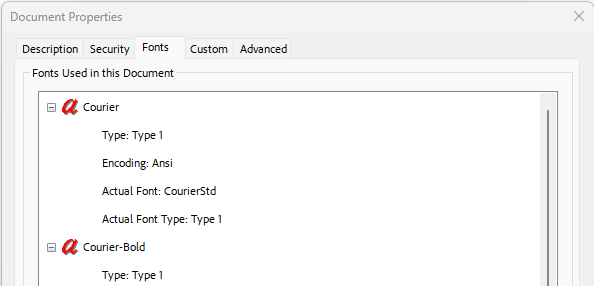
You can verify the fonts included in the output PDF file in the document properties:
PDF resolution
The resolution of the output PDF files is set on the template element in the template used for the merge into PDF. The size of the output PDF file is related to this resolution in the way, that if you double the resolution, then you can expect that included images and barcodes may increase 4 times.
The resolution set on the template element sets the same resolution for the PCL and PDF output, but it is possible to set another, fixed resolution for all PDF output to overrule this.
If you want to do that, then you need to edit the configuration file, application-default.properties (remember to save a copy before editing it) and here insert a line like this:
pdf.forceBarcodeDPI=600
This will override the resolution for all PDF output to the fixed resolution/DPI value set here and the DPI setting on the template element is ignored for PDF.
The application-default.properties file is found here:
On the Windows platform
The file is normally placed in the path shown below, but it is configurable during installation:
C:\Program Files\InterFormNG2\application-default.properties
On the IBM i platform
The file is placed in the IFS inside: \iformng2\InterFormNG-shell\Core