The multicast and merge workflow component is placed in the basic section, but it is not a basic function.
With this component you can create multiple outputs and then merge them together as a single output.
This component has been made to help those, that wants to insert extra pages in the output, than normal output generates.
For these setup you need to consider the right merging strategy.The special situations are e.g.:
1.You want to insert an extra fixed page as page 1 before the normal output. (simple merge)
2.You want a back page with terms and conditions (or similar) as page 2 of your output (interleaved merge).
3.You want an extra page with terms and conditions to be printed as the last page of your output (simple merge).
4.You want to use the same back page on all pages (Interleave and loop).
5.You want to print the full print out in duplex and add blank back for the pages without a back page (Interleave and fill blanks).
Normally you can solve the first and last situation by setting up your template to handle that, but you will normally have a problem to handle the second situation directly in the designer.
In short you can use the multicast and merge a bit like the multicast component except that this has special requirements to the output of the branches, and the multicast and merge component also merges multiple outputs into one.
You will see this when you insert a multicast and merge component:

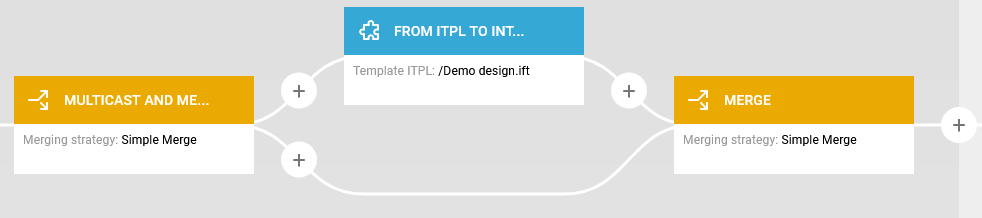
So as you can see two yellow boxes are added. The leftmost box can branch out to multiple branches, where each branch can generate its own output.
You create branches by clicking on the + icon in the middle of the two boxes (marked above).
All of the branches are merged (and collected) in the merge box on the right.
Below this is explained:
1.How to add a new branch
2.How to delete a branch
3.How to copy a branch
4.How to do the final merge
5.An example: Insert a back page on the back of the first page only. Print this in duplex and the rest in simplex.
How to add a new branch
To add a branch to a MultiCast and merge workflow component you need to click the + icon in the middle:
When you click the + icon a pop up window will appear (the same as whenever you are adding any new workflow component).
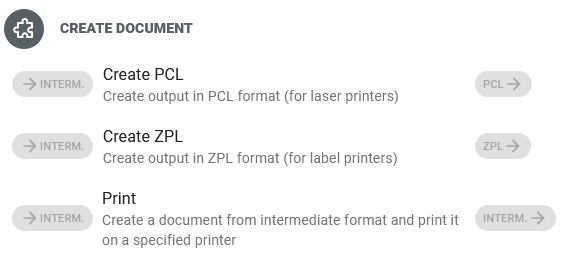
You can select any workflow component, but in reality, there are two workflow components, that you should consider:
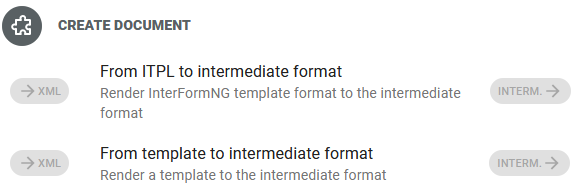
Both of them are listed as advanced components. You can e.g. find them by searching for intermediate
The first component merge an input XML file with an InterFormNG template (i.e. a template created by InterFormNG - and not InterFormNG2).
The second component merge the input XML file with an InterFormNG2 template.
The output of the components is called intermediate, which is a special preliminary format, that can be used for merging into any of the final formats like e.g. a print out or a PDF file.
After you have added the first branch you will see, that there is now a new empty branch. You can click the + icon of the new empty branch to add additional branches:
How to delete a branch
If you want to delete a branch of the multicast and merge component, then you just place the mouse over the leftmost element of the relevant branch and click the round icon on the right:

Now you click Delete sub-tree to delete the branch from the selected component.
Remember, that you can undo/redo changes by clicking the arrows on the top right of the workflow editor.
How to copy a branch
If you want to copy a branch, then you first need to copy the source branch into the clipboard. You do that by placing the mouse over the leftmost workflow component in the branch and then click the round icon on the right:
Now select the option: Copy sub-tree to clipboard.
Now you need to paste the contents of the clipboard into the new branch. You do that by adding a new branch, and then select PASTE FROM CLIPBOARD on the top right of the pop up window:

How to do the final merge
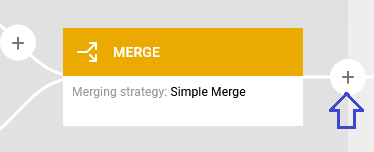
At the very right of the multicast and merge we have the merged result of two documents in the special intermediate format. The final task is to merge this intermediate format into the final output e.g. print out or PDF.
To do that you might first need to press F5 to refresh the browser session and ensure, that the workflow editor knows, that the output format of the multitask and merge component is intermediate.
Now you click the + icon to the right of the merge element to add the final merge:
And now you can see the list of all workflow components. To filter the components you should search for the final output e.g. PDF or print:
If you specify PDF you will see these:
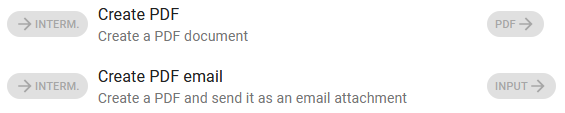
So if you want to create a PDF file or an email with an attached PDF, then you select either of these. Please notice, that the input format shown on the right is '->INTERM.', which confirms that we have found the right ones, as this is the abbreviation for Intermediate.
If you instead search for print, then you see these components (among others):
For most installations you simply select the bottom component (Print), and on this component you select one of the defined printers.
Print first page in duplex with back page and the rest in simplex
Here is an example of how the multicast and merge can be combined with templates in order to generate a printed output, where the first page is printed in duplex with a fixed back page (e.g. with Terms and Conditions) and the rest of the pages are printed in simplex.
First we need to prepare two templates:
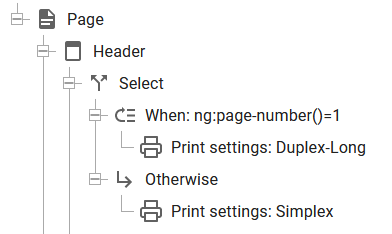
1.The main template. This template need to enable duplex on page 1 and simplex on the other pages with the designer element, Print settings e.g. inside a select element. This is e.g. setup like so in the header of the template:
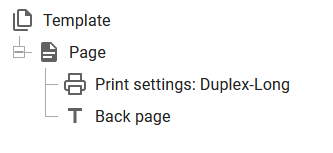
2.The back page template. This is the fixed template to be used on the back of page 1. The template also needs to enable duplex via the Print settings element. T
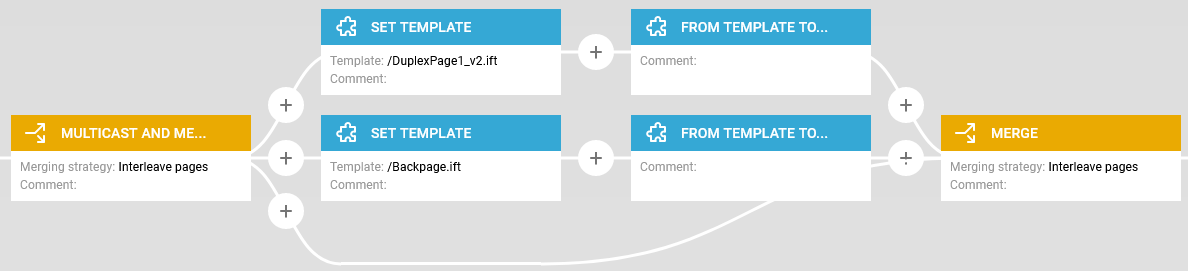
Now we can build a workflow, that use these templates in order to include the extra back page on page 1 like below:

The first part is the multi-cast and merge, where we use the merging strategy: Interleave pages:
After this we setup the print out:
