You can print to on most printers in InterFormNG2.
The printing can be done with these workflow components, if the printer is registered in InterFormNG2:
1.With the Print workflow component. This is the normal print component, that does a merge with an input file and a template and prints the result.
2.The To printer workflow component. This component expects, that the payload of the workflow contains printable data e.g. PCL, ZPL, Direct Protocol or even PDF.
3.You can also print to remote printers (on another network) via remote client.
4.A an extra tool you can setup a Print queue manager in InterFormNG2, which can be used as a tool to e.g. reprint or redirect printed output.
5.Stapling and selection of a special output bin and similar functions can be activated with extra PJL commands (and extra PCL commands) in the workflow, on the printer settings or on the driver settings, if you use driver print.
6.The drawer/tray for PCL output can be selected in multiple ways including the design element: Print settings and the workflow elements: Set printing properties, set paper type, Extra PCL commands.
7.For PCL output you can select between simplex and duplex with the design element, Print setting (which can dynamically change the settings in the middle of a print out) and with the workflow component, set printing properties.
8.If you want to select a specific output bin on a PCL5 compatible laser printer, then you should read this section below: Output bin selection.
Support for unregistered printers is covered in this section.
You can merge an XML or spooled file with a template into any of the printable in the payload with these workflow components: Create Direct Protocol document, Create PCL document, Create PDF document and Create ZPL document. These documents can then be sent to a printer with the To printer workflow component.
For each of printer data streams (mime types) there are special settings, which you should consider. They are:
Advanced Direct Protocal settings
This video introduce simple print with InterFormNG2:
Special print features
Special print features are listed below:
1.Duplex/simplex (print on either both front and back or only on the front of the output pages). This can be setup on the Set printing properties component before the merge into print and in the design element, print settings.
2.Tray/drawer selection (what drawer/tray the printer should take the paper from). This is setup via a paper type, that must be defined on the printer configuration. This option is also setup on the Set printing properties prior the the print merge or in the design element, print settings.
3.Special PCL commands can be added with the Extra PCL commands component prior to the merge into print. This can e.g. be used to setup tray/drawer selection via a special PCL drawer number or an output bin on the PCL5 compatible printer.
4.Special PJL commands can be added with the Extra PJL commands workflow component before the merge with a template. This can be used for accounting, output bin support, stapling, password, follow me and many other things.
5.If you want to add an extra back page e.g. with Terms and conditions, then you should consider the multicast and merge component.
6.The option to select a specific output bin is covered below.
Output bin selection
It is possible to setup a laser printer to use a specific output bin i.e. to place the printed result in a specific bin. That is normally possible with a PJL command, but the required PJL command is not standard, so if you want use a PJL command, then you need to consult the manual of the printer, that you are using. The alternative to the PJL command is the PCL command:
EC&l<BinNbr>G,
where the characters ‘EC’ are used for denoting the escape character (hex 1B), which is needed in a PCL command. (It is also possible to set the hex characters instead if needed).
The text <BinNbr> represents the PCL output bin number, that you want to select on the printer. So in order to e.g. select bin number 5 we will need to insert the command: EC&l5G. Please notice, that the PCL output bin number may not be the same as the physical outbin bin number, so it is recommended to test a few values to ensure which PCL bin number match the physical bin number, that you want to select on the printer.
Simple implementation of output bin selection
You can implement the selection of a specific output bin in these ways:
1) You can add the command on the printer specification in the advanced PCL settings as below:
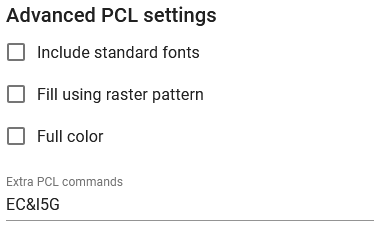
, but that is normally not a good idea as all print outs will then be placed in the selected output bin. It can however be useful for initial testing.
2) You probably want to select a dynamic output bin and you can do that by assigning a value to the predefined workflow variable, interform.destination.printer.pcl.pcl and assign the value before you print like below:

Here the variable is setup with the workflow component, Set multiple workflow variables like below:

Here the variable is simply setup as a fixed text, but you might want to select the outbin bin number dynamically via an XPath expression, which e.g. depends on the user and/or the template, that you are merging with. A dynamic selection via a translation file is covered in the section below.
Dynamic selection of the output bin
With the information mentioned above we can now build a solution to dynamically select the output bin based on e.g. the user, that created the input file (if that is available) combined with the template, that we are going to use for the merge.
For that we can e.g. build a translation file with the contents like below:
USER1,Template1.ift = 3
USER1,Template2.ift = 4
USER2,Template1.ift = 5
USER2,Template2.ift = 6
*OTHERWISE* = 1
For the first 4 rows the format is: User profile followed by a comma (,) followed by the name of the template and the value after the equal sign is the output bin number to select.
That means, that the output bin to select for USER1 is 3, if the template is 'Template1.ift' and 4 if the template is 'Template2.ift'.
In this case we intend to use the template name as a part of the key, but for that we need to keep in mind:
1) That the key is case sensitive.
2) That the key is not allowed to contain any spaces, so if the template name does contain spaces, then you might need to reconsider to use that as a key or to remove any spaces or replace spaces with underscore before using it as a part of the key.
The last entry in the translation file is *OTHERWISE*, that is matched with the value 1, which means, that we want to select output bin 1 if a match is not found in the lines above.
The translation file with the contents above is in this case named: outputbins.properties
This can be used in a workflow like below:

1) In this example we setup a few variables with the workflow component, Set multiple workflow variables like below:
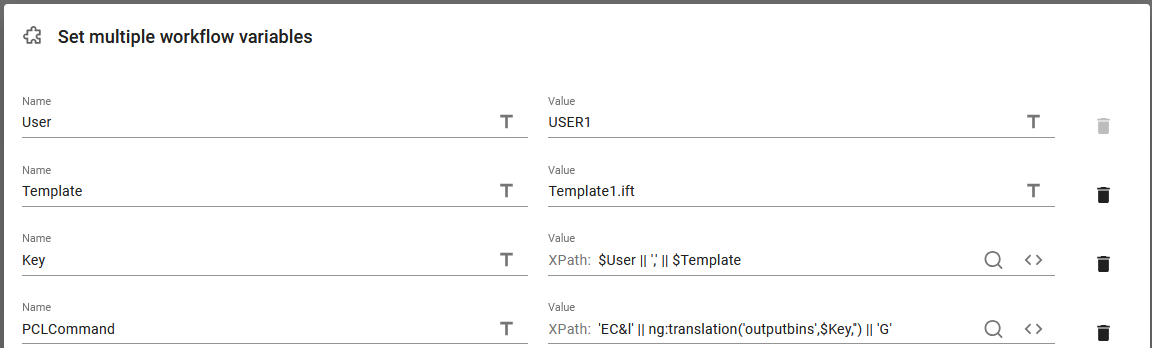
Each of the variables are covered below:
User
This variable is the user of the input file. If this should be the owner of an input spooled file, then the User variable can be set via either of these Xpath expressions:
ng:trim(//@user) (extracts the user attribute of the spooled file and trims it for leading and trailing spaces with ng:trim())
ng:trim($interform.input.spooled.user) (Use the predefined variable, interform.input.spooled.user and trims it of leading and trailing spaces).
In this case the User variable is the fixed value, USER1.
Template
This is the template, that we are going to merge with. We here include the extension as a part of the template name, but we could choose to exclude the extension, ".ift" from the translation file and this variable. In this case the template variable contains the fixed text "Template.if1".
Key
This is the combined key, that we want to use for the lookup in the translation file, outputbins.properties. In this case we concatenate the User and the Template variable and use a comma (,) to separate the two. The || character makes InterFormNG2 concatenate each part. With the values above this variable contains the value "USER1,Template1.ift".
PCLCommand
We do not really need to define a variable for this, but this variable contains the full PCL command, that we want to add to the PCL print data stream. Its contains the fixed text 'EC&l' (last character is a small l - the first character of the word: lima). The || characters again concatenate this with the ng:translation function and the fixed text 'G' at the end. The ng:translation function refers to the translation file, outputbins.properties as described above and the $Key is a reference to the Key variable above. The third parameter of the ng:translation() function is empty (''), which indicates the language/locale. As this is empty (and not used) the lookup is used.
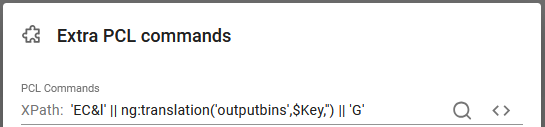
2) As the next step we define the Extra PCL command as below. This defines the additional PCL commands, that should be inserted in the subsequent print component:
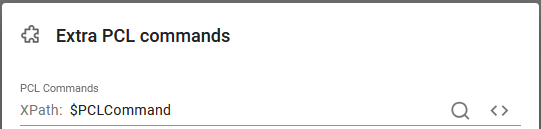
We could in this case also simply have refered to the variable we just defined like below:
3) The final step is to print with the print component:
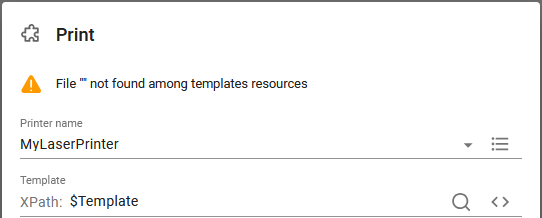
In the print element we refer to the variable, $Template which cause the warning above as workflow editor is unable to verify if the value of that variable actually contains the name of a template.