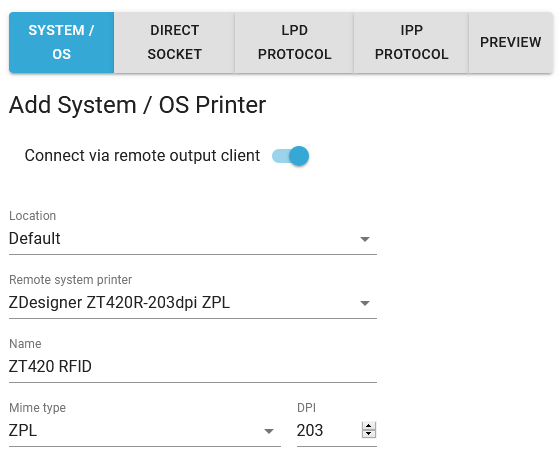
If you want to print on printers, that are only reachable via a remote client, then you first need to ensure, that the remote client has successfully connected to the InterFormNG2 host at least once. You can verify that via the log for the remote client.
After that you can add printers in InterFormNG2, that are only known on the remote client.
When you want to configure a printer, that is reached via a remote client, then you first need to determine which location ID, that is defined on the remote client, that you want to use.
Now you can add a printer in InterFormNG2, that refers to a location ID via a remote client:
On the tenant you can add a printer via Settings and printers and here activate: Connect via remote output client like below:
(Below only the System/OS printers are described. The other connection methods are covered here.)
For the actual printing you can e.g. use the print workflow component.

Location
The location a drop down list of the available locations (each remote client has a location ID in the configuration). This is a list of all remote clients, that has successfully connected to the tenant.
Remote system printer
This is relevant only for System/OS printers, that are defined on the server, that is running the remote client. This is a drop down list of all printers, that are defined on the server, that is running the remote client as selected under location above.
Name
The name to use for the remote printer.
Mime type
Here you select the type of print data stream, that is sent to the printer. You can select between PCL for laser printers, ZPL for ZPLII (Zebra Printer Language) compatible label printers and Direct Protocol - Intermec printers.
DPI
The resolution of the printer.