In InterFormNG2 you can use these image types: bmp, png, gif, tif, tiff, jpg, jpeg, svg and webp.
The images can be referred to in the designer via the image element.
You can install/upload the images in the Library via your browser, but you can also refer to a URL of an image (inside the image element) to use dynamic images. Finally you can also install the images automatically e.g. via a monitored folder.
As for most of the resources you can create folders and subfolders for the images. This is covered in these sections:
Listing images in the Library
From the Library you can see a list of all images. You can in the overview decide, if you want to see simple list with the image names, or if you want to see thumbnails of each image. You can select your preferred view in the upper right corner:

If you select the detail view, then you will see a simple list like this:

- and if you select the thumbnail option, then the view will look like this:

Automatic Install of images via a monitored folder
Instead of manually installing the images into the Library you can also automatically install image via a monitored folder. Here is an example of a workflow that does that:

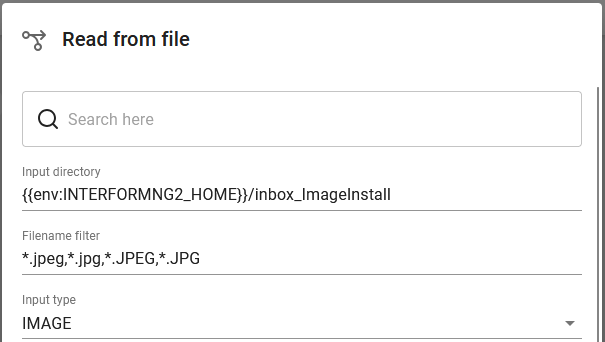
The first element is the Read from file, which is setup like below:

Here you may notice, that the images that are loaded are expected to have any of the extensions jpg or jpeg in either lower or upper case and that the input type is IMAGE.
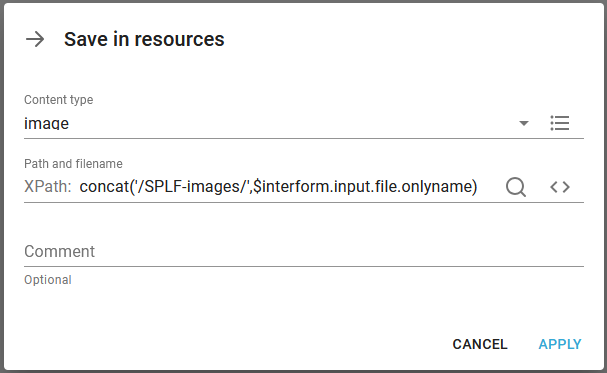
The second element is Save in resources, which saves the image found as an image in the Library:

Here we use the predefined variable, $interform.input.file.onlyname to use the same name as found in the input folder.
You can use the List resources workflow component to delete old images.