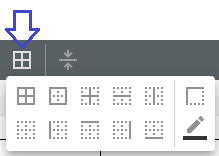
Multiple design elements can be used as containers i.e. to contain multiple design elements, but there is one specific element, that is called container, and you can insert that with this icon:

The container can not only be used as a physical group of elements, but you can also use this to insert a simple box/frame e.g. with rounded corners.
Elements inside of a container are positioned relatively to the container, so if you reposition the container, then all elements inside are moved.
For a container element the topics below are covered in this section:
1.The flow direction. Decide if the elements in the container flows from the top and down or from left to right.
2.How to force a line break in a container e.g. with the line break element.
3.Dimensions of a container.
4.Color and thickness of the borders.
5.Fill a container with a color.
6.Set the position of a container.
7.Rotate a container.
8.Setup rounded corners for a container.
9.How to setup multiple columns (newspaper layout) in a container.
Container properties
The properties of a container can be edited either by double clicking on the container in the tree element list or by right clicking on the container (also in the tree element list) and select Container properties.
Flow direction for a container
The flow direction of a container defines in what direction elements are positioned - if they are positioned as flowing elements. If elements are fixed positioned, then this setting is ignored.
The default flow direction is column, which mean that elements are as default position below each other.
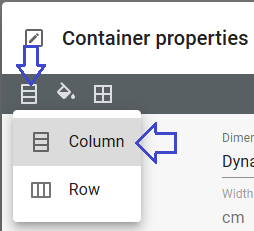
The flow direction can be set on the container properties.
The two flow directions are column and row.
Column
You select this (vertical) flow direction, if you select this in the top left corner:
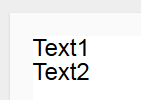
This flow direction means, that each element is placed below the previous element like these two texts:
Row
You select this (horizontal) flow direction with this option in the top left corner of the container properties:

With the row setting the elements are placed from left to the right like the two texts below (Text1 and Text2):

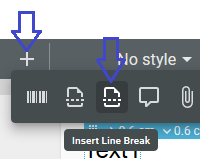
You can use the special line break element inside a container, that has row as the flow direction to force a line break, and place the subsequent elements below the previous ones. You can insert the line break element, if you first click the '+' icon in the top, and then the line break element:
Dimensions of a container
Dynamic width and height depending on contents (default)
As default the size of a container is dynamic (Dynamic width and height based on contents). This setting means, that the width of the container is the width of the element in which the container is inserted. If you e.g. insert a container with this setting directly in a page element, then the width will be the full page width, where the margins of the page are subtracted. The height of the container is zero until flow placed elements are inserted, and then the container height grows as elements are inserted. Fixed placed elements inside of the container does not make it expand.
Fixed width, dynamic height depending on contents
You can use this setting instead of using the full width as above, if you do not want to use the full (dynamic) available space, but e.g. limit the width to a fixed size, while keeping a dynamic height to fit the flowing elements inside.
Dynamic width, fixed height
Use this setting to let the container match the parent container in the width combined with a fixed height of this container.
Fixed width, fixed height
With this setting you have full control of the size of the container. If you insert more elements, than can fit inside the container, then the elements are inserted, but the border and filling will respect the fixed size.
Another way to set the size of a fixed size container is to first select the container in the element tree, and then drag in the resize-handle of the container in the result window to set the fixed size:
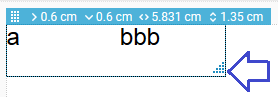
The actual size is shown in the blue header: The height is here set to 1.35 cm and the width is set to 5.831 cm.
Color and thickness of the borders
It is possible to activate borders around a container. If you just want to insert a simple box, then you can use a container for that. You can active the border, and change the border thickness and color individually on the 4 edges.
The border properties can be set both on the container properties and in the header of the designer, when the container is selected.
The icon in the header is this:
You set the border thickness and the border color on a container like on a table element. You can even add new colors while selecting the the border color.
It is also even possible to set round corners on the container.
Fill a container with a color
You can fill a container with a color. That can e.g. be used, if you want to create a grey box or perhaps even a black box with white text inside. The color filling of a container is setup in the container properties as for a table element. You can also add new colors while selecting the filling.
Set the position of a container
As any other element a container can be positioned in the output in two different ways:
(This is set on the container properties).
1.Dynamic placement depending on surrounding content.
With this setting the position of the container depends on the container in which it is placed. This is also referred to as flow or relative position.
Subsequent relative positioned elements are placed relative to the container depending on the dimensions of the container and the flow direction of the parent container: If the flow direction of the parent container (e.g. page element) is column, then the next elements are placed below the current container. If the flow direction of the parent container is row, then the next elements are placed to the right of the current container.
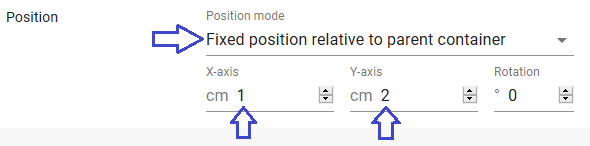
2.Fixed position relative to parent container.
The container has a fixed position, that is independent of any other flow elements on the page. The position of the container is however relative to the container e.g. the margin setting of the page element in which it is inserted. Any elements outside the container is not affected by the dimensions of the container.
You can set the relative position of the container with these settings of the container properties:
With this setting it is also possible to rotate the container as explained below.
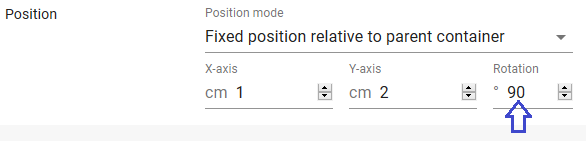
Rotate a container
It is possible to rotate a container element with all its contents, if you have set a fixed position for the container element. With a fixed position you can rotate the container (clockwise) with the Rotation setting on the container properties:
Setup rounded corners for a container
It is possible to create a box or frame with rounded corners, if you create a container element, activate borders of the container, and then set the rounded corners on the container properties:

You set the roundness of each corner individually. Zero means a sharp corner, and other values indicate that the corner is to be a section of a circle with the stated radius.
How to setup multiple columns (newspaper layout) in a container
You can make InterFormNG2 place the elements in a container element in multiple columns like a newspaper layout:
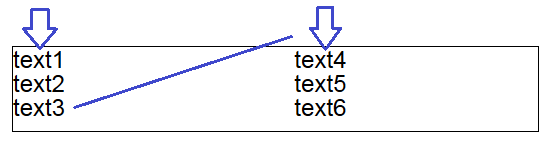
If you want this layout of the elements inside of a container, then you need to set multiple columns and possibly a spacing on the container properties like below:

Above we have chosen two columns like the text example above and a spacing of 1 cm. The spacing is the spacing between the columns. It is marked with an arrow below:
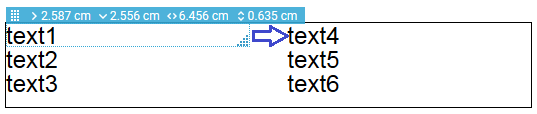
Without the spacing the texts: "text4'... "text6" would be output 1 cm more to the left.