A special Infor M3 module for InterFormNG2 can help you to integrate InterFormNG2 with the ERP solution, M3 from Infor.
The exact integration setup depends on the version of M3, that you are running. The description below covers version 10.2, but in newer versions from 13.4 you can output XML directly from M3.
The setup of the integration consists of 2 parts:
Setup of Infor M3
The description below contains a description of how M3 can be setup (if you are running M3 version 10.3). Use the suggestions below carefully and at your own risk. Although this should be correct, InterForm A/S cannot be held responsible for any problems or loss of data, that are directly or indirectly related to the suggestions below.
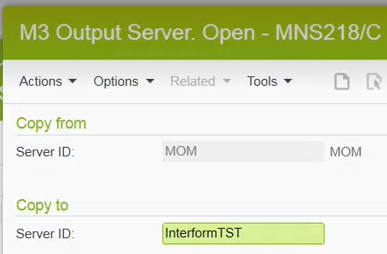
1.The first step is go to the M3 screen MNS218 and here you need to create a new server. You can e.g. consider to copy the MON server. Here we call the new server: InterformTST:
Now click Next and you will see the next configuration screen for the new InterformTST server:
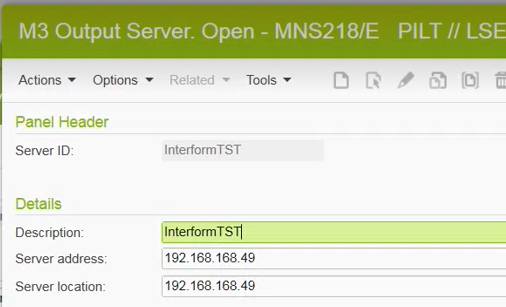
In the screen above you change the description and set the IP-address of the InterFormNG2 server. Then click next to create the new server:
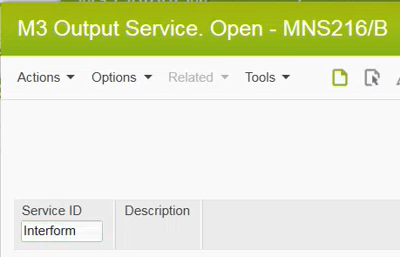
2.Next you move to the screen, MNS216 where you should create a new service e.g. called InterForm:
You configure the service like below:
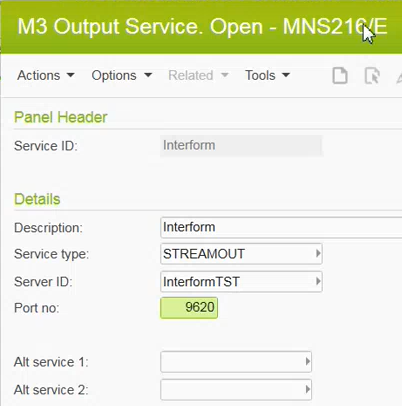
Here we have setup the description, selected STREAMOUT as the output file type (in newer M3 versions from version 13.4 and cloud this can be setup as XML). The port number is the port number, that you want to use for communication between InterFormNG2 and M3. In this example we use 9620. The Alt. service 1 and Alt. service 2 can used for fail-over, so that these services are used, if this service should fail. Normally these fields are left blank.
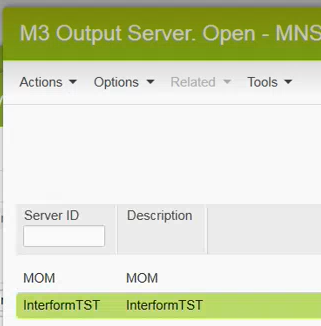
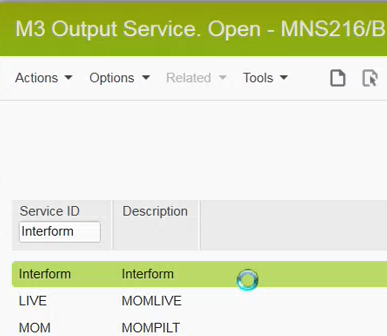
After you click Next you can see, that the new service has been added:
3.Next we need to call up screen, MNS204:
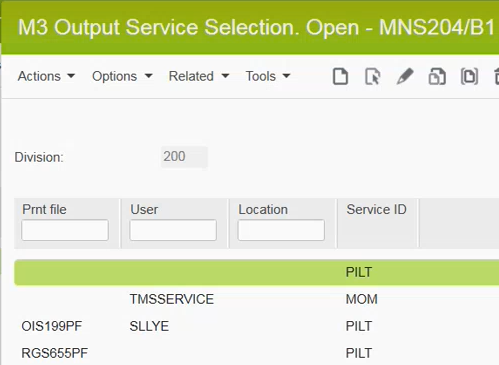
In this screen we tell M3 for which combination of the printer file, user and location as specific service ID (as specified in MNS216) is to be called.
When a specific output has been generated, then Infor M3 will try to match all of the fields (where all have been filled out). If there is no such record, then M3 will search for a match for the printer file and the user, where both fields have been filled out. If again there is no such match, then M3 will search for a match where only the printer name has been filled out. Finally if there is a again no match, then M3 will take the record (if there is one), where all the three fields a blank.
Based on the setup above we want to add a new record, that can trigger InterFormNG2. Here we copy the OIS199PF record and change the setup like below to handle order confirmations:
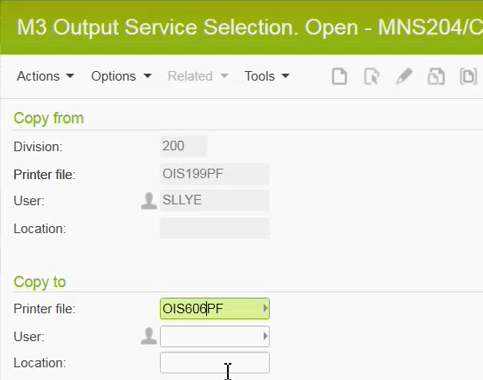
Now click Next to see this screen:
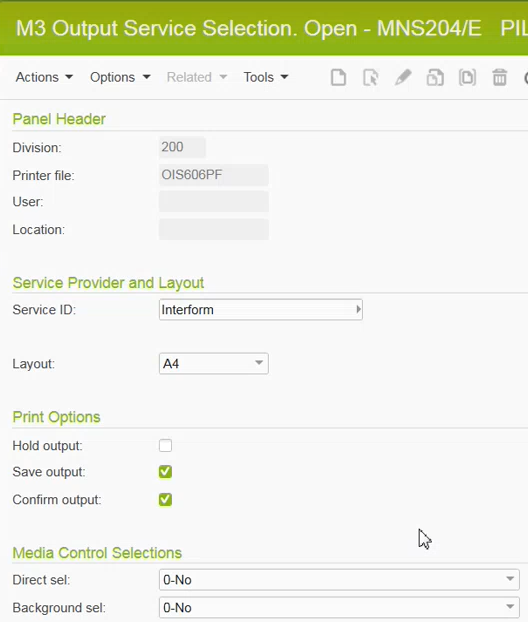
On the screen above you should change the Service ID to Interform and you should consider to setup the right layout. The layout setting can be seen in the data file, when it is later sent to InterFormNG2. With the Save output activated like above M3 will keep the files, that are sent to InterFormNG2. This might be handy, if we want to verify what was sent to InterFormNG2. You should consider to setup M3 to delete old processed files, that are saved in this manner.
It is a good idea to activate the Confirm output as M3 will ask you to confirm the selected service, when you generate some output for it.
Now you can press Next to add the new entry:

4.If you now try to print out an order confirmation, then you can see the status of the print out via the MNS206 screen:
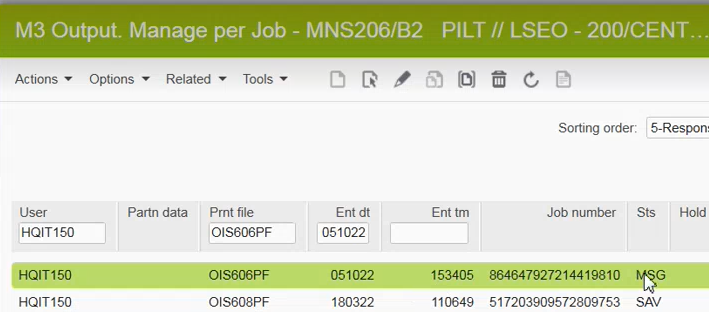
Here you can see, that the processing ended up in error (status MSG) as we have not yet connected InterFormNG2 with Infor M3.
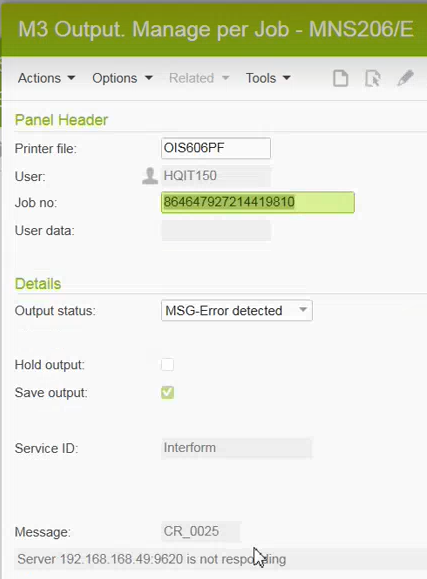
You can see the details, if you double-click the record :
You can also verify the contents of the data file, if you right click on the record, choose Related options and then View, then you can see the contents of the data file:
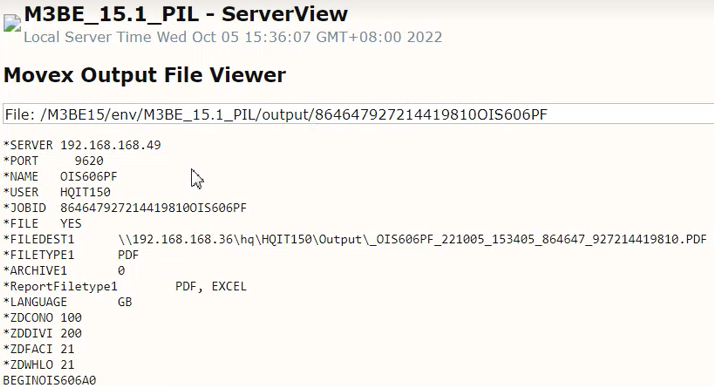
This is the data file, that InterFormNG2 will receive. The fields, *FILE, *FILEDEST1 and *FILETYPE1 reflects your selection in MNS205 and that information can be retrieved in InterFormNG2 later to be used, when the final, merged result is produced. Similar you can choose in MNS205 to e.g. email or print and depending on that the email receiver or printer name will be included in the header of the data file, that is sent to InterFormNG2.
In the InterFormNG2 workflow we can later choose to use this information, if we want.
This concludes the setup in Infor M3.
InterFormNG2 configuration for M3
1. Setup the InterFormNG2 configuration file
In order to connect Infor M3 with InterFormNG2 you first need to change an InterFormNG2 configuration file. The file is called application-default.properties and you can find that in the folder, C:\Program Files\InterFormNG2 if you are running InterFormNG2 on the Windows platform.
Here you should add this line:
m3.portNumber=9620
Now save the changed file and restart the InterFormNG2 service. Make sure, that the port number specified here match the port number selected in M3 in the section above.
2. Setup the InterFormNG2 workflow
With the setup above we can now add a new workflow in InterFormNG2, that accepts the special text files, that are generated by M3. We setup the workflow with M3 input as the input type.