For support cases it can sometimes be required, that you include a saved printer file, that is used by the Spool2XML module.
This would normally be the converted (XML) printer file, which will make the printing application generate 'XML like' spooled files.
The procedure to save the printer file is covered in details below:
1.Identification of the XML printer file.
2.Create a temporary save file.
3.Save the printer file to the save file.
4.Copy the save file to the IFS
5.Download to your PC and attach the save file e.g. to a support ticket.
Identification of the XML printer file
From the IFORMNG2/IFORMNG2 menu you can see the name and library of the printer file, if you first select option "2. Work with XML definitions" from the menu below.
IFORMNG2 InterForm NG2 Main Menu
Select one of the following: System . . . : PMK250 User . . . . : KSE Administration Version . . : 1.6.0b 1. Work with monitored output queues 2. Work with XML definitions 5. Work with IFORMNG2 output queue
10. Start IFORMNG2 subsystem 11. End IFORMNG2 subsystem 12. Work with IFORMNG2 subsystem
31. Display print service log 51. Adjust CPI - *AFPDS configuration 91. License 92. Change NG2 installation
Selection or command ===>
F3=Exit F4=Prompt F9=Retrieve F12=Cancel F13=Information Assistant F16=System main menu
|
Then you will see the list of the XML definitions like below:
Work with xml definitions XDF300D
Position to . . . . . . Printer file
Type options, press Enter. 2=Change 3=Copy 4=Delete 5=Display 12=Record formats 14=Parent child relationship 15=Display keys 17=Export
Opt File Library Description _ AM64MRP1 IFORMDEV CVTPRTFXML NG401PR EXPORTID:1 CVTPRTFXML NG401PR EXPORTID:2 CVTPRTFXML NG401PR EXPORT0001 CVTPRTFXML NG401PR KSE_HIGH CVTPRTFXML NG401PR KSE_HIGH¤ CVTPRTFXML NG401PR PRODNY CVTPRTFXML NG401PR VERSION 2. CVTPRTFXML
End F3=Exit F5=Refresh F6=Create F8=Import F11=View 2 F12=Cancel
|
If you now choose to e.g. change the XML definition with option 2=Change, then you can see the main settings of the XML definition:
Change xml definition XDF310D
Printer file . . . . . . : AM64MRP1 Library . . . . . . . : IFORMNG2AS Name, *ALL
Reference printer file . : AM64MRP1 Reference library . . : AMALIBB
Description . . . . . . . CVTPRTFXML Template . . . . . . . . .
Create fragments . . . . . 3 0=Ignore fragment processing 1=Single fragments file 2=Multiple fragment files 3=Treebuilder
Output queue . . . . . . . Library . . . . . . . .
Optimize xml-output . . : 0 0=No 1=Yes
F3=Exit F12=Cancel
|
In the top you can see the name and library of the XML printer file, which in this case is AM64MRP1 in library, IFORMNG2AS.
Create a temporary save file
The next step is to create a temporary save file. You can e.g. create that in the QTEMP library with the command below:
CRTSAVF QTEMP/AM64MRP1
Here I have chosen to name the save file the same as the printer file, but you can freely choose the name.
Save the printer file in the save file
Now you can save the printer file to the save file created in the previous step.
You can do that with this command:
SAVOBJ OBJ(AM64MRP1) LIB(IFORMNG2AS) DEV(*SAVF) SAVF(QTEMP/AM64MRP1) TGTRLS(V7R1M0)
Where the parameters are:
OBJ
The name of the printer file, that you want to save.
LIB
The library of the printer file, that you want to save.
DEV
The type of target for the save. *SAVF means, that we want to save into a save file.
SAVF
The save file that the printer file is to be saved into. It should match the save file created in the previous step.
TGTRLS
The target release of OS400 to save to. It is highly recommended to save to the earliest possible version. Here the target release is V7R1M0.
Copy the save file to the IFS
Now you can copy the save file into the IFS with this command:
CPYTOSTMF FROMMBR('/QSYS.LIB/QTEMP.LIB/AM64MRP1.FILE') TOSTMF('/IFORMNG2/AM64MRP1.SAVF') STMFOPT(*REPLACE) CVTDTA(*NONE)
The parameters are:
FROMMBR
Here you should state the path to the save file. The path must be written in the format above, where it is here referring to the save file named, AM64MRP1 in library QTEMP.
TOSTMF
This is the target stream file in the IFS, that we want to create. Here we copy the save file into the stream file, AM64RP1.SAVF in the folder, IFORMNG2.
STMFOPT
*REPLACE means, that the existing stream file with the same name (in the same folder) should be replaced, if it should already exist.
CVTDTA
This sets up the conversion. *NONE means, that the data in the save file should not be converted, but a binary copy is done.
Copy the stream file to the PC
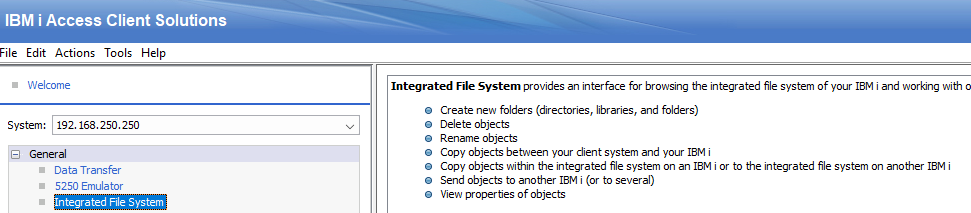
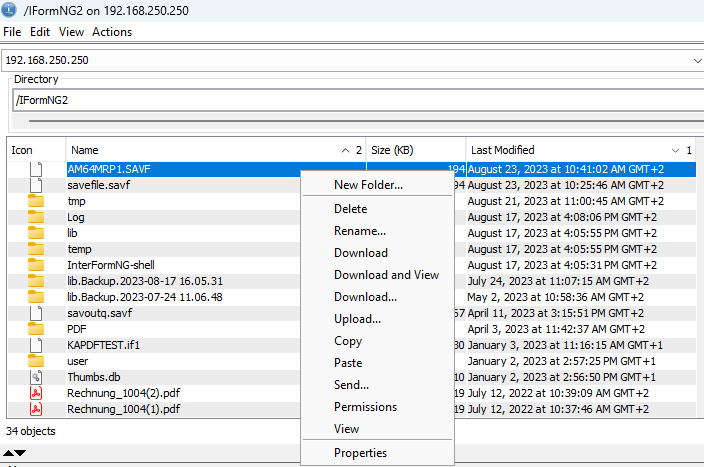
The final step is to copy the stream file to your PC. The most simple way is to access the folder via MS File explorer, but if that is not an option (e.g. if the Netserver is not running on the IBM i), then you can download it e.g. via IBM i Access Client Solutions, where you select Integrated File Systems:
Here you need to select the stream file in question and then right click to download the file.
Afterwards you can find the file in the downloads folder on your PC.