Configuration of the host server for the remote client
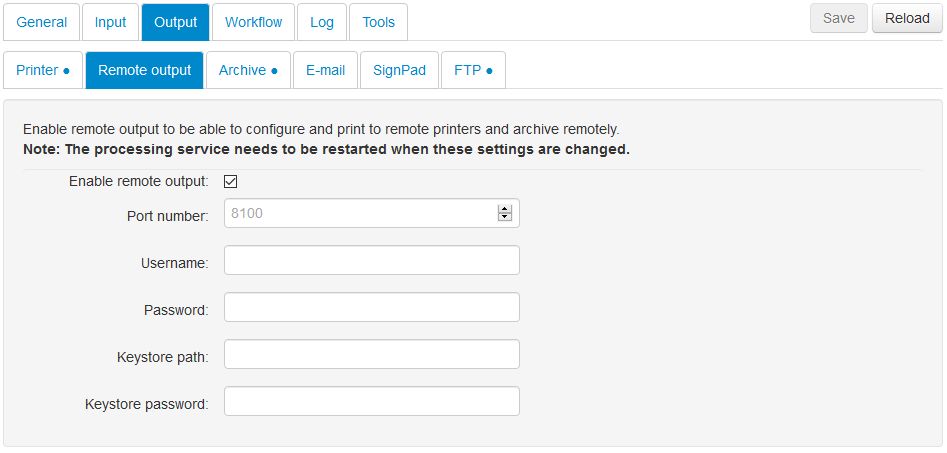
The first thing you need to do is to enable the remote communication via the web interface. You set this up like below under Output and Remote output:

The port number is the port number used for communication between the remote client and the InterFormNG server.
The user name, password, keystore path (the path and file name of the keystore file) and keystore password all refers to the keystore and the certificate inside.
The settings above must of course be matched between the host and the remote client.
Configure a remote printer on the server
If you want to print on a remote printer, then you should first setup the remote printer on the client and let the client connect the host server. Once a minute the remote client connects to the host server and uploads a list of the system printers (defined on the operating system), that are defined on the clients machine.
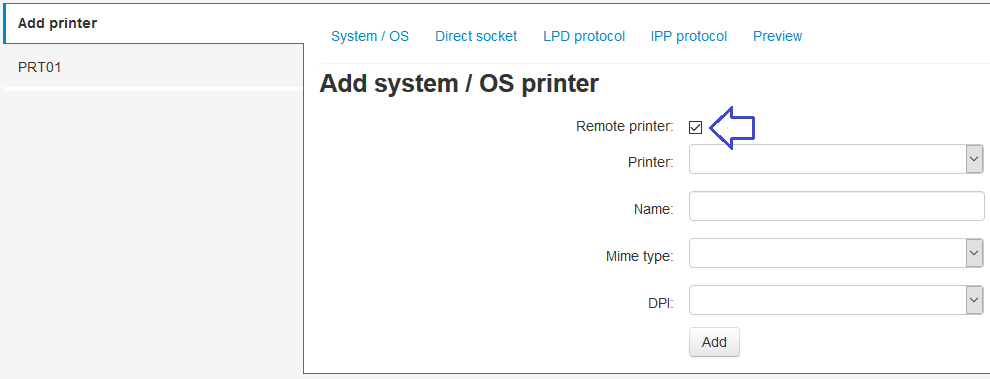
You define printers on the host by adding a printer while activating the 'Remote printer' option:

and then the list of system printers defined on the remote are shown as a drop down list under 'Printer' above. You can also define non-system printers as remote printers, if the printer are not defined on the machine of the client, but still only reachable in the network of the client.
Configure a remote email account on the server
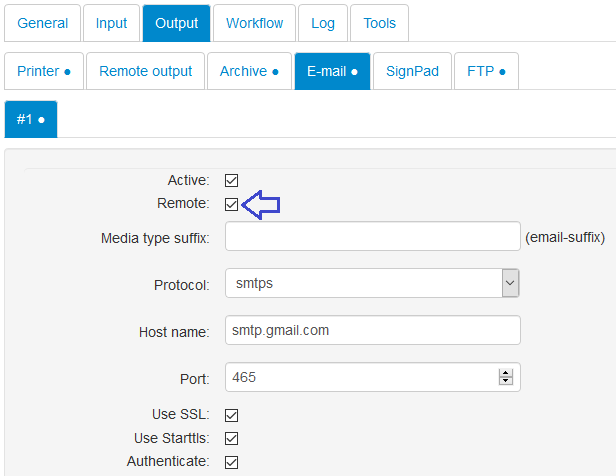
If you want to email via the remote client (e.g. because the email server is only reachable from the remote client and not the host), then you can define it as a remote email account:

The email account should be defined on the host. If you have multiple email accounts, then you need to use the Media type suffix to select between them.
Configure a remote directory on the server
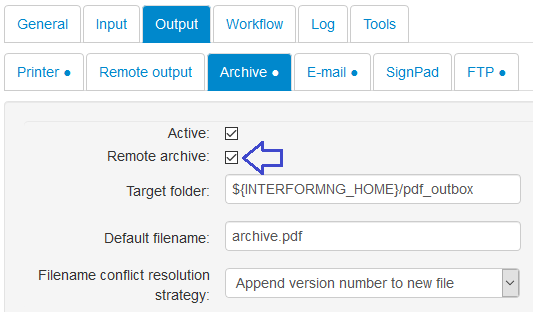
When you run InterFormNG with a remote client, then you can create PDF files either only locally on the server network or on the remote network - accessed via the remote client.
In the archive configuration you decide via the Remote archive option:
