The section below describes the database configuration for the From database workflow input, which is very seldomly used. For most you should consider the alternative: From database with custom SQL.
To use the database input component, database connection settings first have to be configured.
Log in as tenant administrator and select "settings" from the top navigation bar. Then jump to the section "database".
To configure a new database, first give it a unique name in the "name" field. This name is used to identify the database when using it in a workflow.
Under "connection", first select the database type that you want to use. If you cannot find your database on the list, then select "other". Once you select the database type, the fields "JDBC driver class" and "Hibernate dialect" will be pre-filled with typical values. You can edit these two values if they are not what you want. "JDBC driver class" is the Java class name of the database driver that you added a jar file for. "Hibernate dialect" is the dialect that should be used by the Hibernate ORM framework to generate SQL statements for your particular database type and version.
Connection URL
For "connection URL" specify the JDBC protocol URL used to connect with the database. The URL should be without username and password, since these are specified separately. The URL typically looks like this: jdbc:<DATABASE-TYPE>://<IP>:<PORT>/<DATABASE_ID>
For instance for MySQL it could be: jdbc:mysql://localhost:3306/interformdatabase
For IBM i the connection could be:jdbc:as400:MyIBMi/MYLIB;naming=system;translate binary=true
,where MyIBMi is the host name or IP-address of the IBM i and MYLIB is the library in which you want to create the table/file.
For IBM i: Please notice, that you need to either start journaling for the file/tables involved or you can also chose to turn off commitment control on the connection by adding this to the connection URL:
;transaction isolation=none
Finally enter the username and password for the user that should be used for connecting to the database.
The button "Test connection" can be used to test if the connection settings work. You will be presented with an error message if they do not.
The button "Create the tables" can be used to create the tables on the database.
The created tables are as shown in this entity relations diagram:
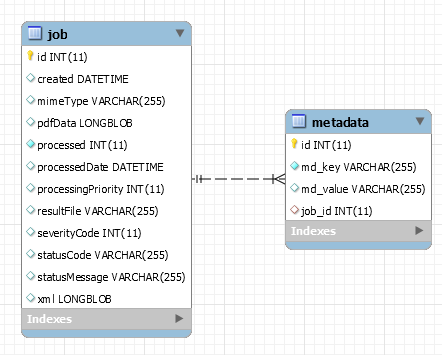
Note that primary key ids are automatically generated on databases that support it (for instance MySQL).