One optional feature in InterFormNG2 is versioning of resources.
The versioning features makes it possible to maintain a version history on resources in the library.
Versioning of resources is a way to keep track of changes to resources and this can also be combined with an approval process, so that changes are not activated until they have been approved.
Versioning is setup in two places:
1.On the tenant settings you can enable versioning for one or multiple resource types and decide if changes are effective immediately or only done after approval.
2.On the system settings you can define global user groups (roles) to enable changes and approval, so that special users can be allowed to approve and/or update changed resources.
The linked sections below cover versioning in details:
Settings
Versioning and approval are both disabled by default. It is possible to enable versioning and/or approval for each individual resource library folder (i.e. templates, translations, images etc.). This is done on tenant level in the Versioning section of the tenant settings:
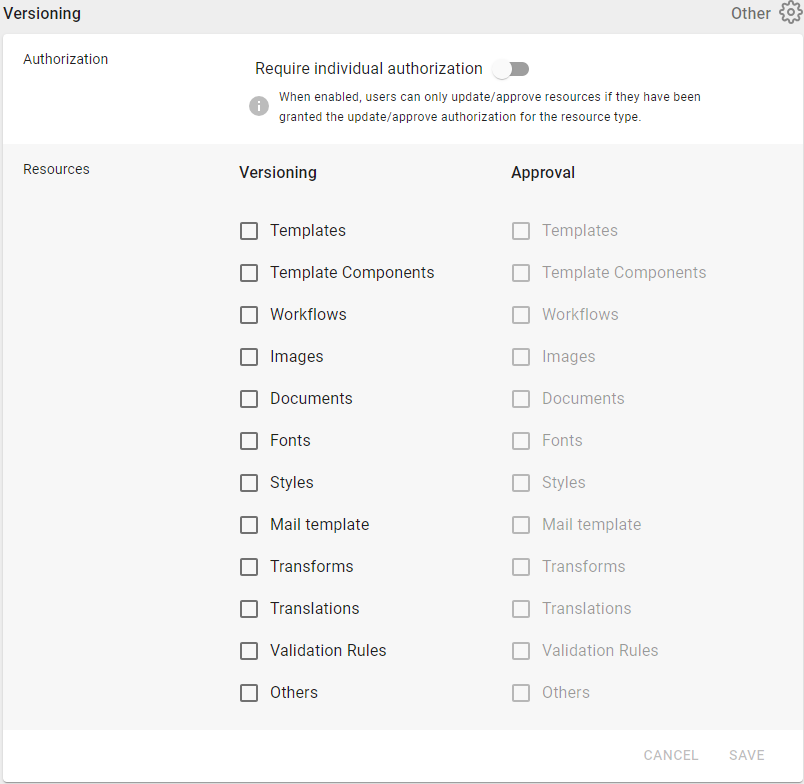
Here you also find the setting Require individual authorization.
When this setting is disabled, all users with “User” or “Tenant admin” role can change resources and also approve changes to resources.
When this setting is enabled, the users additionally need an authorization role for updating/approving resources of specific types. These authorizations can be added with the new “user group” functionality (more on this later). Users without those specific authorizations cannot change/approve anything that is under version control.
Versioning and Approval
Once versioning is enabled, all new resources that are uploaded/created will be assigned v1.0 initially. Resources that existed before versioning was enabled, will initially have no version history. When a change is made to an un-versioned resource, the first version after the change is assigned v1.0 and becomes the first version in the history. The original un-versioned resource instance will not be part of the version history.
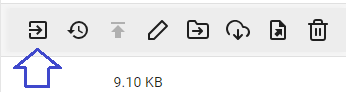
When versioning is enabled for a resource category, that resource cannot be modified without first being checked out (except some cases where checkout is automatic, covered later…). For all resources, it is possible to do the checkout in the library by using the Resource Checkout icon that appears when hovering the mouse over the item in the list (on the right):
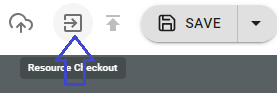
For templates it is also possible to do the checkout in the designer, using the same icon in the designer upper-right corner (near the save button):
To prevent concurrent modification of the same resource, only one user can have a resource checked out. If another user tries to check out the same resource, an error will be displayed.
Save changes (temporary)
When the resource has been checked out the you can save it as many times as the you want. That is e.g. how it can be used in the designer: The user, that currently has checked out the template can do a lot of changes and save a many times as needed. In that way it can be avoided that changes are lost. These saves does not cause a new version until you go on to either publish the changes or request approval.
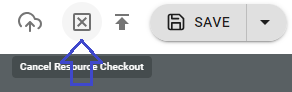
Cancel the checkout
If you have checked out a resource, and no longer wish to modify it, you can cancel the checkout (the checkout button changes to cancel checkout when you have the resource checked out). Cancelling the checkout will discard any changes that have been made to the resource while it was checked out.
Cancelling the checkout is of course important to do in order to allow other users access to modify it.
Regular users can only cancel checkout for the resources they checked out themselves, but the tenant admin can cancel checkout on resources checked out by other users.
The cancel checkout icon is this:
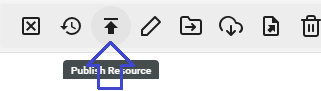
If approval is disabled, then changes to a checked out resource can be published to create a new version of the resource. To publish the changes in the library, hover the mouse over the item and select the Publish Resource icon:
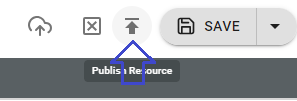
For templates, the same icon can be found in the designer, next to the checkout button:
When publishing, you will be asked to write a description of the changes that you made. This description becomes part of the version history. You can also choose if this should be a new major version. Versions are numbered as X.Y where X is the major version number and Y is the minor, so this choice affects which of the numbers that are incremented.
Note that only the user that checked out the resource is allowed to publish it.
Requesting approval for changes
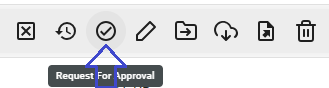
If approval is enabled for the relevant resource type, changes cannot be directly published but have to go through an approval process. In this case you will not see the Publish Resource icon (as shown in the previous section) but instead a Request for Approval icon is shown in the Library:
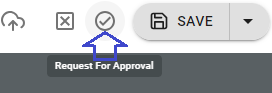
For templates you can also request approval directly in the designer:
As with publishing, you will be asked to enter a description and if it is a major or minor version. In addition, you also have to select an approval workflow. The approval workflow is a normal InterFormNG2 workflow, so it is possible to create more than one by setting different values for the approval flow unique name in the workflow.
After requesting approval, the resource becomes locked and no-one is able to change it until the approval process has been completed.
Once approval has been requested for a resource, this generates an approval task which can be found in the new section of the library called Approvals. Here you will see a list of all approval tasks, completed as well as pending:
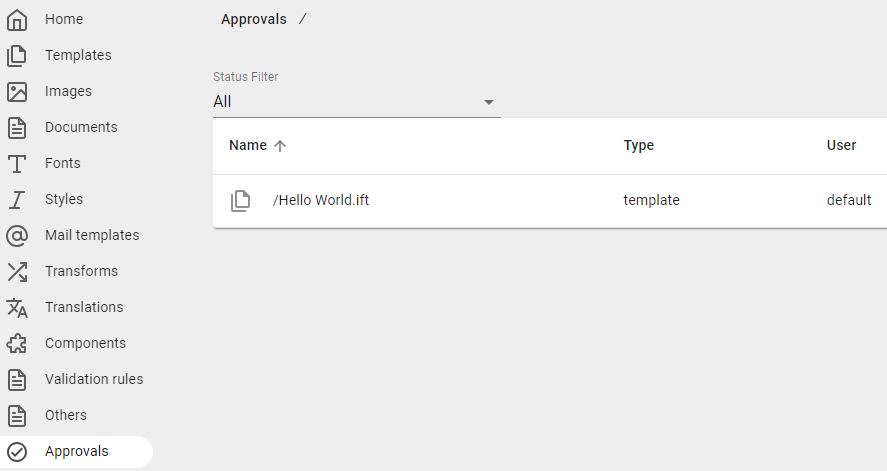
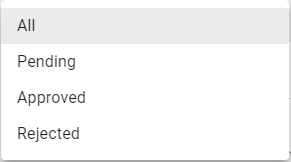
Status filter
The drop-down status filter at the top lets you filter what approvals, that you want to see:
Clicking on an approval task, takes you to the approval screen. Here you have two tabs:
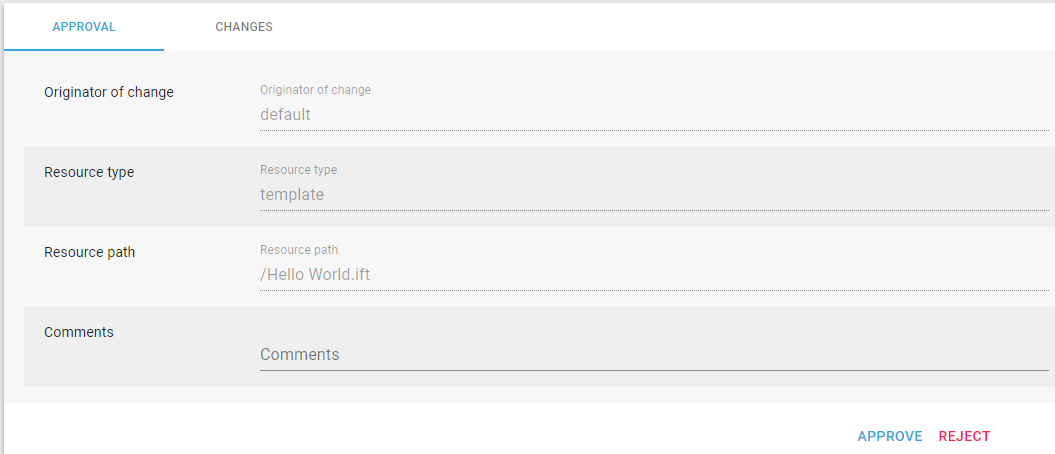
1.On the Approval tab you can see the resource path, name, who made the change as well as the comments from the person who made the change. There is also a field where you can write comments related to approval/rejection reason.
2.On the Changes tab, you can (for most resource types) either see the changed and earlier version of the resource side-by-side, or see the difference between the two versions (for text-based resources) - as seen below:
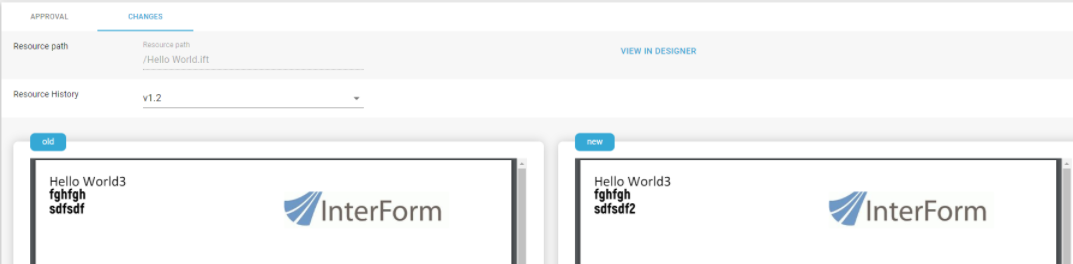
If the resource is a template like above you can jump directly to the designer and verify the contents if you click the View in designer link.
Finally you can use either the Approve or the Reject button to decide the outcome of the approval task. If the change is approved, then it is published as a new version. If the change is rejected, the resource goes back to checked out state, so the originator can make further modifications to the resource, or cancel the change.
Approval screen URL
Note that the approval screen has a URL that looks something like: https://localhost:8086/approval/?instanceId=ID-1702033302086-0-543
The instanceId is a unique id for this approval instance, which is assigned automatically as part of the approval workflow. This value is stored in the workflow payload with XPath /changeRequest/id. This can be used to refer to the approval screen in for instance an e-mail that is sent to the approver as part of the approval workflow.
Viewing version history and reverting
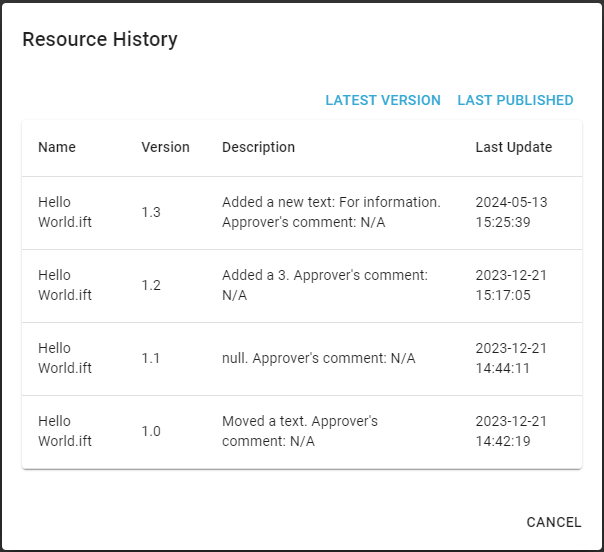
In the library, it is possible to view the version history of a resource by hovering the mouse over the item and clicking the History icon:

Then you see something like this:
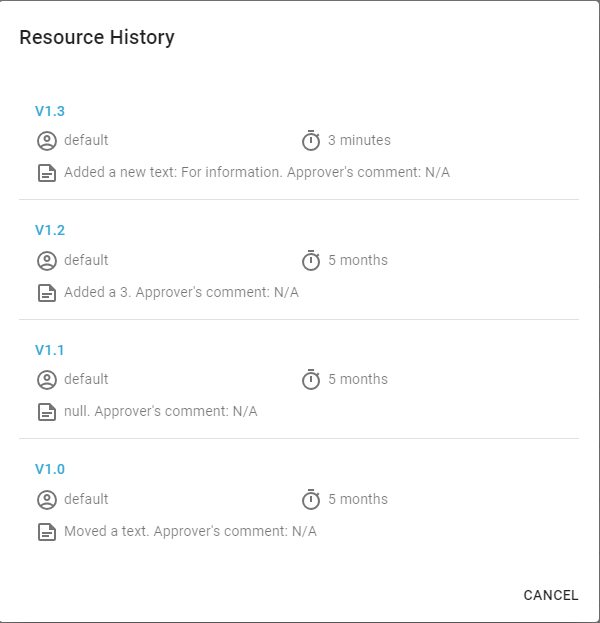
The history will display version number, time and date of the publishing, the user who made the change, the change comments and the approver comments (if approval is enabled). The version number is clickable. Clicking on the version number will create a new version of the resource where the content matches what is was in that version (i.e. it reverts the resource to that version).
Approval workflows are designed the same way as any other workflow, the only difference is that they are triggered by an event inside InterFormNG2, not an external event.
To create a new approval workflow, the input component Start approval process must be used. The input type should be the default “XML”, as the state of the approval process is tracked in an XML payload. As Approval flow unique name you must specify a name for the workflow. This should be descriptive of what this approval flow is used for, since it is all the user sees when selecting an approval flow. It must also be unique (not used as the name for another approval workflow).
In the actual workflow, you need to insert the Await approval component at some point in the workflow. This is the point where the workflow is paused and a user has to make a decision to approve/reject the change. You must also insert a Complete approval process component at some point after the Await approval component. On this component you should set the field Approval outcome to the XPath value /changeRequest/decision. The Complete approval process component is the one that actually performs the actions required for the decision that was made in the approval (approved resources will be published, rejected resources will be unlocked).
For the rest of the workflow, you can use most of the workflow components that you normally use in a workflow. However, you should avoid using multicast and repeating components (such as split). This is because the workflow state needs to be saved when it reaches the Await approval state, and information about the current loop iteration or branch is currently not part of the saved state.
The XML payload that is used in the workflow looks like this:
<?xml version='1.0' encoding='UTF-8'?> <changeRequest> <id>ID-1693228252119-0-1</id> <approvalFlowName>Standard</approvalFlowName> <username>TestUser</username> <resourceType>template</resourceType> <path>/test_template.ift</path> <additionalResources> <resource index='1'> <resourceType>component</resourceType> <path>/test_component.icmp</path> </resource> </additionalResources> <majorVersion>false</majorVersion> <description>This is a description of what was changed</description> <decision>Approve</decision> <approver>ApproverUser</approver> <approverComments>Looking very good</approverComments> </changeRequest>
|
Note that the fields decision, approver and approverComments are null until the approval decision has been made.
This is the most basic approval workflow:

Where the details of the components are shown below:
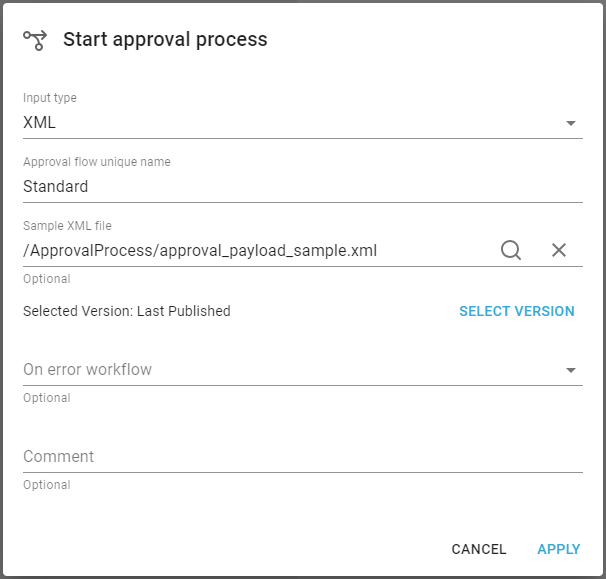
This use the workflow input type, Start approval process.
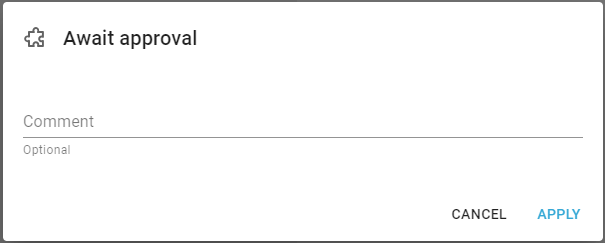
This refers to the workflow component, Await approval.
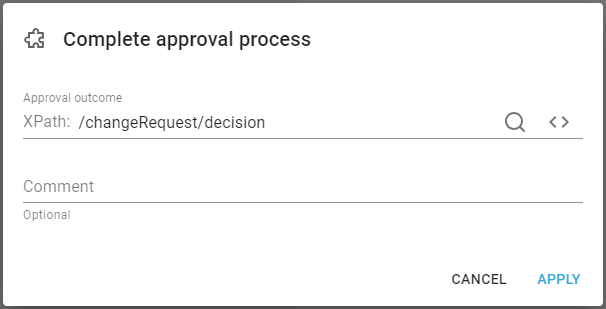
This use the workflow component, Complete approval process.
Note: Always import/create an approval workflow before enabling approval in the settings.
Note: It is dangerous to change the approval workflow while you have pending approval tasks using it.
Individual authorization and user groups
If you enable the Require individual authorization setting, it is necessary to create user groups and assign users to user groups.
User groups are defined once for all tenants, so they can only be created when you are logged in as system admin. To create/edit user groups as system admin, go to Settings → Manage user groups:
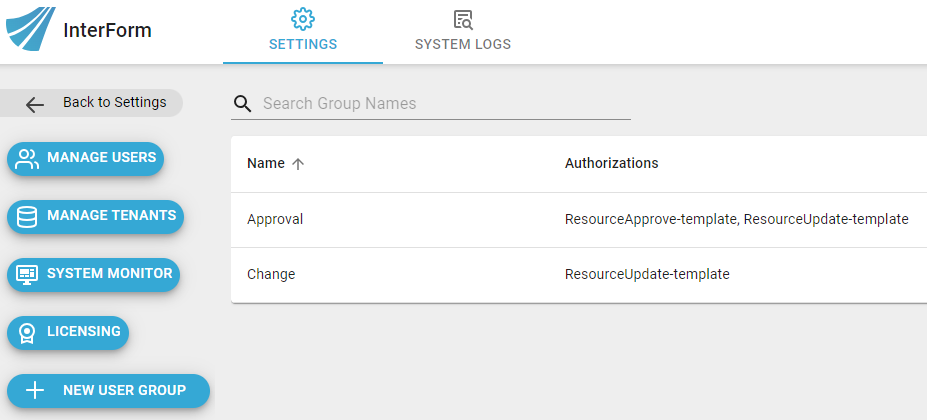
Here you can see a list of existing groups and create new groups with the New user group button. Each group must have a unique and descriptive name.
A set of authorizations (roles) can be assigned to a group. Any user that is assigned to that group will have those authorizations. A number of authorizations exist for the versioning feature, to control who can modify resources and who can approve the changes to those resources:
•Authorizations that start with ResourceUpdate- provide access to modifying a specific resource type.
•Authorizations that start with ResourceApprove- provide access to approving changes to resources of a specific type.
Once you have defined some groups, you can assign users to those groups. This can be done by both the system admin and the tenant admin. To assign groups you need to go to the normal “manage users” screen and edit the user. When editing a user, you can select the groups to assign the user to, from the “user groups” drop-down:
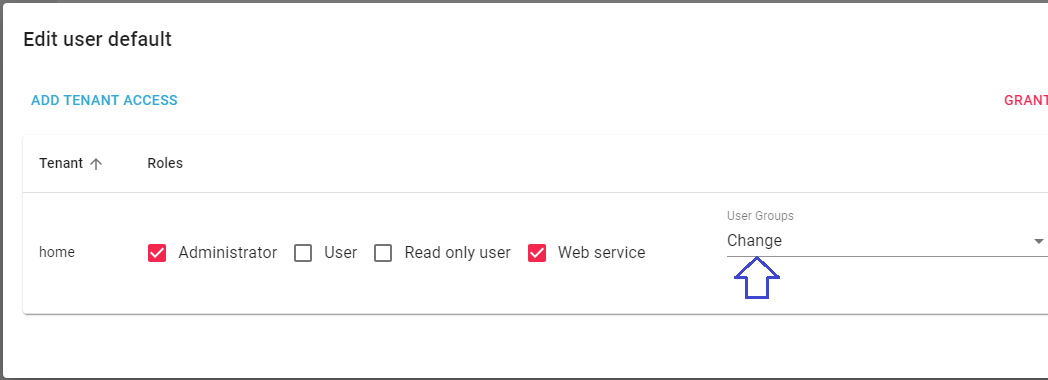
Groups are assigned on tenant basis, so if a user has access to multiple tenants, then the user can be assigned to different groups on those tenants.
Importing templates/workflows
Importing workflows and importing templates with the “import archive” function is also affected by versioning. When importing a zip file where some or all of the resources are under version control, the version controlled items will automatically be checked out during the import (if they are not already checked out). After the import, it is then possible (on the import dialog) to request approval or publish all the imported resources in one go.
Select other versions
By default, wherever a versioned resource is used (a template used in a workflow, an image used in a template etc.) the last published version is used by default.
However, it is possible, for each use of the resource, to select another version.
When a versioned image/component/translation is used in a template, or a template/transform/script/etc. are used in a workflow, you can use the button select version to select a different version:
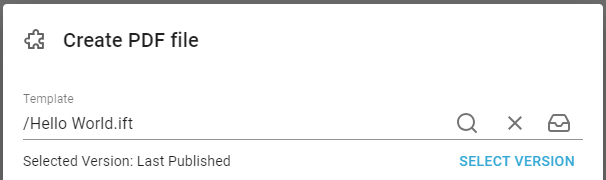
This will display a list of all versions of the resource, so you can select the one to use:
There are also two buttons:
Latest version
Always use the checked out version, if it exists. Otherwise the latest published will be used.
Last published
Use this latest published version.
External database configuration
By default, the versioning repository is stored in the file system. To use an external database for the versioning repository, the following property is needed in configuration file:
application-default.properties:
versioning.provider=database