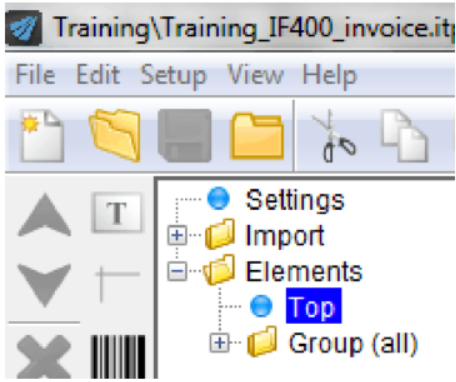
In this section we will describe how you can design the template layouts. Imports of resources like images, fonts etc is described here. In order to start designing you need to open the template (or create a new template) and click the Layout tab in the top then click on ‘Top’ or any other element below to add or change design elements:

Now the design elements on the left are shown:

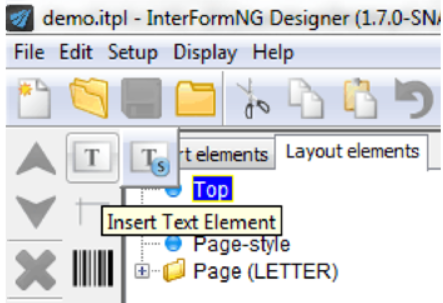
If you place the mouse over an icon a pop-up text will describe the icon. If you place the mouse over the rightmost icons additional elements (simular to the first one) is also shown - like this:

In the case above you can see that the current icon is a text element. The icon to the right of it is the text style element (marked with a blue S in the bottom right corner).
The style elements has an effect on the subsequent design elements in the template. This means e.g. that the top text style element with the icon looking like this:

- Can set the font type (e.g. arial), the size and if the texts inserted now should be bold, italic or underlined. All styles takes effect until another style of the same type overwrites the settings.
It is a good idea to start your template by setting styles for most of the element types - especially the Text style (the icon above) before adding a page element. This makes it easier to find the styles, if you later would want to change them.
For the ‘physical’ elements like e.g. the text element, you should first select a place inside a page element, and then insert the element type by clicking on it with the left mouse key, and then click in the result window to state where in output the element is to be inserted. Then the element is added to the element list.
Suspend elements
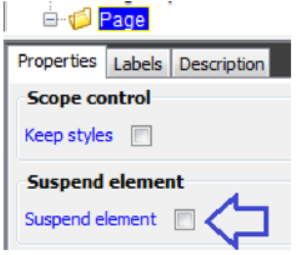
If you want to disable an element, you can activate the suspend option:

This makes it easier to e.g. debug a design or do temporarily remove elements, that you might want to include later. You can also suspend/activate multiple elements at a time as described here.
You can preview the result at any time by clicking one of the rightmost icons in the upper right part of the screen:

From left to right the icons are:
PDF Preview
Click this icon to preview the result as a PDF file.
PCL Preview
Can only be used, if you have associated the file extention ‘.hp-pcl’ with an application, that is able to convert the PCL5 datastream into a graphical format.
ZPL Preview
It is possible to preview the ZPL result via the printer memory, if you have an available ZPL printer, that is not used for printing. This can be setup via General System Settings (Page ) in the web interface.
DriverPrint
Prints the result to any of your windows printers on which you run the designer. A pop-up window will ask for which printer to use.
Also notice that all measurements are as default in inches and pels separated by a comma. 1 inch equals 240 pels, so this means that e.g. 1,120 is the same as one and a half inch. You can change the measurement into either ‘normal’ inches (without pels) or centimeter.
Changing the templates by other means than the InterFormNG designer is unsupported (at your own risk) and may result in unpredictable results.