In some situations you might need to transform, sort or split up the original XML file. This can e.g. be necessary if multiple documents are included in a single XML file, and you want to distribute them individually as e.g. emails or separate PDF files.
The function can not only split up an XML file, but also transform it into a different structure hence the name: Transform.
A third possibility is to use the transform to add database information (via SQL) into the XML file.
An example of an XML file (Intro_demo.xml) is here:
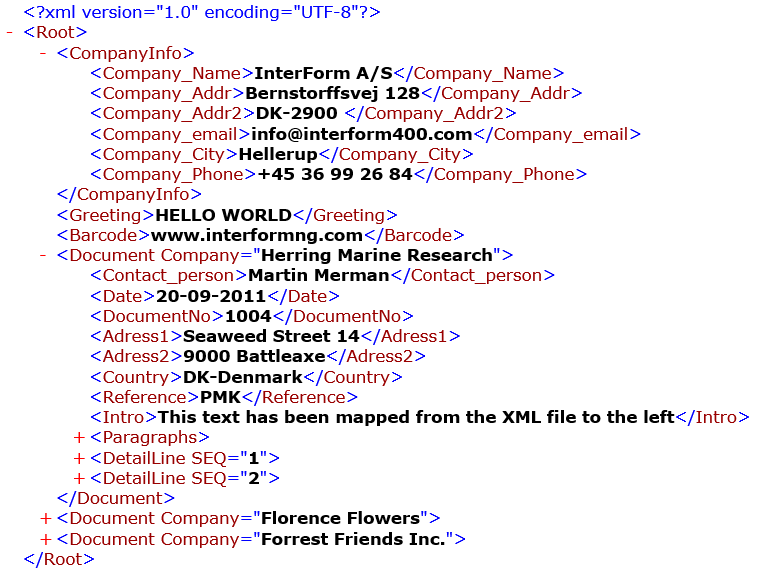
The file can be found in {INTERFORMNG_HOME}\resouces\document\Intro. This functionality will be described while working on this xml file below.
The XML file contains elements, that are in common, which might be included in each of the resulting XML files and it contains multiple nodes (Document) which is the basis of the split, so that each Document branch will result in a new XML file.
If you do not want to include any common nodes in the new xml files, then you can skip the XSLT description below and just define the path for the node, that should be the used as basis for the split.
Activating the transform function
The transform function is activated only via the workflow via the web interface, so in order to use this you first need to activate the workflow. Under Workflow and Template Selections you can setup the transform.
You need to add a rule to be triggered for the xml file(s), that should be transformed. After you have selected a rule you can setup a transform by clicking the Transformations column:

The fields are:
Split XPath expression:
The path to the detail node. If there are multiple nodes with this path, then multiple XML files will be created (split). This will later be referred to as the detail path. If you (e.g. by accident) have specified a path for the Split XPath expression, which does not exist, then the file will not be transformed. If you are afraid of typing in the wrong path (it must be 100% accurate and it is case sensitive), then you can use the graphical designer and use the text element, set it to xpath and use ‘select from document’ (refer to page ) and copy if from there. The path /Root/Document (as shown above) will split up the demo xml files shipped with InterFormNG.
If you do not want to split up the xml file, then you should keep this blank.
Here you can enter an XSLT stylesheet to setup the contents of the new XML file(s).
The xslt file must be placed {INTERFORMNG_HOME}/resources/transform or a subdirectory inside of this.
The xslt files supported are version 1 and version 2. If support for version 2 is required, then you need to prefix the name and relative path of the xslt file with saxon: e.g.: saxon:/mydir/Myconversion.xsl.
If you keep the transformation stylesheet blank while doing a split like described above, then only the detail path will be included in the new, splitted XML file(s).
Folder:
Here you can type a path to where the transformed file(s) will be created. You can state a relative path (relative to {INTERFORMNG_HOME}) or the full path. If you keep this blank, then the XML files will be created in {INTERFORMNG_HOME}/transform_box. The use of the folder is described on page .
Copy to:
It is possible to copy the transformed XML files to another path and name. You can specify a dynamic name as the ‘Copy to’ field is expected to be an XPath expression. This means e.g. if you want to state a fixed path and name, then you need to include the path and name in double qoutes like: “C:/MyFolder/file.xml”. The file will be overwritten, if it already exists.
In the Copy to example above, the splitted XML files are not only created in the {INTERFORMNG_HOME}/transform_box directory, but also copied to the file named: concat("C:\InterFormNG\",/Document/DocumentNo,".xml"), where /Document/DocumentNo is a 4 digit number found in the new xml files, so one of the files will be: C:\InterFormNG\1003.xml.
Validate XSD:
In this field you can refer to an XSD. The XSD can validate the transformed XML file, and if the validation fails, then the processing of the file stops with an error. With this you can be sure, that the incoming XML file validates correctly against specific rules (e.g. for electronic invoicing). The XSD file must be placed inside {INTERFORMNG_HOME}/resources/transform (or a subfolder).
If you add any actions under the Actions tab, then these will be executed for all the new, transformed XML files.
Before we run the transformation, it is a good idea to check out if the transformed/splitted XML files are used as input in the workflow. You can set that via Input Configurations and File System Configuration:
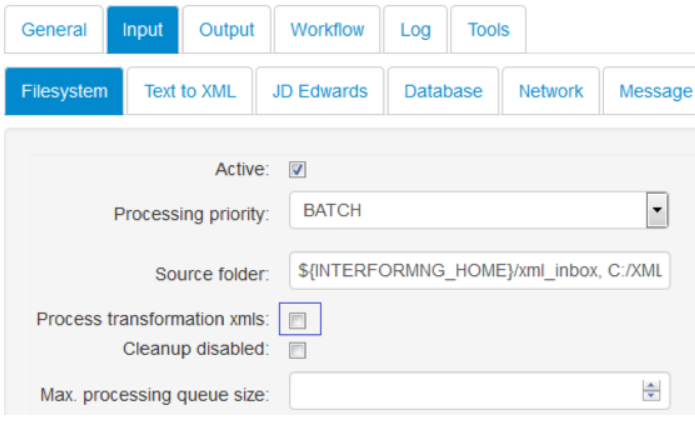
The Process transformation xmls setting defines if you want to run the transformed xml files through the normal processing. This could be relevant if you want to handle each new xml file in a different manner i.e. some should emailed and others should be printed. For first time testing you should disable this. If you activate this (and you set the output folder of the transform to the ‘XML_inbox’ directory), then the transformed files will be processed.
If you run the Intro_demo.xml file as incldued through the transform definition above (without any validation and no action), then the output will be these 3 files in {INTERFORMNG_HOME}/transform_box:
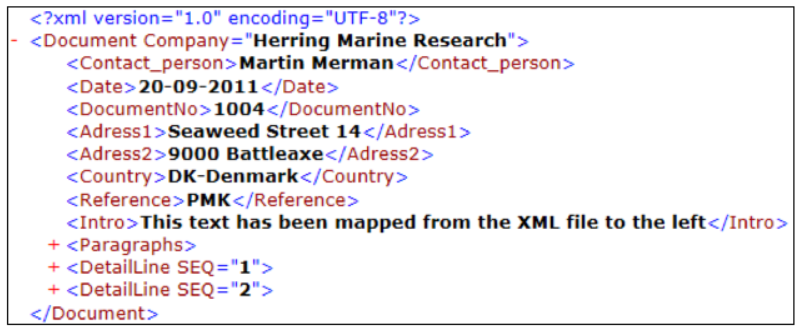
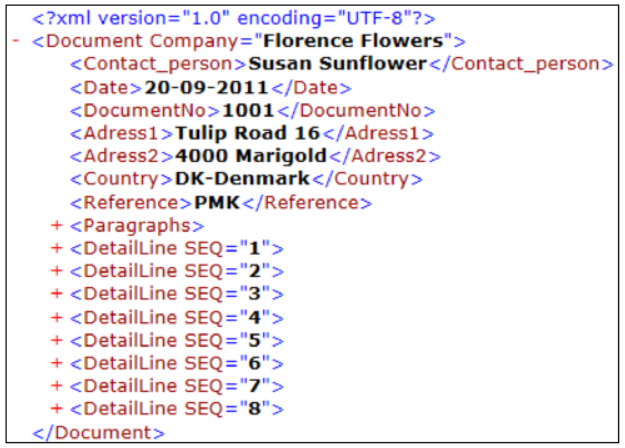
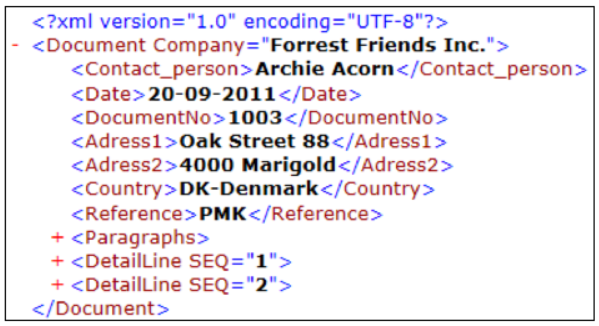
So by simply stating the path, that should trigger the split you will get each branch in separate files like above. So that is the simplest way to split, but the contents of the output is fixed.For more advanced splitting and transforming we will need to use XSLT.
The files created by the transform function will (as default) be created in the {INTERFORMNG_HOME}/transform_box directory named the same as the original file with a counter added at the end e.g. Example-1.xml, Example-2.xml etc..
The files created in the tranform_box (or whatever output directory you specify) will not automatically be deleted, but will be overwritten if you transform an XML file with the same name again.
If you want to build a template for the splitted files you can e.g. copy one of them from {INTERFORMNG_HOME}/transform_box into {INTERFORMNG_HOME}/resources/document and import it in the template.