The choice workflow component can be used to condition the processing of the files. The choice component can branch out to one or many cases (subtrees) depending on a condition for each case (subtree).
When you insert a new choice component it will look like this:
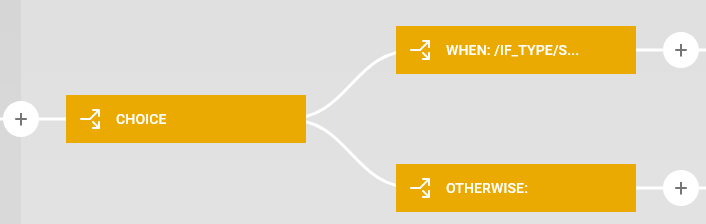
The Choice is 'born' with two cases: On the top case you can insert other components, that are to be executed only, if the condition setup in the WHEN condition is true.
You can add multiple WHEN cases via an option on the choice part, and you can also delete the OTHERWISE case, if you not need it.
Only up to one case is executed. The processor checks the conditions for the cases from the top. If a condition is true, then the subtree (connected to this branch) is executed and no other (lower) case is considered, even if conditions for multiple cases are true.
The OTHERWISE case is special. It has no condition and is simply executed, if none of the conditions for the branches above are true (the OTHERWISE branch is always the bottom branch).
You can create many cases on a choice component, but if you need more than around 10 branches, then you should consider to group them and call a sub-workflow for each group to make it easier to keep an overview of all the cases and the logic, that they represent.
A similar component (which is a bit more advanced) is the choice and join component.
The sections for the choice component are these:
3.Change the sequence of the cases
4.How to setup a condition
5.Recommendation for implementation: You should consider to combine this with a sub-workflow.
How to delete a case
The choice component always need a single WHEN case, so if there is only one WHEN, then you cannot delete that case.
To delete a case you place the mouse on the WHEN/OTHERWISE case and click the circle on the right:

When you click this, then the options for this component/branch is shown:
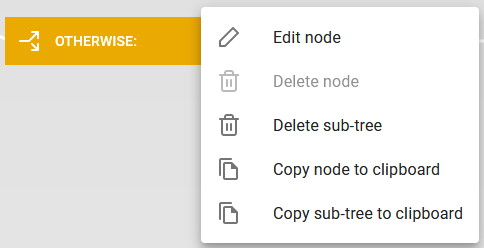
If you now click Delete sub-tree, the whole branch/sub-tree is deleted. Please note, that also any component connected to the branch is deleted. You can regret a change and undo a delete if needed. It might be a good idea to first copy the sub-tree to the clipboard and paste it after the delete, if you want to keep it.
You can also delete a branch, if you edit the Choice element like described below.
How to add a case
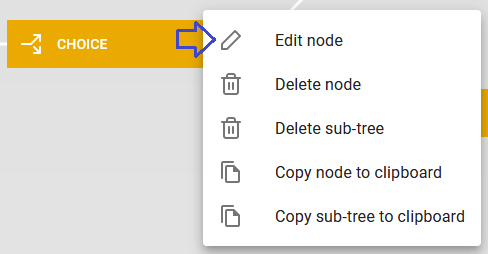
To add a new WHEN case in a CHOICE component you need to place the mouse over the CHOICE element and click the circle on the right:

Now you can click the Edit node option to work with the WHEN cases:
Then you see this:
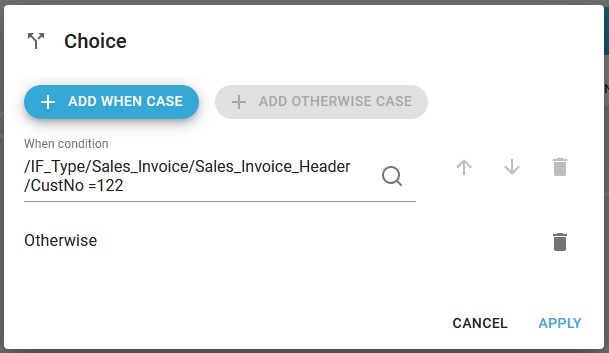
In the example above there is a single When branch and an Otherwise branch. You can delete them (A When case can only be deleted, if there are at least two When cases) with the rightmost garbage bin icon.
To add a new When case you click the blue icon: + ADD WHEN CASE.
Change the squence of the cases
You can also change the sequence of the When cases with the arrow keys on the right.
How to setup a condition
The condition in a choice component must be setup as a valid Xpath expression, that returns a boolean i.e. the value 'true' or 'false'. You can use normal boolean expressions with the functions 'or' and 'and'. It is faster to create valid references to the Input XML file if you load a sample XML file in the input type selection of the workflow.
Remember, that you need to use either single quotes or double quotes to delimit a string in the Xpath expression.
Recommendation for implementation
When you implement the choice you might get into a situation, where you are considering to duplicate a lot of workflow component for each of the branches after a choice. If you do, then you should read the recommendation below.
In order to avoid duplicating too much, then you should consider to move some of the elements from your workflow into a sub-workflow, that is called from the main workflow. When you call such a sub-workflow from the main workflow, then the processing comes back to the main workflow after the sub-workflow has been executed.
There are mainly two strategies to implement a sub-workflow, and you can even combine them:
Option |
Pros |
Cons/prerequisites |
|---|---|---|
Move the choice element into a sub-workflow |
If the choice is used mainly to set some conditioned variables, for subsequent processing, then this is a very good idea.
The conditions are hidden in a sub-workflow, which can be good, if you want to have a smaller main workflow to keep a good overview.
You can also use this if the number of branches is very high, so this can be a way to reduce the number of branches in the main workflow. |
All the branches of the choice should return with the same type of payload. If they are not, then you need to handle that in a special way.
If you are using the simple basic create output components in the choice branches, then all returns the same payload and it should work fine.
The conditions are hidden in the sub-workflow, so you cannot directly see these conditions. |
Call common sub-workflows in each choice branch |
This works fine even if the choice branches change the payload into different payload types as you can freely choose which sub-workflows, that you want to share between the branches.
The conditions are directly visible in the main workflow, which may give a better overview - if there are not too many branches in the choice. |
If there are many branches in a choice element, then this will not reduce the number of branches - only the length of each branch. |