It is possible to edit the components and the flow of components of a workflow. To do that you first need to open the workflow.
Then you see this:

This displays the flow of actions, that are executed in the workflow.
The color of the nodes indicate the function:
The leftmost green box (or node) specifies the input type for the workflow.
The yellow boxes/nodes are workflow functions like branching, merging flows and conditioned sub-workflows.
The red boxes/nodes on the right are here references to other (sub) workflows.
The blue nodes indicate output nodes. This changes the payload of the workflow.
The input files are processed from the left to the right.
Remember, when you edit the workflow:
1.The workflow changes are not committed, before you click the save option in the upper right corner:

2.You can at any point undo or redo your latest changes with these two arrows in the top right corner:

The leftmost arrow rolls back the latest change (Undo), and the right arrow inserts the last change, that you rolled back.
To edit an existing function/node or the input type setup in the green leftmost box you can either double (left) click on the box or place the mouse pointer over the box/node, that you want to edit. Then this appears:

If you click this, then a pop up window appears:

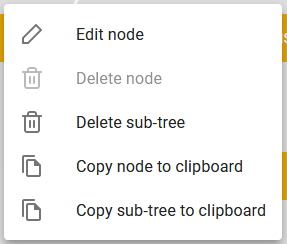
The contents varies a bit depending on the specific node, that you have selected. In this case you can see, that we cannot delete the choice node itself, but we can e.g. edit the settings if we select the Edit node option.
It is possible to delete a node or a sub-tree of the workflow, you can also copy one node or a complete sub-tree to the clipboard, so that you can copy it to another place in the current workflow or to another workflow.