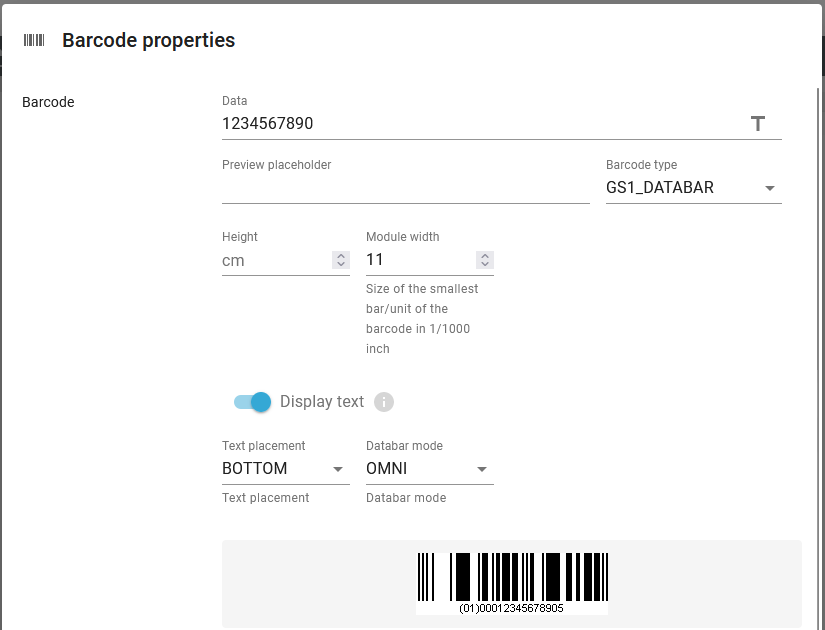
If you want to insert a GS1 Databar barcode (formerly known as rss-14) in a template, then you need to insert a barcode element, where you select this as the barcode type:

The parameters are:
(The headers are links to the common description).
The data, that you want to put into the barcode.
Here you can enter a text constant for the data, that you want to use for the barcode in the result view in the designer.
The width of the lines of the barcode. This is rounded to up to a whole number of dots in the selected output resolution (DPI). For the mime types, ZPL and Direct protocol the resolution/DPI is set on the printer and for PCL/PDF output the resolution is set on the template element in the template.
Enable this to display the data of the barcode also a human readable text.
Text placement
This has only effect, if the Display text option above is enabled. The possible values are:
BOTTOM: Display the text below the barcode.
TOP: Display the text above the barcode.
Databar mode
Here you select the type of barcode. The two possible values are:
OMNI: An omnidirectional barcode with a single row (like shown above) is generated.
STACKED: The barcode will be stacked (multiple rows).
Please note that in 'stacked' format the Databar height is about double height of the specified bar height, since two sets of bars are on top of each other. The ZPL version of this also looks a little different, due to a limited number of settings in ZPL.
How InterFormNG2 should react, if the data used cannot be converted into the barcode e.g. because of unsupported characters.