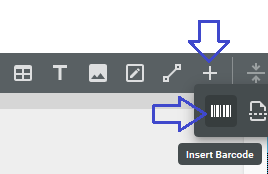
To insert a barcode in InterFormNG2 you need to click this icon:

You can find it via the '+' here:
You can edit an existing barcode element by double clicking the barcode element in either the element tree on the left or in the result view of the designer.
This section covers these topics:
1.Select the data to be inserted into the final barcode.
2.Set optional preview data to be used instead of the final data fro the result view in the designer.
3.Select the barcode type.
4.Configure the barcode settings including size and encoding.
5.How to rotate the barcode.
6.How to insert line breaks in a 2D barcode.
7.How to insert any hex character in a 2D barcode.
8.Alignment: Set the anchor (corner for position) of the barcode, if it is placed in a fixed position.
Select the data for the barcode
The data you want to insert into the barcode is selected in the top of the barcode properties:

On the very right you see a capital T. It indicates, that the data written in the Data field is a text constant, that is going to be inserted into the barcode. If you click the T, then you can change the input mode to Xpath, and then the line will now look like this:

In this Xpath mode you can type in an Xpath expression, and you can insert a path to a node in the input XML file with the magnifying glass on the right. Click the <> icon to change into the fixed text mode as shown above.
Optional preview data shown in the designer result view
As default the designer shows the input selected in the input data field above, but it is possible to override that for the result view with the preview placeholder. This can e,g, be handy if you are using a barcode element on detail lines, where the Xpath expression might not be executed in the result view. You set the preview data on the barcode element with the "Preview placeholder" field:

In the example above the final barcode will be the contents of the input XML file node /Root/Barcode, but in the result view in the designer the barcode will be shown with the data '1234' inside. A preview in the designer will not use the preview placeholder, but will show the final, merged result.
Select the barcode type
A prerequisite in order to create a barcode is to select what kind of barcode type you actually want to create.You select that on the barcode type field on the barcode:

The barcode type is selected on the drop down list:
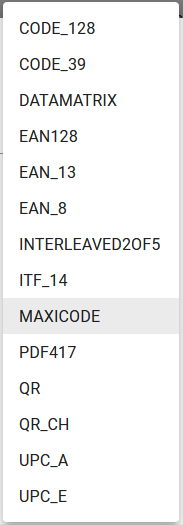
There are links to sections describing each of these barcodes below:
QR_CH (special QR code for Swiss Invoices)
Various barcode attributes are now shown below - depending on the barcode type selected.
The barcode settings/attributes
Depending on the barcode type selected above some special barcode attribute fields are shown in the barcode element. These settings e.g. control the height and width and the encoding of the barcode.
The settings are described below:
The data that you put into a barcode. This can be a
For the 1D barcodes you can set the height here. The default value (if not filled out) is 0.5 inches = 1,27 cm. For 2D barcodes the size is set indirectly via the module size and version/error correction.
The module width is the width of each module. In 1D (line) barcodes the module width is the width of the narrow lines. In 2D barcodes a module is the small rectangles, that makes up the barcode.
The module is measured in 1/1000 of an inch. That means, that if you set this value to 1, Then the module width will be 0,001 inch. The default value (if not filled out) is 10 equal to a module size of 0,01 inch.
The module width is rounded up to the nearest whole number of dots in the printer resolution selected. That means, that the barcode may get bigger on a printer with a lower resolution (e.g. 203 DPI) compared to a printer with a higher resolution. Please notice, that the resolution (DPI) of the output is set on the template element in the template for PDF, PCL and driverprint output, and that the resolution (DPI) on the printer is used instead for ZPL and Direct protocol output formats.
Here are the widths of a dot in some resolutions:
1 dot in 203 dpi is (1/203) = 0.0049 inch wide
1 dot in 300 dpi is (1/300) = 0.0033 inch wide
1 dot in 600 dpi is (1/600) = 0.0017 inch wide
So the width of a barcode may vary depending on the select module width and the printer resolution setup in output configuration (in the web interface). The list below shows the actual module size in the output for a specific resolution. Each column are described below.
Module size |
Actual size in dots |
Actual size in inches |
Relative size compared to 600 DPI |
|||||
|
203 DPI |
300 DPI |
600 DPI |
203 DPI |
300 DPI |
600 DPI |
203 DPI |
300 DPI |
1 |
1 |
1 |
1 |
0.004926 |
0.003333 |
0.001667 |
2.955665 |
2 |
2 |
1 |
1 |
2 |
0.004926 |
0.003333 |
0.003333 |
1.477833 |
1 |
3 |
1 |
1 |
2 |
0.004926 |
0.003333 |
0.003333 |
1.477833 |
1 |
4 |
1 |
2 |
3 |
0.004926 |
0.006667 |
0.005 |
0.985222 |
1.333333 |
5 |
2 |
2 |
3 |
0.009852 |
0.006667 |
0.005 |
1.970443 |
1.333333 |
6 |
2 |
2 |
4 |
0.009852 |
0.006667 |
0.006667 |
1.477833 |
1 |
7 |
2 |
3 |
5 |
0.009852 |
0.01 |
0.008333 |
1.182266 |
1.2 |
8 |
2 |
3 |
5 |
0.009852 |
0.01 |
0.008333 |
1.182266 |
1.2 |
9 |
2 |
3 |
6 |
0.009852 |
0.01 |
0.01 |
0.985222 |
1 |
10 |
3 |
3 |
6 |
0.014778 |
0.01 |
0.01 |
1.477833 |
1 |
11 |
3 |
4 |
7 |
0.014778 |
0.013333 |
0.011667 |
1.266714 |
1.142857 |
12 |
3 |
4 |
8 |
0.014778 |
0.013333 |
0.013333 |
1.108374 |
1 |
13 |
3 |
4 |
8 |
0.014778 |
0.013333 |
0.013333 |
1.108374 |
1 |
14 |
3 |
5 |
9 |
0.014778 |
0.016667 |
0.015 |
0.985222 |
1.111111 |
15 |
4 |
5 |
9 |
0.019704 |
0.016667 |
0.015 |
1.313629 |
1.111111 |
16 |
4 |
5 |
10 |
0.019704 |
0.016667 |
0.016667 |
1.182266 |
1 |
17 |
4 |
6 |
11 |
0.019704 |
0.02 |
0.018333 |
1.074787 |
1.090909 |
18 |
4 |
6 |
11 |
0.019704 |
0.02 |
0.018333 |
1.074787 |
1.090909 |
19 |
4 |
6 |
12 |
0.019704 |
0.02 |
0.02 |
0.985222 |
1 |
20 |
5 |
6 |
12 |
0.024631 |
0.02 |
0.02 |
1.231527 |
1 |
21 |
5 |
7 |
13 |
0.024631 |
0.023333 |
0.021667 |
1.136794 |
1.076923 |
22 |
5 |
7 |
14 |
0.024631 |
0.023333 |
0.023333 |
1.055595 |
1 |
23 |
5 |
7 |
14 |
0.024631 |
0.023333 |
0.023333 |
1.055595 |
1 |
24 |
5 |
8 |
15 |
0.024631 |
0.026667 |
0.025 |
0.985222 |
1.066667 |
25 |
6 |
8 |
15 |
0.029557 |
0.026667 |
0.025 |
1.182266 |
1.066667 |
26 |
6 |
8 |
16 |
0.029557 |
0.026667 |
0.026667 |
1.108374 |
1 |
27 |
6 |
9 |
17 |
0.029557 |
0.03 |
0.028333 |
1.043176 |
1.058824 |
28 |
6 |
9 |
17 |
0.029557 |
0.03 |
0.028333 |
1.043176 |
1.058824 |
29 |
6 |
9 |
18 |
0.029557 |
0.03 |
0.03 |
0.985222 |
1 |
30 |
7 |
9 |
18 |
0.034483 |
0.03 |
0.03 |
1.149425 |
1 |
31 |
7 |
10 |
19 |
0.034483 |
0.033333 |
0.031667 |
1.088929 |
1.052632 |
32 |
7 |
10 |
20 |
0.034483 |
0.033333 |
0.033333 |
1.034483 |
1 |
33 |
7 |
10 |
20 |
0.034483 |
0.033333 |
0.033333 |
1.034483 |
1 |
34 |
7 |
11 |
21 |
0.034483 |
0.036667 |
0.035 |
0.985222 |
1.047619 |
35 |
8 |
11 |
21 |
0.039409 |
0.036667 |
0.035 |
1.125968 |
1.047619 |
36 |
8 |
11 |
22 |
0.039409 |
0.036667 |
0.036667 |
1.074787 |
1 |
37 |
8 |
12 |
23 |
0.039409 |
0.04 |
0.038333 |
1.028057 |
1.043478 |
38 |
8 |
12 |
23 |
0.039409 |
0.04 |
0.038333 |
1.028057 |
1.043478 |
39 |
8 |
12 |
24 |
0.039409 |
0.04 |
0.04 |
0.985222 |
1 |
40 |
9 |
12 |
24 |
0.044335 |
0.04 |
0.04 |
1.108374 |
1 |
41 |
9 |
13 |
25 |
0.044335 |
0.043333 |
0.041667 |
1.064039 |
1.04 |
42 |
9 |
13 |
26 |
0.044335 |
0.043333 |
0.043333 |
1.023115 |
1 |
43 |
9 |
13 |
26 |
0.044335 |
0.043333 |
0.043333 |
1.023115 |
1 |
44 |
9 |
14 |
27 |
0.044335 |
0.046667 |
0.045 |
0.985222 |
1.037037 |
45 |
10 |
14 |
27 |
0.049261 |
0.046667 |
0.045 |
1.094691 |
1.037037 |
46 |
10 |
14 |
28 |
0.049261 |
0.046667 |
0.046667 |
1.055595 |
1 |
47 |
10 |
15 |
29 |
0.049261 |
0.05 |
0.048333 |
1.019195 |
1.034483 |
48 |
10 |
15 |
29 |
0.049261 |
0.05 |
0.048333 |
1.019195 |
1.034483 |
49 |
10 |
15 |
30 |
0.049261 |
0.05 |
0.05 |
0.985222 |
1 |
50 |
11 |
15 |
30 |
0.054187 |
0.05 |
0.05 |
1.083744 |
1 |
The columns are:
Module size
The specified module size (or module width) in the InterFormNG2 barcode. This is measured as 1/1000 inches, so a value of 5 means, that you have specified a module size of 0.005 inches.
Actual size in dots
These columns shows how the number of dots that are used in each of the resolutions: 203 DPI, 300 DPI and 600 DPI.
Here you can e.g. see, that for a 203 DPI printer a single dot is 0.004926 inches wide, so any lower value is rounded up to this width.
Actual size in inches
Here you can see the module size (or module width) in the specific resolution. If you e.g. specify a module size of 31, then the module size used in 203 DPI will be 0.034483 inches, in 300 DPI it will be 0.033333 and 0.031667 in 600 DPI.
Relative size compared to 600 DPI
This shows the relative module sizes for the barcodes. These two columns show the relative width of the modules for the lower resolutions compared to the 600 DPI result. From the columns above you can see, that the relative difference gets lower the larger the module size you have specified. For a module width of 1/1000 inchesthe barcode in 203 DPI will 2.96 times the module in a 600 DPI barcode and the 300 DPI barcode will be twice the module in 600 DPI. For a module width of 50/1000 inches the 203 DPI module width is only 1.08 times the 600 DPI barcode and the 300 DPI barcodes is the same size as 600 DPI.
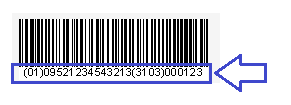
Activate this, if you want the text in the barcode to be written as human readable text below the 1D barcode.
This is activated via this option on the barcode element:

And looks like this in the output:
This field is used differently for 1D barcodes compared to 2D barcodes. The default value (if not filled out) is 2.
For 1D barcodes this is the ratio between the wide and narrow lines of the barcode, meaning that with 2 the wide lines are twice as wide as the narrow lines.
For 2D barcodes this is the ratio between the height and width of the modules (a module is the small rectangles that makes up the barcode). A value of 2 makes the modules twice as high as the are wide.
This is used for Code128 barcodes only. With the default value of ALL, any code set may be used by InterFormNG to encode the input text. This is recommended, as the barcode will be as small (and efficient) as possible. Alternatively you can select a specific codeset instead. Refer to this link for information of the code128 code sets: https://en.wikipedia.org/wiki/Code_128
With this you can chose to add a checksum to the code39 barcode. The possible values are:
Auto
Adds the checksum is not already added.
Add
Add a checksum to the data in the barcode.
Check
Tests the checksum of the input data. Invalid checksum results in an error.
Ignore
The checksum is not tested and is not added unless it is included in the input data. This is the default.
This sets the error correction for the 2D barcode. The Error correction for a PDF417 barcode can be set as a value between 0 and 8. The larger the value the larger the barcode will be - and easier to scan. The error correction for QR can be L, M, Q or H (listed after size). Higher error correction creates a larger barcode or leaves space for less data with a fixed version.
The error correction is linked with the version field for the QR barcodes: If you specify a specific version, then the size of the barcode is fixed, so a higher error correction leaves less space for the data, that you put into the barcode.
If the input data for a barcode is invalid e.g. if you try to create a barcode with alphanumeric data, that only supports numeric data, then you have such a situation. With the Error handling option you can tell InterFormNG2 what to do if the data is invalid. The options are:
Value |
Description |
Fatal |
Stop with an error. No output is generated. |
Warning |
A warning is added to the job log. The output is generated, but the barcode is missing. |
Ignore |
The barcode element is ignored. The output is generated, but the barcode is missing. |
This field is only used for the PDF417 barcode. With this you can decide if the barcode should either have a fixed width or height and then grow in the other direction as more data is inserted. The default value (if not filled out) is COLUMNS, meaning that the barcode width is fixed and the barcode gets higher as you add more data. The layout direction works with the Number of columns or rows field below.
This is a field used for the PDF417 barcode only. It is linked with the layout direction field above. This sets a fixed number of either data rows or columns.
Specifically for the QR barcode the version can also be specified. The version defines a fixed size of the QR barcode. If left blank or if you set the value to 0, then InterFormNG will always create the smallest possible QR barcode for the specific input data. If you set a specific version (other than 0), then the supported data (in the barcode) will be limited to what the specific size supports. More information about the version can be found here:
http://www.qrcode.com/en/about/version.html
You can rotate a barcode in two ways:
1.Rotate the barcode itself.
You can set a rotation on the barcode settings in the bottom:

This rotation require, that you select a fixed position. Then you can set a rotation, that is a multiply of 90.
2. Insert a barcode in a container, that is rotated.
Refer to rotation of a container.
If you use a barcode for ZPL printing, then you might get this error in the renderer:
Zebra does not support rendering barcodes with an orientation of ROTATED_90_DEGREES and anchor of BOTTOMLEFT.
If you get this error, then you need to rotate the complete label 180 degrees. The reason for this is, that the barcodes in ZPL are generated by the printer itself thus making it impossible for InterFormNG2 to know exactly where to place the barcode as the same edge of the barcode is used as a reference.
If you have chosen a fixed position for the barcode (like shown for the rotation option above), then this anchor option is shown instead of the margin in the bottom of the barcode element:

The default setting is Top and Left, which means, that the top left corner of the barcode is placed in the position stated as the fixed position. The possible values are:
Vertical anchor
Top
Use the top of the barcode as reference.
Baseline
Use the baseline of the barcode as reference, where e.g. the display text of a code128 barcode will be output below this line. It is recommended to use bottom as the vertical anchor instead.
Bottom
Use the very bottom of the barcode (including any optional display text) as the point of reference for the barcode.
Horizontal anchor
Left
Use the leftmost part of the barcode as reference to be placed in the fixed position, that is stated above.
Leftline
Use the left line part of the barcode as reference. The left value is recommended instead of this.
Right
Use the rightmost part of the barcode as reference when the barcode is placed. This is also referenced as right alignment.