The Edit Print Command
The APF3812/APFEDTPRT command makes it possible to edit a spool entry before merging with an overlay.
Copy and edit print (APFEDTPRT)
Type choices, press Enter.
Input spool file . . . . . . . . FILNVN *SELECT Name, *SELECT Input output queue . . . . . . . FROMOUTQ Name Library . . . . . . . . . . . Name, *LIBL Output queue for edited print . TOOUTQ Name Library . . . . . . . . . . . Name, *LIBL
Bottom F3=Exit F4=Prompt F5=Refresh F12=Cancel F13=How to use this display F24=More keys
|
If you specify *SELECT for the input spooled file name, then you can state the output from where you want to select the spooled file to be edited and, on what output queue you want to create the edited spooled file. After selecting the spooled file with '1' you enter an editor (EDTF) where you can change the contents as you please. When done with the editing just press F3. The new, edited spooled file is named EDTPRT.
The Check Triggers Command
The command APF3812/APFUPDTRG checks all triggered files in a library and updates trigger programs: If a trigger program is placed outside the library in which the files are placed, then the referenced trigger program is changed, so that a trigger program in the same library is used. This is relevant for the very few files, that are using triggers in InterForm400.
The command has only one parameter: The library for which this update to run.
Prior to running the command, you can e.g. see the trigger programs with the command: PRTTRGPGM to see if this command is relevant or not.
Example:
If we run the PRTTRGPGM command on an old, renamed InterForm400 library e.g. APF38127B8, then you might see a spooled file with this:
Display Spooled File File . . . . . : QPSECTRG Control . . . . . Find . . . . . . *...+....1....+....2....+....3....+....4....+....5....+....6....+....7....+....8....+....9 Trigger Programs (Full Report) 5770SS1 V7R1M0 100423 Specified library . . . . . . : APF38127B8
ASP --------------------------------------Trigger---------- Library File Device Name Type Library Program Time APF38127B8 SGNBCHP *SYSBAS SGNBCHP1 *SYS APF3812 SGNBCHP Before APF38127B8 SGNBCHP *SYSBAS SGNBCHP2 *SYS APF3812 SGNBCHP Before APF38127B8 VNSTRNP *SYSBAS QSYS_TRIG_APF3812_ > *SYS APF3812 VNSTRNP After APF38127B8 VNSTRNP *SYSBAS QSYS_TRIG_APF3812_ > *SYS APF3812 VNSTRNP After * * * Full text of truncated lines * * * QSYS_TRIG_APF3812____VNSTRNP____000001 QSYS_TRIG_APF3812____VNSTRNP____000002
|
In the report above we can see, that the files SGNBCHP and VNSTRNP are both using a trigger program outside the APF38127B8 library. In order to correct this we run this command:
APF3812/APFUPDTRG LIB(APF38127B8)
If we now run this command again, PRTTRGPGM LIB(APF38127B8), then we can see the changed trigger programs:
Display Spooled File File . . . . . : QPSECTRG Control . . . . . Find . . . . . . *...+....1....+....2....+....3....+....4....+....5....+....6....+....7....+....8....+....9 Trigger Programs (Full Report) 5770SS1 V7R1M0 100423 Specified library . . . . . . : APF38127B8
ASP --------------------------------------Trigger---------- Library File Device Name Type Library Program Time APF38127B8 SGNBCHP *SYSBAS QSYS_TRIG_APF38127 > *SYS APF38127B8 SGNBCHP Before APF38127B8 SGNBCHP *SYSBAS QSYS_TRIG_APF38127 > *SYS APF38127B8 SGNBCHP Before APF38127B8 VNSTRNP *SYSBAS QSYS_TRIG_APF38127 > *SYS APF38127B8 VNSTRNP After APF38127B8 VNSTRNP *SYSBAS QSYS_TRIG_APF38127 > *SYS APF38127B8 VNSTRNP After * * * Full text of truncated lines * * * QSYS_TRIG_APF38127B8_SGNBCHP____000001 QSYS_TRIG_APF38127B8_SGNBCHP____000002 QSYS_TRIG_APF38127B8_VNSTRNP____000001 QSYS_TRIG_APF38127B8_VNSTRNP____000002
|
The APF Work Output Queue Command
The command APF3812/APFWRKOUTQ looks and acts like the WRKOUTQ command, except that this command opens up a Swiftview window on the PC, if a spool file containing PCL codes is displayed with option 5. If the spooled file contains ZPL codes, it is displayed as a PDF file. Two other things differs from the standard OS/400 WRKOUTQ:
•If you have used a PJL printer type in InterForm400 when you did the merge, you can actually change PAGERANGE on the merged PCL spooled file, if you change this attribute through option 2 on this command. In this manner you can print only a part of the merged spooled file. Note however, that the full spooled file will be downloaded to the printer even though only a part will be printed. (This requires, that the printer is PJL compatible).
•If you select option 1=Send for a spooled file you will get this screen:
Output Queue APFOUTQD
Queue: AFC_INPUT2 Library: APF381_A04 Status: RLS
Type options, press Enter. ----------------------------------------------------------- ase 7=Messages | Send spooled file | | | | Select one of the following options: | s Form Type Pty | | DEMO 5 | 1. Send Network Spooled File | 1001 5 | 2. Send PDF E-mail | 1003 5 | | 1004 5 | | | | | Option: _ | | | | F3=Exit F12=Cancel | | | End ----------------------------------------------------------- ===> F3=Exit F4=Prompt F5=Refresh F9=Retrieve F11=View 2 F12=Cancel F17=Top F18=Bottom F20=Writers F21=Description F22=Printers
|
So if the spooled file is *SCS you can use option 2 to merge the spooled file with an overlay and send the merged PDF file as an attachment in an e-mail. In this manner you can send the e-mail interactively.
Find which job got *DTAQ entry (CHKDTAQ)
The command APF3812/CHKDTAQ can be used for debugging in InterForm400, if you e.g. find that an Auto Forms Control job does not react to a new (ready) spooled file on an output queue, that is monitored by Auto Forms Control. First you make sure, that you can find a data queue with the same name as the output queue in the same library, then you should verify that the data queue is connected to the output queue by looking at the description of the output queue.
If all looks good, then you can suspect that another job than the expected Auto Forms Control job is taking the entries of the data queue and in that way prevents Auto Forms Control from reacting to a spooled file. You can run the command, APF3812/CHKDTAQ in order to verify which job, that takes the entries from a data queue used by InterForm400:
Find which job got *DTAQ entry (CHKDTAQ)
Type choices, press Enter.
Data queue . . . . . . . . . . . DTAQ > AFC_INPUT1 Name Library . . . . . . . . . . . > APF3812 Name
|
The parameters are:
Data queue
The name of the data queue (normally also the name of the output queue), that you want to verify.
Library
The library of the data queue (normally also the name of the library of the output queue).
Prerequisites/please note
•The command should only be run interactively.
•The command cannot be run in parallel i.e. only one job can run this command at a time.
•The command temporarily creates the journal APF3812/CHKDTAQ and journal receiver APF3812/CHKDTAQ. These objects are deleted automatically, when you press either Enter, F3 or F12, but if the job ends before any of these keys are pressed, then the journal and journal receiver might need to be manually deleted - after running this command to end all journaling in the journal: ENDJRNOBJ OBJ(*ALL) OBJTYPE(*ALL) JRN(APF3812/CHKDTAQ)
The APF Work Spooled Files Command
Simular to the APFWRKOUTQ command, the command APFWRKSPLF is an InterForm400 version of an OS400 command - in this case WRKSPLF, with additional functionality. Refer to the APFWRKOUTQ command above for a description of the extra functionality.
The Calibrate QLnnn+ Printer Command
The wireless QLnnn+ printers (e.g. the QL420+ printer) can be used via the QLZPL203 printer type on the InterForm400 merges. The printer however is not able to calibrate when e.g. the media is changed. To help you with that, the APF3812/CALIBQL (Calibrate Qlnnn+ Printer) command have been added.
The command will create a spooled file, that will calibrate the printer when printed. You can e.g. activate the save attribute of the spooled file so it can be released from the output queue whenever a calibration is necessary. The command looks like this:
Calibrate QLnnn+ Printer (CALIBQL)
Type choices, press Enter.
Output queue . . . . . . . . . . OUTQ *JOB______ Name, *JOB Library . . . . . . . . . . . __________ Name, *LIBL Form type . . . . . . . . . . . FORMTYPE *STD______ Character value Hold output spooled file . . . . HOLD *NO_______ *NO, *YES Save output spooled file . . . . SAVE *NO_______ *NO, *YES Media type . . . . . . . . . . . MEDIA *GAP_ *GAP, *MARK
Bottom F3=Exit F4=Prompt F5=Refresh F12=Cancel F13=How to use this display F24=More keys
|
The media type indicates the media used: *GAP means that the labels are separated by a gap, and *MARK indicates labels indicated by a mark on the back of the media.
The Compare Overlays Command
The compare overlays command, APF3812/CMPOVL compares two overlays and lists any differences:
Compare overlays (CMPOVL)
Type choices, press Enter.
Overlay 1 . . . . . . . . . . . OVERLAY1 > OVL1 Name File set . . . . . . . . . . . > KSE Name Overlay 2 . . . . . . . . . . . OVERLAY2 > OVL2 Name File set . . . . . . . . . . . > KSE Name Output . . . . . . . . . . . . . OUTPUT > *PRINT *, *PRINT
|
The output is a report, that you can display or get as a spooled file (output(*PRINT)).
After the the headers of each overlay the elements are included like this:
First a list of all elements in overlay1, that are not found in overlay2 (only the sequence number may be changed).
Then the list of all elements in overlay2, that are not found in overlay1.
If any detail of an element is changed in overlay2 compared with overlay1, then the old element will be included in the list of overlay1, and the new element is included in the list of overlay2.
The Display Black/White image Command
The command, APF3812/DSPBWIMG can be used for graphically viewing a black and white TIFF image using SwiftView.
If the image has been imported to InterForm400® via option 5. Work with Images in the Administration Menu, only the parameters IMAGE and RESOLUTION has to be filled out (then the TIFF image is a member in the APF3812/IMAGE file).
If the image is not placed in the APF3812/IMAGE file, this image can be viewed by stating *FILE as the IMAGE parameter and the file and member name as the FILE and MBR parameters.
Display Black/White image (DSPBWIMG)
Type choices, press Enter.
Image . . . . . . . . . . . . . > IMAGE *FILE_____ Name, *FILE Resolution . . . . . . . . . . . RESOLUTION 300 75, 100, 150, 200, File . . . . . . . . . . . . . . FILE __________ Name Library . . . . . . . . . . . *LIBL_____ Name, *LIBL,*CURLIB, Member . . . . . . . . . . . . . MBR __________ Name
Bottom F3=Exit F4=Prompt F5=Refresh F12=Cancel F13=How to use this display F24=More keys
|
The Display IP Address Command
If you program yourself you might want to know the ip-address of the connected 5250 session for an interactive job. You can find that out via the Display IP Address command (APF3812/DSPIPADR). The command have no parameters and displays the result like this:
Display IP address
Device name . . . . . . : QPADEV000F Device IP address . . . : 222.2.1.100
F3=Exit F12=Cancel
|
The Display Unicode Spooled File Command
This command (APF3812/DSPUNISPLF) can be used for displaying special *SCS unicode spooled files. Only the characters represented in the code page of the running 5250 session are displayed. Unsupported characters are shown as a large square as below:
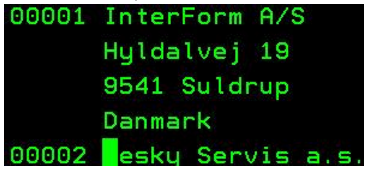
The parameters for the command are the same as for the DSPSPLF command. Note, that the command have also been built into option 5=Display of the APF3812/APFWRKOUTQ command.
Encrypt InterForm400 PDF File
With this command (APF3812/ENCIFPDF) you can take an existing InterForm400 PDF file and copy it to another encrypted PDF file. You can add an owner password, which will enable any function and a user password, that will open the PDF file with the restrictions stated under 'User Access Limitations'.
It is possible to encrypt some PDF files, that have not been created by InterForm400, but it cannot be guaranteed, that all pdf files can be encrypted in this manner.
NOTE: Password protection/encryption and/or digital signature of the PDF file requires a purchase of the Digital Signature/PDF security module for InterForm400.
Encrypt InterForm PDF File (ENCIFPDF)
Type choices, press Enter.
Input PDF File . . . . . . . . . FROMPDF __________________________________ _____________________ Output PDF File . . . . . . . . TOPDF __________________________________ _____________________ Replace stream file . . . . . . REPLACE *NO_ *NO, *YES Owner Password . . . . . . . . . OWNERPWD __________________________________ ______ User Password . . . . . . . . . USERPWD __________________________________ ______ User Access Limitations . . . . LIMITS *NONE_____ *NONE,*NOPRINT,*NOCOPY, + for more values __________ *NOEDIT __________
Bottom F3=Exit F4=Prompt F5=Refresh F12=Cancel F13=How to use this display F24=More keys
|
Note, that the input PDF file cannot be the same as the output PDF file.
The HP Macro Command
The command APF3812/HPMACRO is intended to be included in your CL-programs or activated from the command line. This command can only be used in relation to HP printers and compatibles.
The command gives you the possibility of down loading an overlay in the printer, where it is stored as a macro, which can either be printed automatically on every succeeding page or activated on macro calls in your print data.
This command is very useful if you want to create an overlay that should be activated on all pages printed from the printer, and when printing word processing documents containing advanced features such as Justification, super/sub script, fonts etc.
The macro can then be activated from a word processing document (e.g. Office DisplayWrite 400) by inserting a command in the header or the footer text in the document (e.g. on some interfaces you could enter the text /1B&f999y3X in a header text to add the overlay defined as MACRO-ID 999 to the printout).
You can also have the macro called as a sub-overlay from an overlay definition. This is done by the ?=if...then element. The overlay name entered in the If...then sentence should be MACROXXXXX where the XXXXX denotes the HP Macro ID entered into the HPMACRO command.
Download overlay as a HP-macro (HPMACRO)
Type choices, press Enter.
InterForm 400 file set . . . . . KARTSET ______ Character value Overlay name . . . . . . . . . . KLICHE ______ Character value Printer type . . . . . . . . . . PRTTYP ______ IBM4019, IBM4029, IBM4039... Interface . . . . . . . . . . . INTERF ______ SYSTEM, SYSTEM850, ASCIIR8... Macro-id (0 32767) . . . . . . . MACROID ______ 0-32767 Automatic on every page . . . . AUTOMATIC ______ *NO *YES Place into Flash Memory . . . . FLASHMEM ______ *NO *HP4 *IBM4039 Output queue . . . . . . . . . . OUTQ ______ Name, *JOB Library . . . . . . . . . . . _______ Name, *LIBL Form type . . . . . . . . . . . FORMTYPE ______ Character value
Bottom F3=Exit F4=Prompt F5=Refresh F12=Cancel F13=How to use this display F24=More keys
|
KARTSET
Defines the name of the file-set, in which you have defined the overlay you wish to download as an HP macro.
KLICHE
Is the name of the overlay you wish to download.
PRTTYP
States the printer type you wish to use.
INTERF
This parameter is no longer used.
MACROID
An HP macro must be given an ID in the interval 0-32767. The printer can store a number of different macros. If a macro is down loaded with the same macro ID as one already resident in the printer, the new macro definition will override the old one. If you choose to work with several macros in the printer simultaneously you should number the macros unambiguously.
AUTOMATIC
This parameter defines if the macro should be executed on all pages (*YES) or only when called from a macro definition incorporated in the print data (*NO).
FLASHMEM
This parameter indicates if the macro should be stored in e.g. the optional Flash SIMM module on a printer. Valid values are:
*No = Only downloaded to the memory of the printer.
*HP4 = Store in HP Flash SIMM.
OUTQ
Here the output queue for the final printout is stated. The macro will be transformed into a spool-entry with the filename MACROnnnnn, where nnnnn is the macro ID. The description of the spool entry will be the name of the overlay.
FORMTYPE
This is the forms type you want the macro to have when placed as a spool-entry on the output queue defined by OUTQ.
The output will be placed in the output queue with status HOLD(*YES) and SAVE(*YES).
When you wish to download the macro you only have to release the spool entry.
The Import InterForm400 Resources Command
With this command, APF3812/IMPAPFRSC you can import InterForm400 resources directly into production (into the APF3812 library) without a lot of menu selections:
Import InterForm resources (IMPAPFRSC)
Type choices, press Enter.
Save file . . . . . . . . . . . SAVF __________ Name Library . . . . . . . . . . . *LIBL Name, *LIBL, *CURLIB Transfer to production . . . . . TFRPROD *YES *YES, *NO, *PROMPT Display errors . . . . . . . . . DSPERR *YES *YES, *NO Stream file name . . . . . . . . STMF
Bottom F3=Exit F4=Prompt F5=Refresh F12=Cancel F13=How to use this display F24=More keys
|
The PCL-file from folder to Member Command
The APF3812/PCLTOMBR command can be used for inserting one or several PCL files (from a folder) into a physical file as members. The PCL files can be specified as generic or *ALL.
PCL-file from folder to member (PCLTOMBR)
Type choices, press Enter.
From folder . . . . . . . . . . FROMFLR _____________________________ _________________ From PC-file name . . . . . . . DOCNAM ________ Char, generic*, From PC-file extension . . . . . EXTENSION ____ Char, generic*, To physical file . . . . . . . . OUTFILE __________ Name Library . . . . . . . . . . . *LIBL_____ Name, *LIBL Member prefix . . . . . . . . . PREFIX _____ A - Z , *NONE Add extension to member name . . MBREXT *NO__ *NO, *YES Delete PC-file after copying . . DLTDOC *NO__ *NO, *YES
Bottom F3=Exit F4=Prompt F5=Refresh F12=Cancel F13=How to use this display F24=More keys
|
A member prefix can be specified (A-Z or *NONE). If the prefix is a letter, the member name of the PCL files will then be the name of the PC file preceded by this character.
Note, that in order to be able to use the PCL files when designing overlays, the PC files have to be placed as members in the APF3812/PCL file (for Black and white) or the APF3812/PCLCOL file (for colour files).
PCL files not placed in PCL and PCLCOL can only be used by inserting &&-commands in the spool file.
TIF files can be inserted with a similar command.
The Print PCL-member Command
This command can be used in conjunction with PCL files, that are already installed in InterForm400. With this command you can print such an installed black/white PCL file:
Print PCL-member (PRTPCLMBR)
Type choices, press Enter.
Member . . . . . . . . . . . MEMBER __________ Name Rotation . . . . . . . . . . ROTATION 0__ 0, 90, 180, 270 Top offset . . . . . . . . . TOPOFFSET 0_____ -1200-1200 Left offset . . . . . . . . LEFTOFFSET 0_____ -1200-1200 Output queue . . . . . . . . OUTQ *JOB______ Name, *JOB Library . . . . . . . . . __________ Name, *LIBL Form type . . . . . . . . . FORMTYPE *STD______ Character value, *STD Paper Size . . . . . . . . . SIZE *A4_______ *LETTER,*LEGAL,*LEDGGER Copies . . . . . . . . . . . COPIES 1__ 1-255 Output spooled file name . . SPLFNAME *MEMBER___ Name, *MEMBER Drawer . . . . . . . . . . . DRAWER *PRINTER__ 1-255, *PRINTER User data . . . . . . . . . USRDTA *MEMBER___ Character value, *MEMBER Hold output spooled file . . HOLD *NO_ *NO, *YES Save output spooled file . . SAVE *NO_ *NO, *YES
Bottom F3=Exit F4=Prompt F5=Refresh F12=Cancel F13=How to use this display F24=More keys
|
(After installation and preparation the installed B/W PCL files are saved as members in the PCL file in InterForm400). The unit used for displacement is dots measured in 300 dots per inch. A negative value for an offset will move the PCL file up/left compared to the original. Remember, that any top margin is removed from the PCL as a part of the install in InterForm400.
The Print PDF file Command
The command PRTPDF enables you with the possibility to print a pdf file directly on the System i.
Print PDF file (PRTPDF)
Type choices, press Enter.
From IFS path name . . . . . . . PATH > '/apf3812home/view/kse.pdf'
Output format . . . . . . . . . OUTFMT > *SCS *PCL,*PCLCOLOR,*PCLGREY.. Output queue . . . . . . . . . . OUTQ > *JOB Name, *JOB Library . . . . . . . . . . . Name, *LIBL Form type . . . . . . . . . . . FORMTYPE *STD Character value, *STD Output spooled file name . . . . SPLFNAME PDFPRINT Name User data . . . . . . . . . . . USRDTA PDFPRT Character value,*INPUT.. Hold output spooled file . . . . HOLD *NO *NO, *YES Save output spooled file . . . . SAVE *NO *NO, *YES Paper Size . . . . . . . . . . . SIZE *A4 *INPUT, *LETTER, *LEGAL.. Copies . . . . . . . . . . . . . COPIES 1 1-255 Drawer . . . . . . . . . . . . . DRAWER *PRINTER 1-256, *PRINTER To stream file . . . . . . . . . TOSTMF
Replace stream file . . . . . . REPLACE *NO *NO, *YES More... F3=Exit F4=Prompt F5=Refresh F12=Cancel F13=How to use this display F24=More keys
|
Print PDF file (PRTPDF)
Type choices, press Enter.
Right Adjust Version . . . . . . ADJUSTVER *NONE Code page . . . . . . . . . . . CODPAG 037 Windows PC . . . . . . . . . . . WINPC *SELECT
Windows printer . . . . . . . . WINPRT *SELECT
Bottom F3=Exit F4=Prompt F5=Refresh F12=Cancel F13=How to use this display F24=More keys
|
The special fields of the command are explained below:
OUTFMT
The output format (OUTFMT) defines the format of the spooled file generated.
*PCL |
Print the PDF file in black/white PCL5. |
*PCLCOLOR |
Print the PDF file in color PCL (PCL5c). |
*PCLGREY |
Print the PDF file in grey PCL5. |
Prints the PDF file as a PDF spooled file. Note, that PDF spooled files can only be printed on printers, that supports the PDF printer data stream. |
|
*TXT |
Converts the PDF file into a text file (stream file) as specified in TOSTMF. |
*SCS |
Prints the PDF file as an *SCS spooled file. Notice the ADJUSTVER field to adjust the process. |
*WINPRINT |
Prints the PDF file through WinPrint as specified on the WINPC and WINPRT fields. Notice, that the value *SELECT for the WINPC and WINPRT fields should only be used for interactive jobs! |
Notice that it is not guaranteed that all PDF files can be printed via this command. Encrypted pdf files (that are not protected with a password) can be printed.
The Print TIFF File Command
Use the command, APF3812/PRTTIFF to print TIFF file placed in the IFS. The TIFF file must be black/white and in a format supported by InterForm400. Refer to here for a list of the supported TIFF formats.
Print TIFF file (PRTTIFF)
Type choices, press Enter.
From IFS path name . . . PATH _________________________________________ ___________________ Output queue . . . . . . OUTQ *JOB______ Name, *JOB Library . . . . . . . __________ Name, *LIBL Form type . . . . . . . FORMTYPE *STD______ Character value, *STD Paper Size . . . . . . . SIZE *A4_______ *LETTER, *LEGAL, *LEDGGER... Copies . . . . . . . . . COPIES 1____ 1-255 Drawer . . . . . . . . . DRAWER *PRINTER 1-256, *PRINTER Rotation . . . . . . . . ROTATION *AUTO *AUTO, 0, 90, 180, 270 Resolution . . . . . . . RESOLUTION *AUTO *AUTO, 75, 100, 150, 200... Shrink to fit print.area SHRINK *NO *NO *WIDTH *HEIGHT *BOTH
Bottom F3=Exit F4=Prompt F5=Refresh F12=Cancel F13=How to use this display F24=More keys
|
The Print X-Ref List Command
The command APF3812/PRTXREF prints a list of all InterForm400 resources and lists any reference to each resource including the autodownload specifications. Refer to this link for more information of this list. The command has no parameters - it prints to the default output queue of the job.
The Retrieve Data Queue Information Command
The command, APF3812/RTVDTAQI (Retrieve Data Queue Information) can be used for retrieving the sequence of a data queue. Data queues are used in Auto Forms Control, so the setup effects the sequence in which the incoming spooled files are handled. The sequence should normally be SEQ(*FIFO) - First In First Out.
The Start Screen Attention Command
The command APF3812/STRSCNATN provides you the possibility to call predefined functions when pressing the <Escape> key on the current call level. The functions are to be defined via the command Work with Screen Definitions (APF3812/WRKSCNDFN) - refer to this link for additional information.
The APF3812/STRSCNATN command can e.g. be included in the initial program of the relevant users. (Remember to use MONMSG so the users can sign on even during an upgrade of InterForm400...).
The command looks like this:
Start Screen Attention (STRSCNATN)
Type choices, press Enter.
Command . . . . . . . . . . . . CMD > GO MENU(MAIN)
Default program . . . . . . . DFTPGM > *ASSIST Name,*USRPRF,*ASSIST,*NONE Library . . . . . . . . . . Name, *LIBL, *CURLIB
Bottom F3=Exit F4=Prompt F5=Refresh F12=Cancel F13=How to use this display F24=More keys
|
Above the command ‘GO MAIN’ is issued after the function has been activated. If the user press <Escape> on a screeen that is not looked for in the definitions defined in WRKSCNDFN, then the default program is called - above the ASSIST menu is run.
The TIF-file from folder to member Command
The APF3812/TIFTOMBR command can be used for inserting one or several TIF files (from a folder) as members in a physical file. The TIF files can be specified as generic or *ALL.
TIF-file from folder to member (TIFTOMBR)
Type choices, press Enter.
From folder . . . . . . . . . . FROMFLR _____________________________ _________________ From PC-file name . . . . . . . DOCNAM ________ Char, generic*, From PC-file extension . . . . . EXTENSION ____ Char, generic*, To physical file . . . . . . . . OUTFILE __________ Name Library . . . . . . . . . . . *LIBL_____ Name, *LIBL Member prefix . . . . . . . . . PREFIX _____ A - Z , *NONE Add extension to member name . . MBREXT *NO__ *NO, *YES Delete PC-file after copying . . DLTDOC *NO__ *NO, *YES
Bottom F3=Exit F4=Prompt F5=Refresh F12=Cancel F13=How to use this display F24=More keys
|
A member prefix can be specified (A-Z or *NONE). If the prefix is a letter, then the member name of the TIF files will be the name of the PC file preceded by this character.
Note, that in order for being able to use the TIF files when designing, the PC files have to be placed as members in the APF3812/IMAGE file.
TIF files not placed in IMAGE can only be used by inserting &&-commands in the spool file.
PCL files can be inserted with a similar command.
The Transform XML file Command
The transform XML file command, TFMXMLF is able to transform (or convert) an input XML file into an output XML file with different contents:
Transform XML File (TFMXMLF)
Type choices, press Enter.
XML stream file . . . . . . . . XMLSTMF MyInputFile.xml
Transform stream file . . . . . TFMSTMF Transform.xsl
Output stream file . . . . . . . OUTSTMF MyNewFile.xml
Replace stream file . . . . . . REPLACE *NO
|
The fields are these:
XMLSTMF
The input XML file to be transformed.
TFMSTMF
The transform stream file. This can either be an xsl (or xslt) file, which you use use to transform the input xml file into a different format. Alternatively you can also here refer to an xent file with which you can include both an SQL expression to include additional data from a Database (via SQL) or add new nodes with xpath expressions. The xent format is described in the InterFormNG manual.
OUTSTMF
The output XML file resulting from the transform.
REPLACE
If *YES the output XML file will be replaced if it already exists. If *NO and the file already does exist, then the job will halt with an error.
The Work with Profile Jobs Command
The APF3812/WRKPRFJOB command can be used to list all active jobs for a specific user profile. This command will also display all server jobs serving this user profile.
Server jobs are used for the Graphical Designer and this command can be used for ending all jobs for a user profile is necessary. This is the list shown (if e.g. you have the graphical designer running for this user profile):
Work with Job WRKPRFJO
Position to . . . . . . __________ Job name
Type options, press Enter. 5=Work with
Opt Job name User Job number _ QGYSERVER QUSER 029983 _ QNPSERVS QUSER 029837 _ QNPSERVS QUSER 029972 _ QPADEV000B KSE 029982 _ QRWTSRVR QUSER 029849 _ QZHQSSRV QUSER 029843 _ QZRCSRVS QUSER 029956
End F3=Exit F5=Refresh F12=Cancel
|
Use option ‘5' to work with a job and then option 41 to end the job if wanted. If you want to release a lock of overlay in InterForm400 you can also do that in InterForm400 by selecting option ‘80. Administering InterForm 400' followed by ‘50. Work with Designer job overlay locks’ and ending the job locking the relevant overlay.
Work with Screen Definitions
The command APF3812/WRKSCNDFN (Work with Screen Definitions) can be used for defining actions on various screens when the <Escape > (or Attention) key is pressed. The command has no parameters and when run you will see this:
Work with screen definitions SCR100D
Position to . . . . . . Screen definition Required library . .
Type options, press Enter. 2=Change 3=Copy 4=Delete 5=Display
Opt Screen Req.lib Description COPY_SPLF *NONE Copy spooled file via SNDTCPSPLF from APFWRKOUTQ WRKACTJOB *NONE Joblog as PDF in E-mail from WRKACTJOB APFMENU APF3812 Enter InterForm400 from Main if APF3812 is in LIBL
End F3=Exit F5=Refresh F6=Create F11=View 2 F12=Cancel
|
Above we have defined actions for 3 different screens. A screen definition looks like this:
(Use <Page Down> to view the second screen)
Change screen definition SCR110D
Screen definition . . . : APFMENU Name Required library . . . : APF3812 Name, *NONE
Description . . . . . . . Enter InterForm400 from Main if APF3812 is in LIBL
Type comparisons, press Enter. Specify OR to start each new group. Leave line and/or position blank to select cursor line/position.
AND/OR Line Pos. Opr. Compare value 1 33 EQ OS/400 Main Menu
More... F3=Exit F12=Cancel
|
(Here we only want to call this function IF we are on the OS/400 Main Menu screen AND the APF3812 library is in the library list of the job). If the ‘Required library’ field is *NONE then no special library is required (in the library list).
What to do is defined on the next screen:
Change screen definition SCR110D
Screen definition . . . : APFMENU Required library . . . : APF3812
Command . . . . . . . . . APF3812/APFMENU KARTSET(&A)
Leave line and/or position blank to select cursor line/position.
Line Pos. Len Description &A 20 7 10 File set &B &C &D &E &F &G &H &I End F3=Exit F4=Prompt F12=Cancel
|
Here the first 10 characters from the command line is taken as used as identification of the file set that you want to work with. You can use the variables &A to &I on the command in the top.
To invoke the commands in a specific job you need to run the APF3812/STRSCNATN command, which will activate the function in the current call level.
For a few examples of how to implement and use the APF3812/WRKSCNDFN and APF3812/STRSCNATN commands please refer to this link.
Work with Stream File Locks
With this command (APF3812/WRKSTMFLCK) you can list which jobs, that has a lock on a certain file in the IFS. You state the path as the only parameter. Here you can see any job, that locks the object:
Work with Stream File Locks WRKSTMFL
Position to . . . . . . Job name
Type options, press Enter. 5=Work with job
Opt Job name User Job number _ QZLSFILE QUSER 074244
End F3=Exit F5=Refresh F12=Cancel
|
From this screen you can select to work with the job that has the lock e.g. in order to end it. Be sure, that you are not causing a problem by ending the job - it might be doing something important...
The Unzip to current directory Command
This command unzips a zip file into the current directory (after it is changed). The command APF3812/UNZIP can be used for unzipping files in the IFS. It can e.g. be used for installations where you have a limited bandwidth connection to the iSeries. With this command you can upload/FTP a zip file onto the IFS and then unzip it before you use it.
Note: Licensed program 5722JV1 Java development kit is required in order to run this command.
The command have 2 parameters:
ARCHIVE
Path to archive. This is the path and file name of the zip file e.g.’/PCDATA/MYFILE.ZIP’.
CURDIR
Current directory. The current directory is temporarily changed to this and the unzipped file(s) are placed here e.g. ‘/unzip’. If the command halts with an error or otherwise stopped during execution, then this will be the current directory on return.
The Zip Stream File(s) Command
The APF3812/ZIP command can be used for zipping (compressing) stream files in IFS or folders (QDLS).
ZIP stream file(s) (ZIP)
Type choices, press Enter.
Archive path . . . . . . . . . . ARCHIVE _______________________________ __________________ Create / Add to archive . . . . CREATE *CREATE *CREATE, *ADD Current directory . . . . . . . CURDIR _______________________________ _________________ From stream file . . . . . . . . FROMSTMF _______________________________ _______________________________________________________________________________ _______________________________________________________________________________ ________________________________________________________________ Work dir, if FROMSTMF is /QDLS WORKDIR _______________________________ __________________
Bottom F3=Exit F4=Prompt F5=Refresh F12=Cancel F13=How to use this display F24=More keys
|
Archive path
This is the path and name of the archive (the zipped file). This must have the extension ‘.zip’.
Create / Add
This specifies if you want to add files to the archive. If you select *CREATE the file will be replaced if it already archived.
Current directory
This directory will be added in front of the path stated in ‘From stream file’. This command:
APF3812/ZIP ARCHIVE(‘/ZIPDIR/ARCH1.ZIP’) CURDIR(‘/MYDIR’) FROMSTMF(‘/STATEMENT/*’)
This will zip all files in the directory ‘/MYDIR/STATEMENT’ and in the archive the files will be named ‘/STATEMENT/file.ext’.
From stream file
This is the path and name of the file(s) to be zipped. If you are zipping file(s) in the folder system (QDLS) this can only hold the file name, the path should be stated in ‘current directory’. Generic names can be used e.g. ‘*’ and ‘A*.*’.
Work directory
If you want to archive files placed in the folder system (QDLS), you need to state a work directory. InterForm400® will create a temporary subdirectory in the work directory called ZIP_nnnnnn, where nnnnnn is the jobnumber, which is removed before the command ends.