Settings and tools for the designer
Before you start the actual design you want to setup the graphical designer. Below are a few suggestions for that:
Changing the displayed size
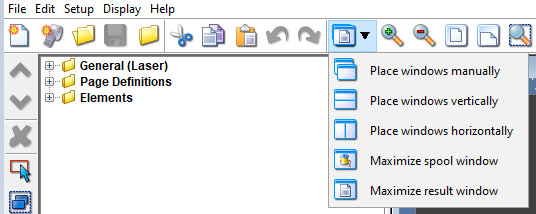
You can zoom in or out by selecting ‘Display’ and ‘Zoom In’, ‘Zoom Out’ or ‘Size’ or by use of the icons looking like magnifying glasses. You can also click on this icon to select how you want to divide the screen between the result and input view:
You can even also drag in the corners of the spool- and result-view to change the size and position of these windows. Finally you can also drag the vertical line, that marks the border between to element listing and the views to extend or reduce the space available for the views.
Apart from the zoom icons above you can also select this to zoom into a selected area:
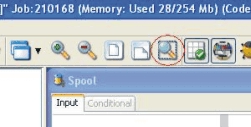
After clicking the icon you place the pointer in the result view and drag (with left mouse key) around the area that you want to zoom into.
Changing the measurement used
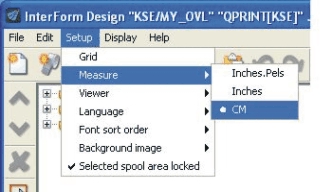
You can chose the measurement used to be either inches and pels (where the pels are 1/240 part of an inch - placed after the decimal point), pure inches (with a normal decimal point) or centimeters. Notice that measurements will be rounded off to the nearest whole number of pels (1/240 Inch).
You select it here:
Selecting unicode output
Press this icon to enable/disable unicode output for display and preview:

(Remember to install unicode soft font(s) and specify autodownload for the used font numbers.)
Refer to codepage settings here.
Previewing the result in PDF or SwiftView
You can preview the final result of the merge. You preview the PCL result in SwiftView. The ZPL and PDF preview is using the application associated with the ‘.PDF’ extension on your PC - most likely Acrobat Reader.
To preview the current result press either of these icons:
(Found on the very top right of the screen)

NOTE: The quality of the ZPL preview depends on the ZPL preview setting in the configuration.
Details for previewing can be found here.
Including a background image
If you have one of the following situations you can use a background image to help you:
1) If you want to redesign or remap the spooled file to fit into a preprinted page, that you have scanned earlier.
2) If you want to create a complete design (or overlay) to be used instead of an existing preprinted page.
The background image is used only as help for the design and is not included in the overlay.
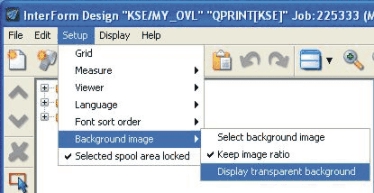
To select a background image select this in the designer:’Setup’, ‘Background image’ and ‘Select background image’. Please note, that the background image does not need to be installed in InterForm400 as the case is for other images, but can be selected directly from the PC. Supported formats are jpg files and bmp files.
Note, that the image will be sized to fit to the page still keeping the image ratio - unless you deactivate ‘keep image ratio’ under ‘Background image’. Deactivation of ‘keep image ratio’ will make the background image to be scaled to fit the full width and height of the page.
Select ‘Setup’, ‘Background image’ and ‘Display transparent background’ to make the background more transparent like below: (Notice that the upper left frame of the scanned image is covered by a frame inserted in the overlay).
Lock spooled file selections
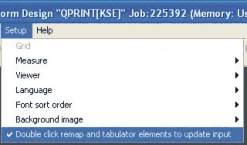
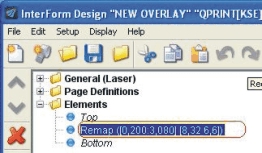
In order to prevent users from unintentionally changing remap window and tabulator elements in the designer the ‘Double click remap and tabulator elements to update input’ feature is added. If you activate it (and it is activated as default), then you cannot change the spooled file area handled unless you double click on the element in the element list in the upper left corner (marked in red below) and click in the Result window when the change is done..
Other Design preferences
Use of Grid
As default the graphical designer has a grid activated, which is 40 pels by 40 pels (6 lines per inch). When the grid is activated the cursor will snap to the grid, making it easier to align design elements. Change the size of the grid by selecting ‘Setup’ and ‘Grid’:
Activate ‘Conditional repositioning’ to reposition the grid when designing conditioned sub-overlays.
Press the icon below to enable a background image, that previously have been included in the designer via ‘Setup’, ‘Background image’ and ‘Select background image’.

Press this icon to (temporarily) disable the grid and the rulers. This will make it possible to place elements freely without the cursor is snapping to the grid.

Designing for colour or B/W (For laser/pdf overlays only)
You can shift between looking at the B/W output or color output by pressing this icon in the upper toolbar.

This will affect what you see in the graphical design and when you preview the result in SwiftView and Acrobat Reader.
Designing for 203 or 300 DPI (For Zebra overlays only)
The printed ZPL result depends on if you run a 203 or 300 dpi printer. Click this icon to change the resolution view, so that it fits that of the printer.

Debugging the design
Press this icon to temporarily disable all design elements below the marked design element. This can be used e.g. to solve problems with conditions, that does not execute as you thought.
Note: A better alternative is to temporarily suspend/enable design elements.

Disabling/enabling the spooled file
Press this icon to (temporarily) disconnect/connect the spooled file and view the overlay without any spooled file text.

Flipping through the pages of the spooled file
On the right side of the tool bar you will see this:

This can be used for flipping through the pages of the merged spooled file and e.g. looking at the merged result page by page. You can drag in the pointer, press the arrows to flip through the spooled file or type a specific page number, that you want to look at.
The tool bar changes its function:
•If you activate copy management you can use this to see each of the resulting copies. P1 denotes e.g. the first primary copy/version of the output.
•If you use a conditioned overlay and you transfer 1 or more lines onto the conditioned overlay, then you can press the 'Conditional' tab in the input view. When looking at the conditional tab you can use this to flip through the places where this condition is true on the current page. The conditional tab will show you the lines transferred to the conditioned overlay. This function is very handy when remapping the spooled file text in the conditioned overlay.
Decide the sort key for the font listing
Select 'Setup' followed by 'Font sort order' to decide in what order you want to have the available fonts sorted when listed. You can chose to either list the fonts by the font number (default) or by the font description (name).