IMPORTANT:
For a similar, better and easier implementation, the Web Input server option is recommended instead of the Network configuration used below.
The InterFormNG service provides several ways for XML to enter the system for processing. A database may be queried periodically, a directory may be scanned and - as a recent addition, a client may connect directly to the service process and send XML over a socket for processing. This functionality is implemented by a plugin called "network-printjob".
This is documentation on the expected input format, the format of the processing receipt, as well as a simple example program that posts a processing request to the service and prints the results to the console.
The feature is setup and enabled via the web interface:
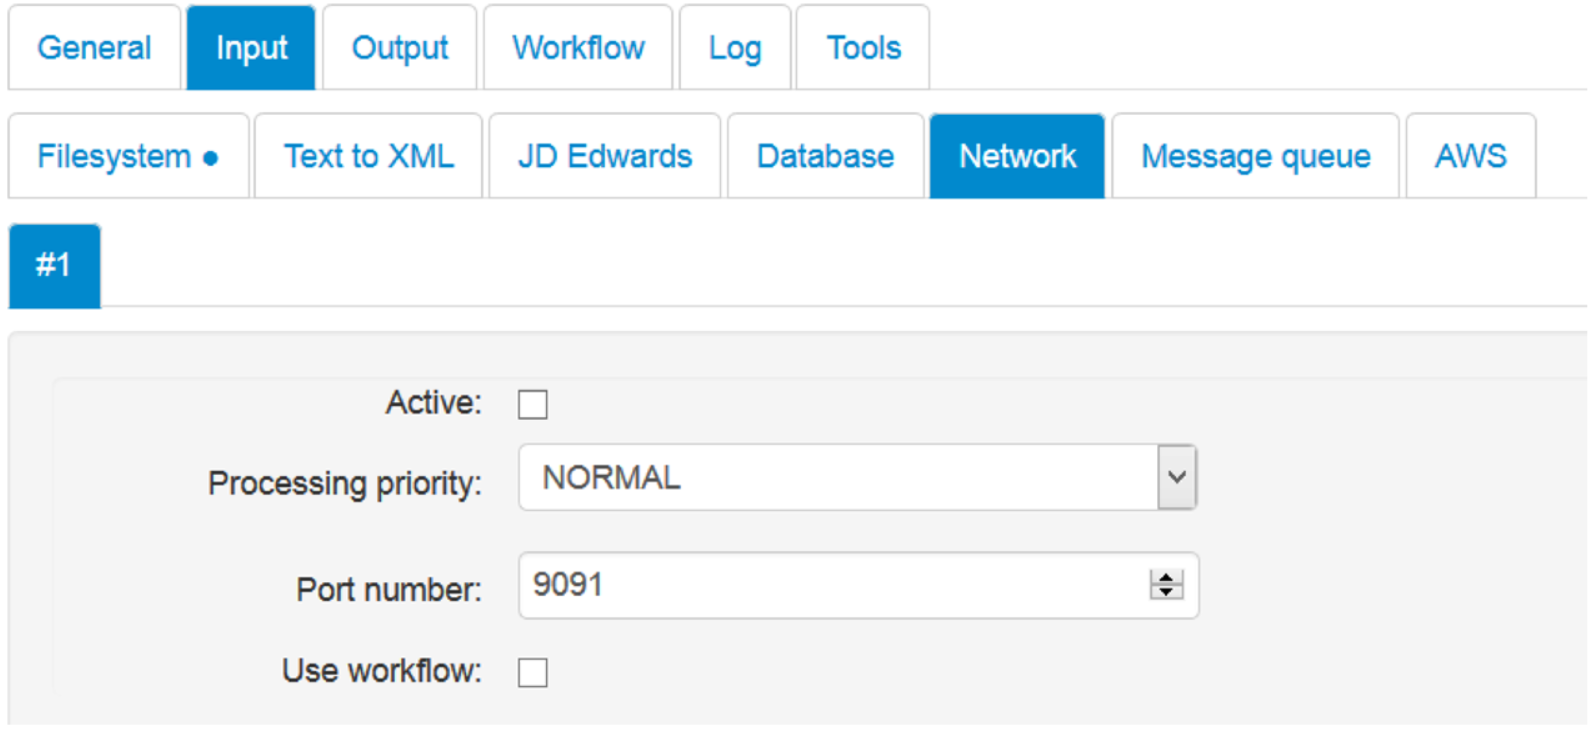
Here you enable the network processing and set the port number and priority used for socket requests. If you want to use multiple Network definitions, you can create/delete them via a right click on the ‘#1' tab. Additional information about this and the license requirements can be found here.
The possible priorities are: Immediate, Normal and Batch. These priorities are described here.
Use Workflow
For the Network feature, you can chose to use the Workflow to decide what actions to do, by activating the ‘Use workflow’ option above. If this is disabled, then the default template is used.
Input format
A request to process XML is similar to a HTTP 'POST' request. It is structured as a series key/value pairs, followed by a message body of arbitrary length.
Header values are expected to be sent using a simple format resembling that of typical property files:
key1: value 1 (cr lf)
key2: value 2 (cr lf)
(cr lf)
The list of key/value headers is terminated by an empty line. After this you may send the actual XML to be processed.
Header keys
Header keys are expected to follow a naming convention in order to be recognized as InterFormNG meta values. For example:
x-interform-metadata-documentType: invoice
Notice the naming convention where a special prefix name is used to indicate that the value should be attached as meta data to the new job. Any key that begins with "x-interform-metadata" is automatically set as meta data on the resulting job. The key will be everything following the prefix, and the value will be everything following the colon. In the example above, the meta data key will be "documentType" and the value "invoice".
Special meta data keys for the Network input are (remember, that they are case sensitive..):
x-interform-metadata-useWorkflow
If you set this to the value true, then the default template (refer to page ) will not be used, but in instead the usual workflow configuration will be used to determine what template to use, and what output to generate. If you set the metadata, mediaType to the value, preview, then only the (path and name of the) PDF file is returned.
x-interform-metadata-returnPdfData
If set to true, the Network call will send the resulting PDF file in return - instead of the path and file name, which is default.
These meta data keys has also special meaning, if set during a Network call, which is to preview (return a PDF file):
interform.plugin.archiver.fileName
The meta data key (also) sets the name of the returned PDF file. If blank the returned PDF file will be ‘Preview.pdf’. The normal use is defined here.
mediaType
This sets the output type. If set to preview the generated PDF file will be returned.
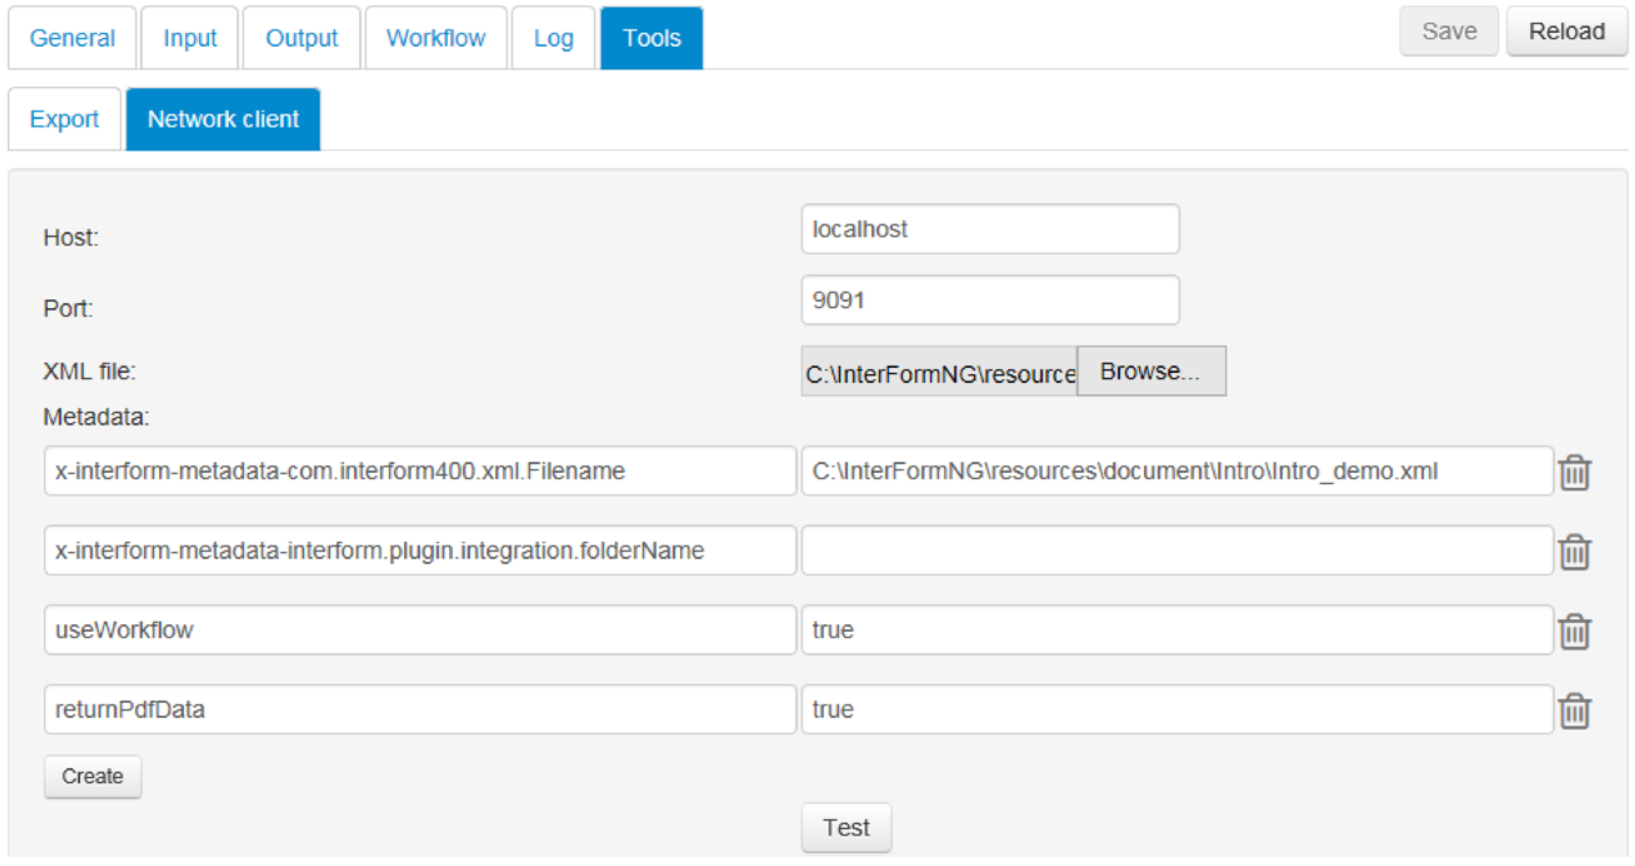
Test the Network configuration
You can test the Network configuration with a tool included in the web interface. You find that under Tools and Network client:
The result of a processing request is a sequence of key/value headers containing status information. In some cases a body containing additional information may follow the headers. For example:
x-interform-response: 200 (cr lf)
x-interform-response-message: Operation completed normally (cr lf)
x-interform-result-url: file:/tmp/InterFormNG/service/127_0_0_1-01109543659659647700.pdf (cr lf)
(cr lf)
body... (optional, only used for extended error information at the moment)
Each key begins with "x-interform". Below is a table of the currently supported response codes:
Response key |
Description |
|---|---|
x-interform-response |
A response code similar to a HTTP response code is always returned. Positive response codes are in the 2xx range, whereas error response codes are in the 5xx range. If an error code in the 5xx range is returned, a stack trace is typically returned in the response body. |
x-interform-response-message |
A textual message describing the operation result. If a job ended in error, the message will indicate the cause of the error. |
x-interform-result-url |
If a PDF was produced as a result of the processing, this header will return an URL pointing to the actual file. Note that depending on the value of the mediaType meta value, a PDF may not necessarily be available as a result of processing the XML. In this case no result url header will be returned. |
Initiating a connection - A Java example
The following is a small snippet of Java code that shows how to connect to the service and provide some XML data for processing. Note that for the sake of simplicity, a lot of the typical error handling and other scaffolding has been left out.
// Establish connection
System.out.println("Sending request");
Socket socket = new Socket("127.0.0.1",9091);
// Send XML request
PrintWriter pw = new PrintWriter(socket.getOutputStream());
pw.println("x-interform-metadata-documentType: invoice");
pw.println("x-interform-metadata-otherKey: other value");
pw.println("");
pw.println("<xml/>");
pw.flush();
// Tell the service that we are done. VERY IMPORTANT.
socket.shutdownOutput();
// Read results
System.out.println("Reading response");
BufferedReader br = new BufferedReader(new InputStreamReader(socket.getInputStream()));
String line = br.readLine();
while (line != null) {
System.out.println(line);
line = br.readLine();
}
br.close();
Although the example is small it does illustrate a few key points. First of all it shows how to send metadata along with your request, and secondly it demonstrates how to properly close the output stream before waiting for input. It is important that you use the shutdownOutput() method on the socket, rather than calling close() on the output stream. Otherwise the socket itself will be closed and you will not be able to receive a response.
Plugin configuration
The network-printjob accepts TCP connections on a port, which by default is 9091. If you wish to change this port number, you may do so by editing the file <plugin-home-directory>/network-printjob/conf/plugin.properties for the network-printjob plugin.
For example, the following configuration will change the port number to 7777:
network.printjob.portNumber=7777
Note that the InterFormNG service must be restarted in order for this change to take effect.
The Groovy example below shows how to define a web server to prompt for a name, insert it in an XML file, use a socket call (in InterFormNG) to convert the XML file into PDF and present the resulting PDF file in the browser:
------------------------------------------------------------------
@Grab('org.apache.camel:camel-core:2.9.0')
@Grab('org.apache.camel:camel-groovy:2.9.0')
@Grab('org.apache.camel:camel-jetty:2.9.0')
//@Grab('org.slf4j:slf4j-log4j12')
import org.apache.camel.Processor
import org.apache.camel.impl.DefaultCamelContext
import org.apache.camel.language.groovy.GroovyRouteBuilder
def WEB_PAGE = '''
<html>
<body>
<form action="/" method="post">
Please enter your name: <input type="text" name="name" />
</form>
</body>
</html>
'''
def XML = '''
<xml>
<name>_NAME_</name>
</xml>
'''
def TEMPLATE = 'Hello.itpl'
def generatePdf = { exchange ->
def inputForm = new Properties()
inputForm.load(exchange.in.body)
def name = inputForm.name ?: 'World'
def xml = XML.replace('_NAME_', name)
def map = [
'x-interform-metadata-com.interform400.xml.Template': TEMPLATE
]
def props = new Properties()
props.load(new FileInputStream(new File(System.env.INTERFORMNG_HOME, 'profiles/default/plugins/network-printjob/conf/plugin.properties')))
if (props.enabled == 'false') throw new Exception("Network-printjob not enabled")
def port = props.'network.printjob.portNumber'.toInteger()
def encoding = 'UTF-8'
def socket = new Socket('127.0.0.1', port)
def os = socket.outputStream
def request = new BufferedWriter(new OutputStreamWriter(os, encoding))
map.each { key, value -> request.write "$key: $value\n" }
request.newLine()
request.write(xml)
request.flush()
socket.shutdownOutput()
def response = new BufferedReader(new InputStreamReader(socket.inputStream, encoding))
props = new Properties()
props.load(response)
response.close()
socket.close()
if (props.'x-interform-response' == '200') {
def url = props.'x-interform-result-url'?.substring(6)
exchange.out.body = new File(url).bytes
} else {
exchange.out.body = props
}
} as Processor
def context = new DefaultCamelContext()
context.addRoutes new GroovyRouteBuilder() {
void configure() {
// new File('_WORKSPACE').mkdirs()
// context.properties.put('CamelJettyTempDir', '_WORKSPACE')
// Jetty needs this
from('jetty:http://0.0.0.0:1234/')
.choice()
.when { it.in.getHeader('CamelHttpMethod') == 'GET' }
.transform().simple(WEB_PAGE)
.otherwise()
.process(generatePdf)
}
}
println 'Starting...'
context.start()
addShutdownHook {
context.stop()
println 'Stopped!'
}
synchronized(this) { wait() }
------------------------------------------------------------------
Prerequisites:
•Groovy is installed (http://groovy.codehaus.org/)
•InterFormNG is running
•InterFormNG is accepting request from socket (Input Configurations > Network Configuration)
Run the script:
groovy WebFrontEnd.groovy
It might take some time to start the first time, as it is downloading Camel (http://camel.apache.org/).
Open a browser:
http://localhost:1234/
Enter your name and press Enter.
How it works.
Camel is started at line 69 in WebFrontEnd.groovy.
At line 75 Camel starts a Jetty server that listens on port 1234.
When a GET request is received (line 77) , it replies with the web page (line 11).
When a POST request is received (line 79), it
•extracts the form data (line 30-32)
•generates xml-data (line 34)
•opens a socket connection to InterFormNG (line 46)
•sends metadata - what template to use (line 49)
•sends the generated xml-data (line 51)
•receives the response (line 55)
•extracts the PDF-file (line 62)
and, finally, returns the PDF-file (line 63)