Excel styles can be referred in a cell in the Excel designer. The styles are not global and are only saved within the current Excel template.
A style can be used for setting up a lot of attributes for a cell. That includes:
1.The font settings and filling of a cell.
2.The horizontal alignment of the data within the cell.
3.The borders of the cells including the color of the borders.
4.The format of the cell e.g. to force an amount to be printed with 2 decimals.
5.Setup the vertical alignment within the cell.
6.Setup the cell/column width including autofit (automatic adjustment to fit the data).
These sections shows to work with the styles:
Create a new style
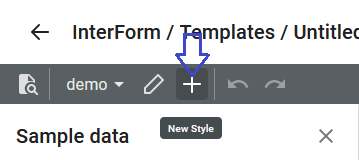
To create a new style you click on the marked + icon on the upper left in the Excel designer:
When you click on this icon a new, empty style is shown:
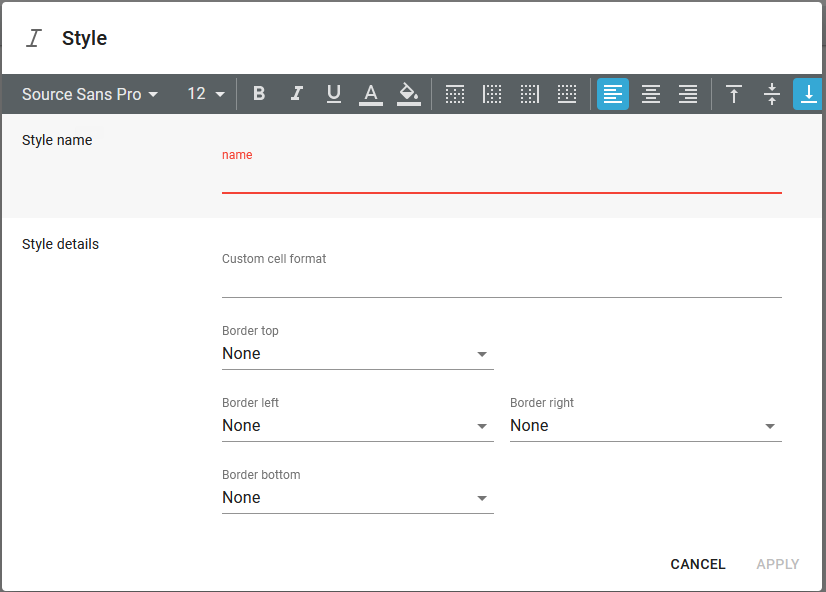
The important thing here is to set a name for the cell (marked in red). The rest of the style settings are optional. You can click Apply to save the new style.
The style is saved in the current Excel template.
Edit an existing style
You can select the style on the upper and then click this icon, if you want to change the settings of an existing style:

First select the style on the drop down list found via (1) and then click the pencil icon marked with (2) to edit the settings of the selected style. When you click Apply (in the bottom right), the style changes are saved in the current Excel template.
Delete a style
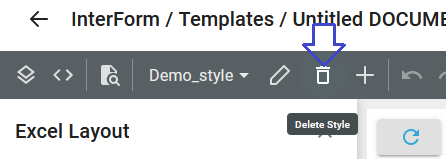
You can delete an existing style, if you select the style and then click on this icon:
Font settings of a style
If you want to change the font settings on a cell, then you need to do that via an excel style. Here you can create a new style or edit an existing one and refer to the style in the cell.
In the style you set all the font settings in the top:

Here you can set the font settings:
1.This is a drop down list of all the fonts installed in the Fonts Library.
2.This is the font size.
3.The is a switch to enable/disable bold (a bold version of the font must be installed in order to use this).
4.A switch to enable/disable italic (an italic version of the font must be installed in order to use this).
5.An option to enable/disable underline.
6.Set the color of the text.
7.Set the color of the filling of the cell.
Alignment of the text
If you want to change the alignment settings on a cell, then you need to do that via an excel style. Here you can create a new style or edit an existing one and refer to the style in the cell.
In the style you set the alignment in the top:

In this example we have chosen to right align the text.
Select the borders and border colors
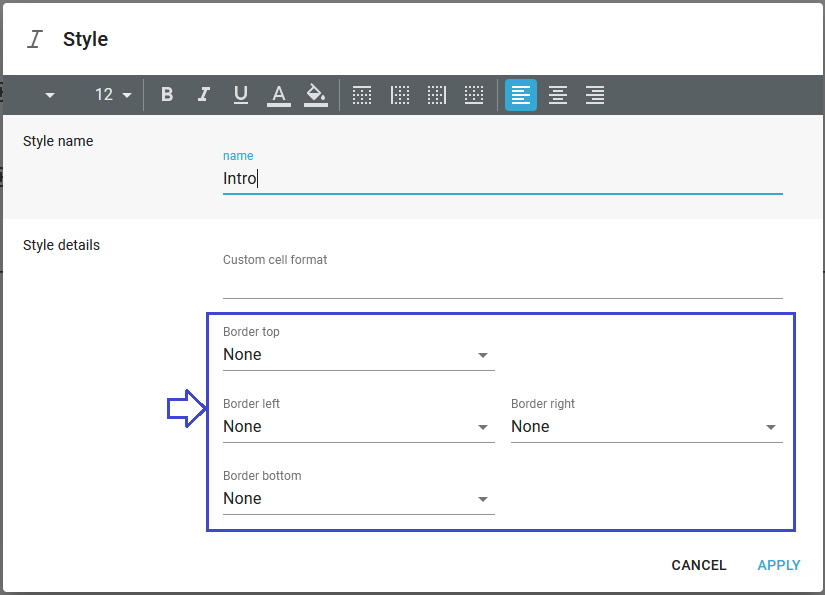
If you want to set the borders on a cell, then you need to do that via an excel style. Here you can create a new style or edit an existing one and refer to the style in the cell. You can set both the border type and the color.
In the style you select the border types in the middle of the style:
The possible border types are (selectable via a drop down list):

The color of each of the borders can be set in the top of the style editor:

Here you simply click the border, that you want to set the color for and then select the color from this list:
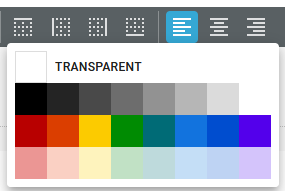
Click on the color, that you want to use and click Apply to save the change.
Format a cell
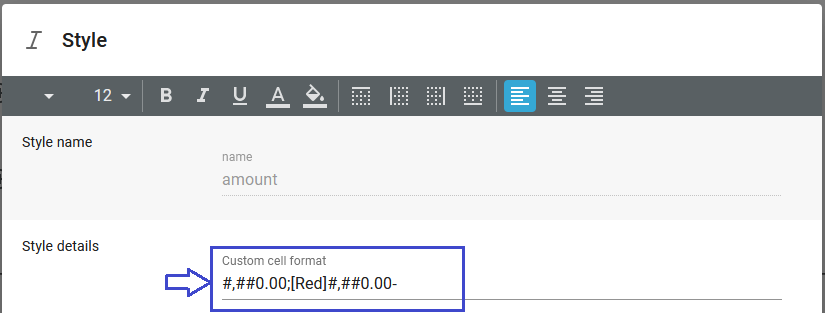
Apart from the option to set the cell type, you can also set a specific format of a cell. This is e.g. widely used in order to ensure that amounts are always written with 2 decimals and perhaps always with at least one digit preceding the decimal point to ensure e.g. that the value .37 is written as 0.37.
The cell format can be freely set as defined as you define a custom format in MS Excel. That means e.g. that if you want to implement these rules for a number:
•The number should be written in red, if it is negative with a trailing minus sign.
•The number must always have exact 2 decimals.
•Numbers less than 1 should have a zero preceding the decimal point.
Then you can enter this in the format inside an excel style:
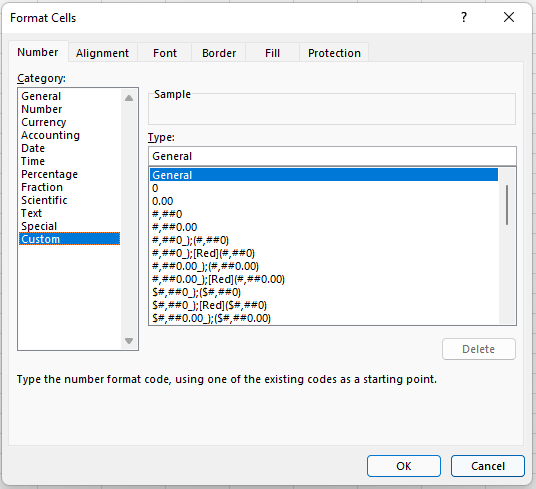
You can see all the custom options in MS Excel under the custom cell formatting as shown below:
Vertical alignment of the contents
You can setup the vertical alignment on the rightmost side of the Excel style:

You can use these 3 icons to either aligning the contents to the top, middle or bottom of the cell.
Column width and autofit
When you generate an output Excel file, then you might want to set a specific width of the cell to match the contents or even want to make the column width autofit i.e. match the width of the contents.
Please note: You can specify different widths for the cells in a column, but as a column can only have one width the width of the column is set to be the largest width of the cells in the column.
You can set the column width in the width parameter of the Excel style like below:
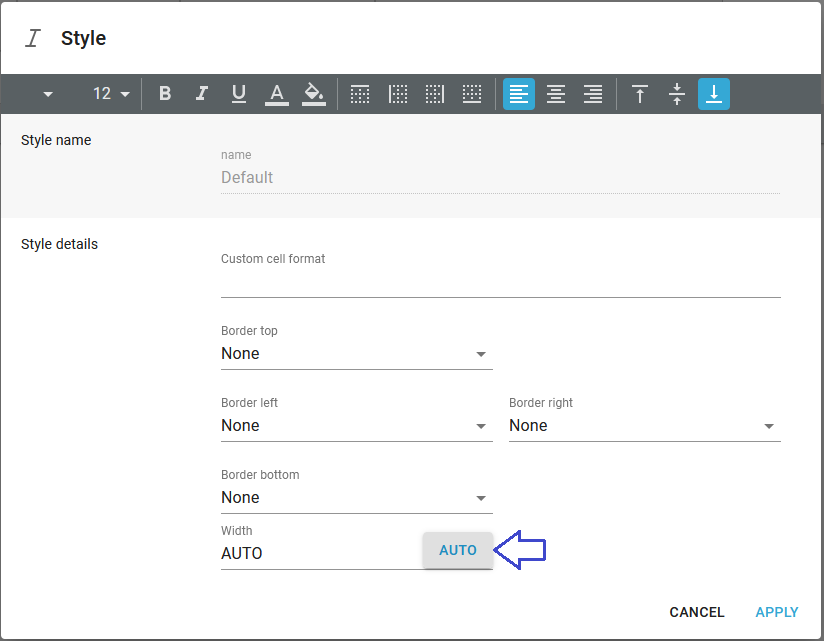
If you type in AUTO or click this icon:

Then the column/cell width will adapt to the width of the contents of the cell.
You can also type in a number for the width, which will set the width of the column in the 'special' Microsoft measurement, which really is based on the Normal font setup...
If you look at the column width in the final, rendered Excel file you might find a small deviation from what you defined in InterFormNG2. This is explained by Microsoft in the link below:
https://learn.microsoft.com/da-DK/office/troubleshoot/excel/determine-column-widths