Function keys for display of a spool file
F13: Set view/print parameters:
This function is used to set the attributes of the spool file you want to merge the overlay with. This must be done prior to selecting F14, F18 or F19.
Select Parameters for view / Print APF730D
Overlay name __________ or Overlay Selector ________ Primary/Secondary set _ 1=Primary 2=Secondary Spooled file: Save to favorites *NO *NO, *YES Job name __________ Job system name *ONLY *ONLY,*CURRENT, User __________ *ANY Job number ______ Creation date *ONLY *ONLY, date File name __________ Creation time blank, time Spool file no. ______ Number, *ONLY, *LAST Code page ______ Number, *INPUT Unicode output ______ *INPUT, *YES Form type A4________ Copies __1 (1-255) Drawer / Paper type *PRINTER__ (*PRINTER, *INPUT, *OVERLAY, 1-255, Name) View format _ 1=PCL 2=B/W PDF 3=Color PDF
Name of output queue to search if spooled file is unknown:
Output queue __________ Library __________
F3=Exit F4=List overlays
|
Overlay Name
Name of an overlay in the file-set you want to view together with a spool file when using the PCL viewer (F14). This is required, though the information is used for PCL viewing only.
Overlay Selector:
If you have defined an Overlay Selector you can test if it is able to pick the correct overlay. In this case Overlay Name above must be blank.
Primary/Secondary Set:
If you have defined Copy Management for the overlay, you can test if you have made the correct selection of overlay elements, by printing the overlay elements for one of the two sets only. If this field is left blank (default) the system will as default pick the Primary set.
Spooled File:
Spooled file identification can be entered here.
You can also choose to select one of the favorite spooled files for this overlay by pressing the F4 key on any of the entry fields for the spooled file. The favorite spooled files listed are the ones saved in the overlay selected on the screen above, and not the overlay, that you are currently editing. If you select an overlay selector instead of an overlay, then no favorite spooled files are listed, so if you want to use an overlay selector with a favorite spooled file, you first need to select the an overlay with the favorite spooled file in the screen above, and when the spooled file has been loaded, then you now select the overlay selector, that you want to use.
The pop up window for selection of the favorite spooled file looks like this:
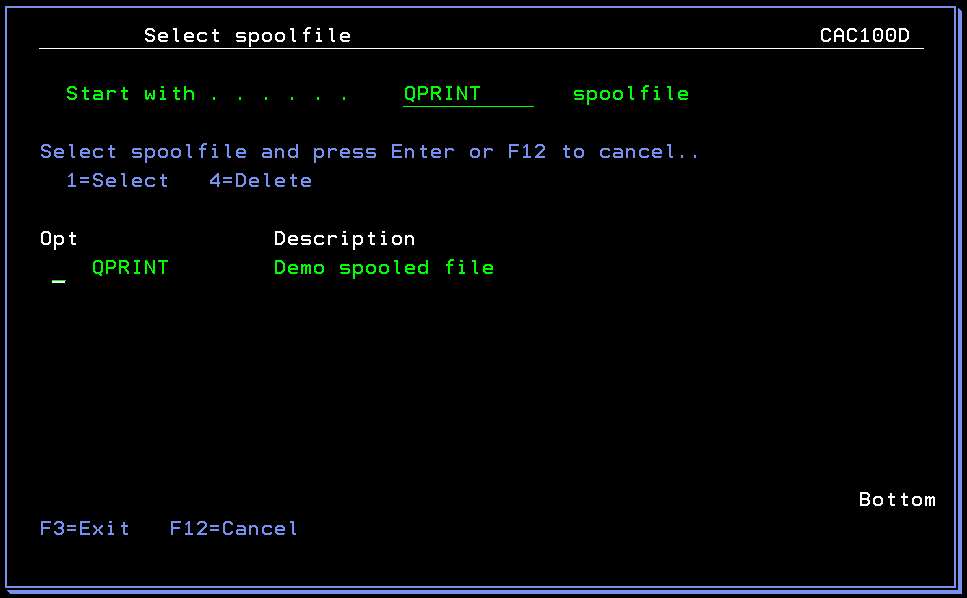
As you can see above, you can also choose to delete any of the favorite spooled files from this screen.
There is an alternative to typing all the information manually. If you type the name of an output queue in the bottom of the screen and press Enter, you can fetch the information about the spool entry from a view of the selected output queue by selecting with option 1:
Work with Output Queue
Queue: PRTHP3 Library: QUSRSYS
Type options, press Enter 1=Select 2=Change 3=Hold 4=Delete 5=Display 6=Release 8=attributes
Opt File User User Data Sts Pages Copies Form Type Pty
1 QPRINT INTERFORM INVOICE RDY 1 1 *STD 5 _ QPRINT INTERFORM PROFIT RDY 5 1 *STD 5
Parameters for option 2 ===> __________________________________________________ F3=exit F11=View 2 F12=Previous F21=Description F24=More keys
|
Delete a favorite spooled file
On the top right on the entry screen above you can state *YES for this field to save the currently selected spooled file as a new favorite for this overlay. You need to select a spooled file and state *YES in order to save it. When you press Enter you will be prompted for a description of this spooled file, which will be shown, when you choose to load a favorite spooled file for this overlay later.
The pop up window looks like this:
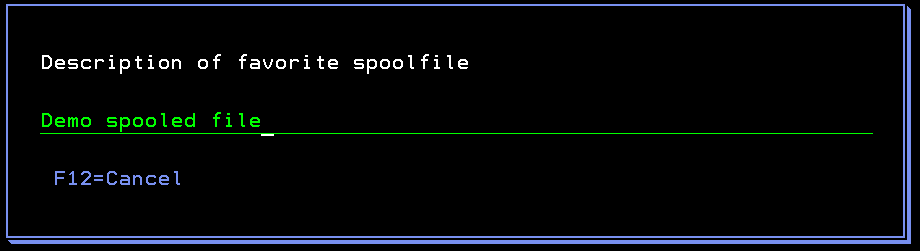
Type Enter to save the new favorite or F12=Cancel to cancel the save.
Code page:
This defines if a specific code page should be forced for the spool entry. *SYSVAL means that the default code page specified for the system will be used, unless a specific code page is defined as attribute for the spool entry.
Unicode output:
*INPUT means that the merged spooled file will be unicode only if the USRDFNOPT attribute of the spooled file selected is ‘IF-UCS2'. Specify ‘*YES’ if you want unicode output independently of the original spooled file.
Form type:
The Form type of the resulting printout. Default *STD
Copies:
1-255
Overwrite the drawer settings of the overlay global settings.
View:
You can specify what you want to view when you press F14 in overlay design. If you choose ‘1=PCL’ pressing F14 will display the result of a merge to PCL - in SwiftView. Choosing option 2 or 3 will make InterForm400 create a PDF file and display it using Acrobat Reader (assuming that Acrobat Reader is associated with PDF files on your PC). .
Please check out the preview options for a user here - including the support for back pages in the PDF preview.
NOTE: In order to get PDF output you need to purchase the PDF module or the classic package for InterForm400.
Output Queue:
The name of the output queue where the spool entry to be merged is placed.
Library:
The library of the above output queue. If left blank the library list will be used.
F14: Request a preview of the merged result.
Details of preview can be found here.
F18: DSPSPLF
With the Remap Window this function is relevant for displaying the spool entry in order to determine lines and columns for the Remap Window. F18 prompts the command DSPSPLF with the job information set by F13 Set view/Print parameters, or by in menu 3. Merge spool entry with overlay. Pressing F18 will only appear if this has been set prior to entering this menu .
F19: DSPPFM
This function works like F18, but prompts the commands DSPPFM for displaying the spool entry as a physical file. This is useful for revealing overprinted lines (bolding), which is not displayed with F18 DSPSPLF.
Remember to subtract the first 5 positions containing SKIP/SPACE information, when calculating coloumn positions in the DSPPFM view..
Please notice, that if you have selected a spooled file and an overlay selector via F13, then you can see, that the spooled file contents in line 1 position 369-378 is overwritten with the name of the overlay selected for the specific page.
Changing the unit of measurement:
After you press Enter on the screen above you can actually change the unit of measurement in this ‘green screen designer’ as in the graphical designer. Just press F22=Set unit to change the measurement unit to millimeters or inches and pels.