The designer can be used not only for designing a template for merges into various outputs like PDF, print or HTML, but the designer can also help you to transform an input XML file (or input spooled file in the version 2 format) into a new, transformed XML or even transformed spooled file (if you create an XML file, that match the special spooled file format).
In order to setup a transformation you should start the designer (either from the top ribbon) or by clicking on an existing transformation template in the Library with the extension .ixt.
The transformation can be used in the workflow component, XSL transformation to convert an input XML file and in the workflow component, Transformation design to XSL.
The transformation designer also can be very helpful, if you want to do advanced transformations: You can use the transformation designer in InterFormNG2 to get a good start and get a good structure of the transformation and output file. If you hit a limitation off the functionality in the transformation provided with the tool below, then you can convert the transformation file (.ixt) into a normal .xsl file and then use and edit the .xsl file to do more advanced stuff.
An example for how you can transform a spooled file is covered below.
Sections below include:
2.Match transformation output to sample file
3.Build a transform based on sample input and output files.
4.Convert a transformation (.ixt) into XSL
6.Variable
11.Comment
12.Transform a spooled file into XML
13.Transform a spooled file into another spooled file.
14.Transform a simple database file into XML
15.Transform a generic database file into XML
When you are editing a transformation the designer looks a bit different compared to when you edit a normal template:
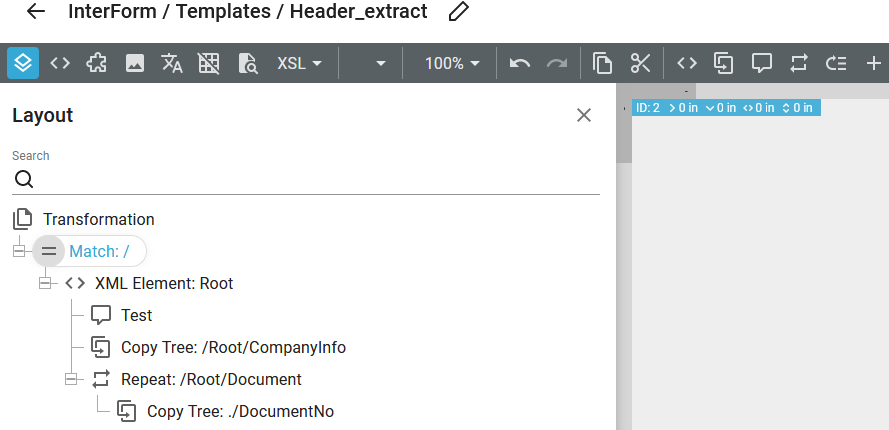
The main part of the designer is described in the section, Introduction to the designer.
Preview
The preview result (selected via the icon with the magnifying glass) is different than the normal designer as its shows the transformed file and the transformation specification:
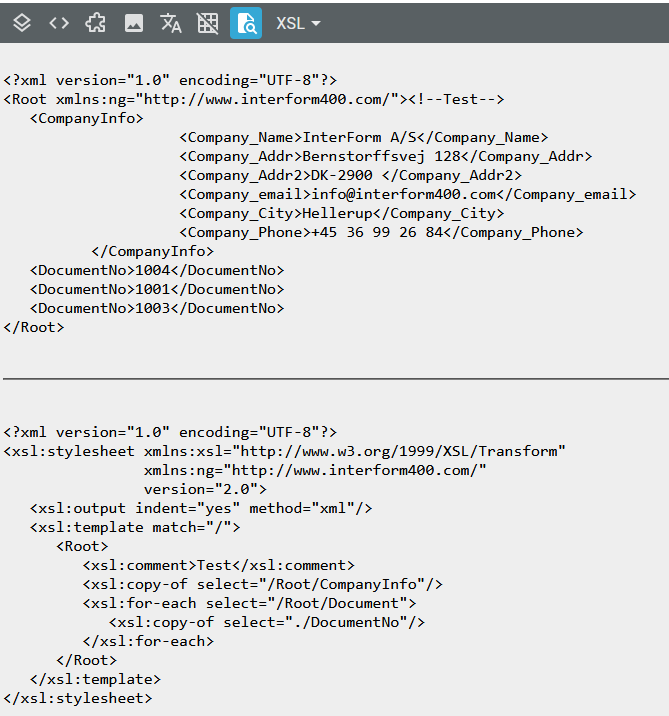
Load a sample input file
One of the first things you need to do is to load a sample input file, that you want to transform. You do that via this icon:
Now you have these options:
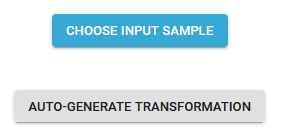
1.Choose input sample. This will copy the sample XML or spooled file into the designer and then you need to build the transformation from scratch.
2.Auto-generate transformation. This is a more advanced function, that can build a transformation definition, that match the format of the selected output sample file or even build a transformation, that tries to transform a selected input file into the format of a sample output file.
Match transformation output to sample file
If you want to create an output file with a specific structure and set of nodes/attributes, then you can consider to load a sample file, that has the requested structure of the output, that this transformation is to create. If you want to follow this path, then you should first click the Auto-generate transformation option above and then select the output sample file
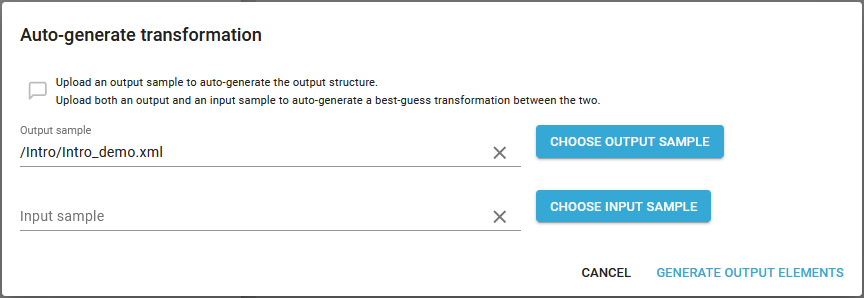
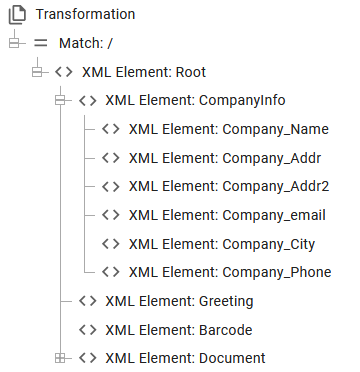
After you click on Generate output elements you will see a transformation definition like below:
And a result view like this:
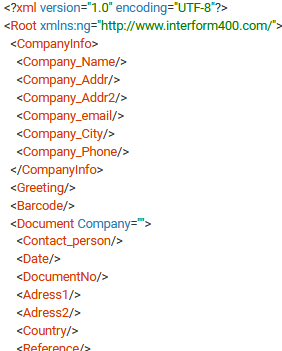
As you can see only the node names and attributes are copied - not the values. Sub-trees and nodes, that appear multiple times are only copied once as the designer expect you to build a repeat to fill out the multiple sub-trees/nodes.
After this you can now load a sample input file and start changing the transformation.
Build a transform for sample input file to sample output file
If you can create a matching input file and output file, then you load both in the transformation designer in order to build the best guess of a transformation, that converts the sample input file into the sample output file even with repeat loops, if these multiple nodes can be matched.
This transformation "builder" tries to match nodes of the input file with nodes of the output files with the rules below:
1.First it tries to match unique values i.e. if a unique value (i.e. the value is found only once in both the input and the output file), then the builder will transform the input node to the matching output node.
2.If there are multiple nodes, that has the same value, then the builder will try to match the nodes based on the path and node names, so if the path match in both files, then these nodes will be linked in the transformation.
The generated transformation is as mentioned a best guess, so you will need to verify the result.
In order to run this builder you should first click this icon:

Now you click Auto-generate transformation:

And then select both an input and an output file:
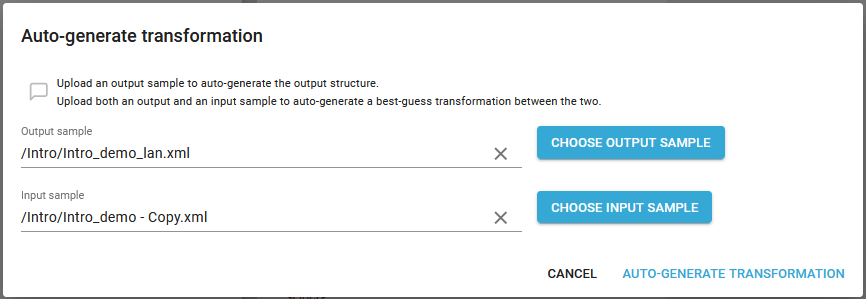
And then click Auto-generate transformation to run the builder.
Convert a transformation template (.ixt) into XSL
When you have created a transformation template (with the extension .ixt), then you might want to convert it into XSL for more advanced transformations. You can do that in two ways:
1.The easiest way is to select the Save option in the top right corner and here select the option, Save XSL as shown below:
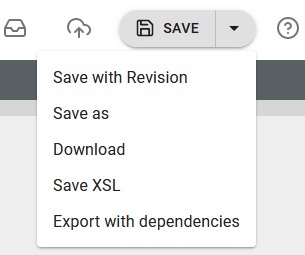
Then you are prompted for the folder to save it in and the name. Please note, that the XSL file will be saved to the Transformation folder of the Library - and not into the template folder like the .ixt transformation template.
2.The alternative way to convert a transformation template into XSL is with the workflow component, Transformation design to XSL
Design elements
The design elements are these:
1.Transformation. This is a fixed element without settings. You cannot add more transformations in a transformation file. You can think of this as a container for all the elements.
2.Workflow variable. On the top level you can insert a workflow variable, which works the same as for a normal template i.e. referring to a variable, which is setup in the workflow.
3.Variable. You can use a variable element, but it is limited compared to the normal template designer as no XML references can be used.
4.Match element. Selects the contents of the input file. Currently you should only add one match element, which is to select the root of the input file.
5.XML element. Use this to define a node in the output XML file. You can e.g. insert other sub nodes inside of this.
6.XML attribute. Use this to insert an attribute of the current XML node.
7.XML namespace. Here you can define the namespace of an output node.
8.Copy XML tree element. This copies a fixed subtree of the input file.
9.Comment element. Inserts a comment in the output file.
10.Repeat element This works exactly like the repeat element of the normal designer.
11.If element This works exactly like the if element of the normal designer.
12.Select element. This works like the Select element of the normal designer.
Variable element
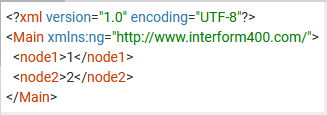
The variable element in the transformation designer is similar to the variable element of the normal template designer, but in the transformation designer the variable is limited to Xpath expressions, that does not refer to the input XML file, so you are normally limited to fixed values although you can setup a template like this:
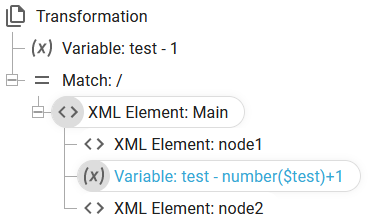
This results in this XML output:
Match element
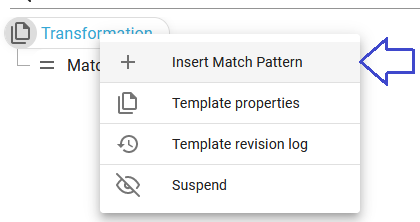
A new transformer template is created with a match element, that selects the complete input file (as it selects the root). The match element selects the subtree of the input file, that is to be processed in the subtree insider the match element. The current transform designer has been built for a single match element, so you should not create extra match elements. It is possible to add a match element, if you select the transformation root in the designer and then you can add a match element in two ways:
1.If you right click on the transformation element and here click on Insert Match Pattern:
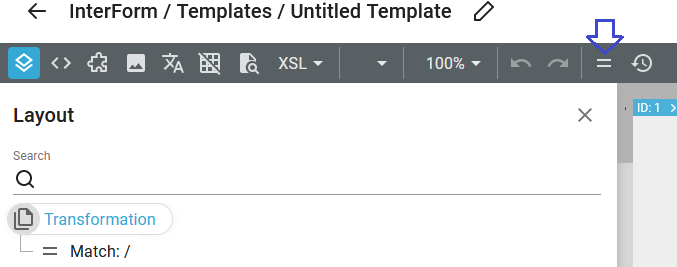
2.When the transformation element is selected you can also add a match element via this icon in the top of the designer:
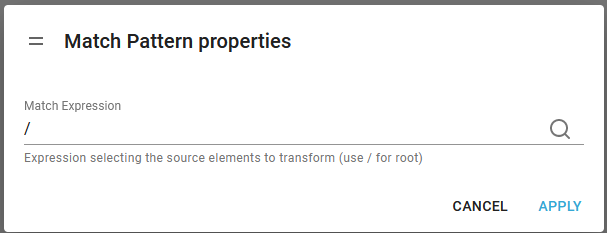
Currently you should keep the / to select the complete input file as shown below:
XML element
You can add a new XML node in the output XML tree if you click this icon in the top:

This will prompt you for the XML node properties:
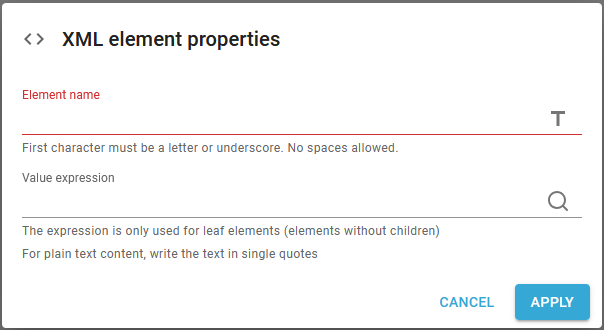
The XML element has these parameters:
Element name
The name of the XML node. You need to type a valid node name, which e.g. means that the first character must be a letter or an underscore. No blanks are allowed in the element name.
The element can either be set as a fixed value or it can be set via an XPath expression, if you click the T-icon on the right.
Value expression
You can choose to set a value for the XML node. This is only supported for leaf nodes i.e. nodes without a subtree.
XML attribute
Use the XML attribute element to insert an attribute of the current node. This element can be inserted if you right click on the parent node in the tree structure on the left and here select Insert and then this icon:
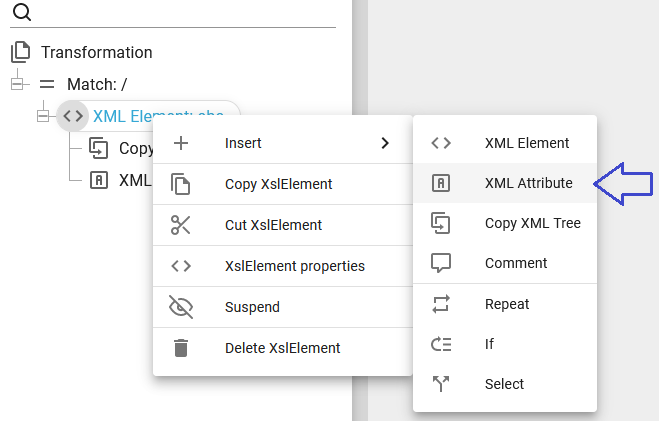
You can also insert it via this icon on the top:

The attribute has these parameters:
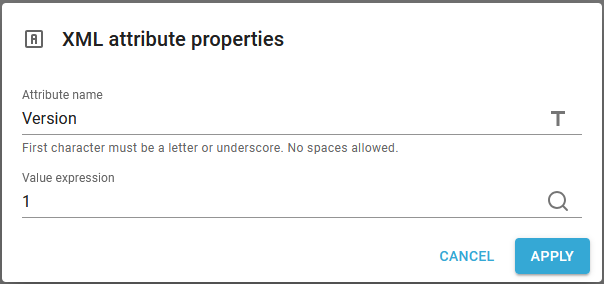
Attribute name
The name of the attribute. The attribute can either be set as a fixed value as above or it can be set via an XPath expression, if you click the T-icon on the right.
Value expression
The value of the attribute. This is an Xpath expression, so you will need to use a delimiter, if you want to insert a text constant.
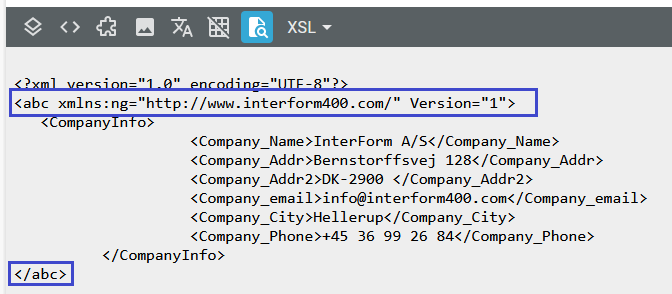
In this example we have added a node, abc with the attribute above:
Namespaces in the translation designer
From version 3.3.0 InterFormNG2 handles the namespaces a bit differently compared to previous versions as the ng namespace is no longer included in the output XML.
For default name spaces the best advice is to output with the same default name space as in the input file. If you have changed the default name space in the input file, then you can refer to the input nodes without specifying the name space (as we insert "xsl:xpath-default-namespace" in the transformation).
If however you want to use a default name space in the output file, that is not set in the input file, then you need to use a wildcard character when you refer to nodes in the input XML file, that are in the default name space like : *:NAME/...
Also you can now add a name space with this icon in the transformation designer:

The namespace element has these parameters:
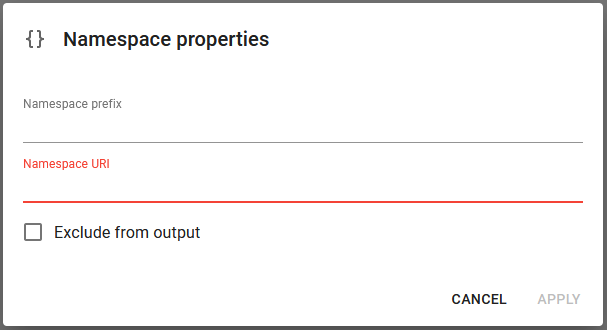
Namespace prefix
The name of the namespace.
Namespace URI
The URI of the namespace.
Exclude from output
If this is selected, then the namespace is not included in the output XML file. This can be used if e.g. there is a namespace in the input XML file, that for some reason is necessary in the transformation (or XSL), but it is one, that you do not want in the final rendered output XML file.
Copy XML tree element
With the Copy XML tree element you can copy a subtree from the input file into the output file. You can insert this element via this icon in the top:

The copy XML tree element has this parameter:
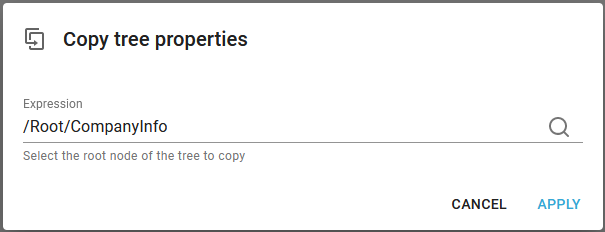
Expression
This refers to the main node of the subtree, that is to be inserted.
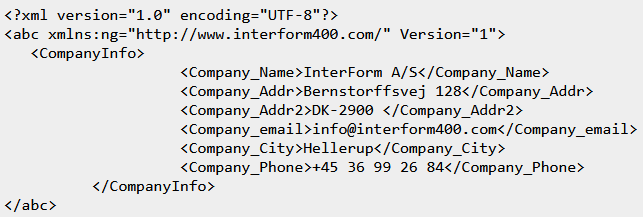
Here is an example, where this has been inserted into the abc node:
Comment element
You can insert a comment in the output XML file with the comment element. This is inserted via this icon in the top of the designer:
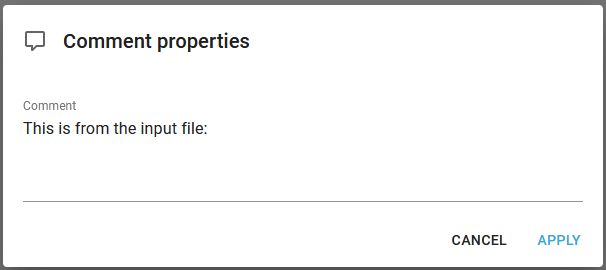
The comment has only one parameter:
This is how it looks in the final output XML file:

Transform a spooled file to XML
Below is an example of how you can convert a spooled file into XML with the transformation designer as covered above.
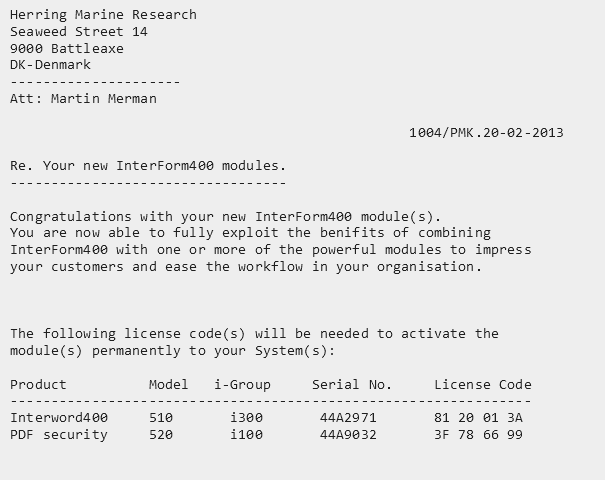
We can consider a spooled file with multiple pages looking like this:
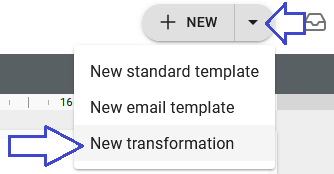
First we load the designer and on the upper right we setup the designer for a new transform definition:
For the actual transformation we here cover a few scenarios:
The output XML is to reflect the page breaks of the input file with a header section and multiple detail lines
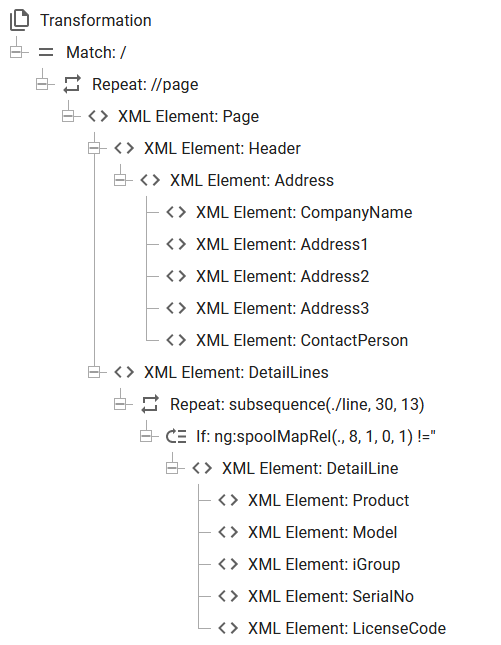
Now we want to setup a transformation, that looks like below:
Which creates this output:
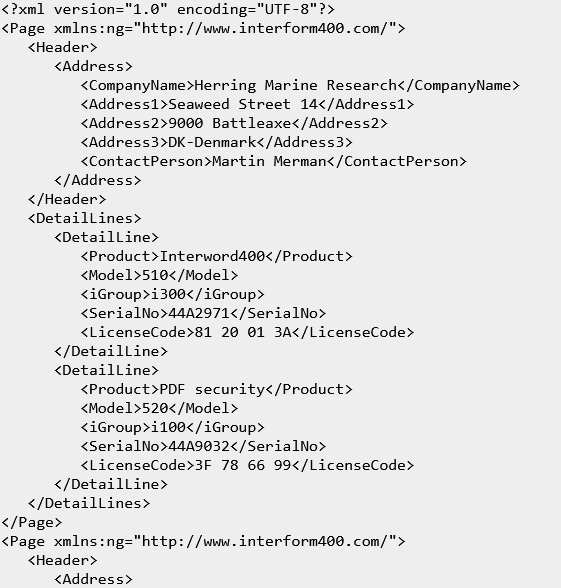
With a page element in the XML file for each page in the input spooled file. This is simple, but probably not what you want.
Here each element is covered from the top:
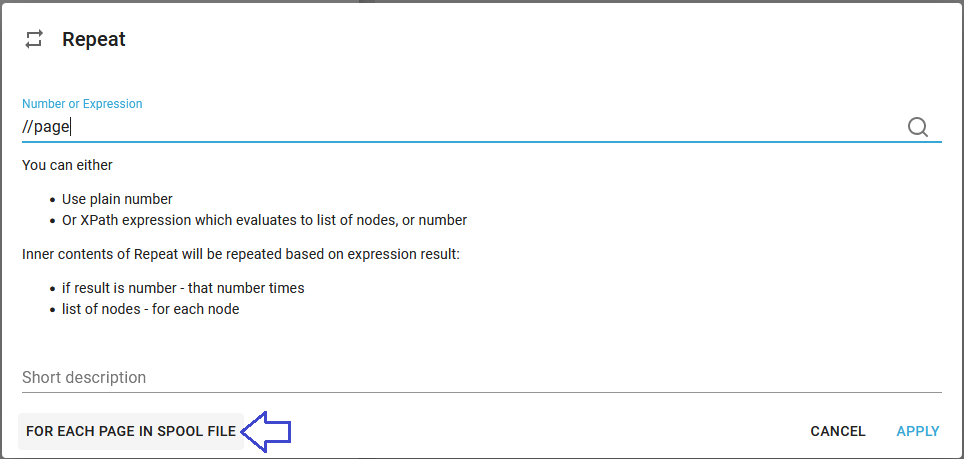
1.First we insert a repeat loop, which is to repeat through all pages of the spooled file:
2.Inside the repeat (for each page) we can insert a Page node, so that the output XML file gets an Page node for each page inside the spooled file:
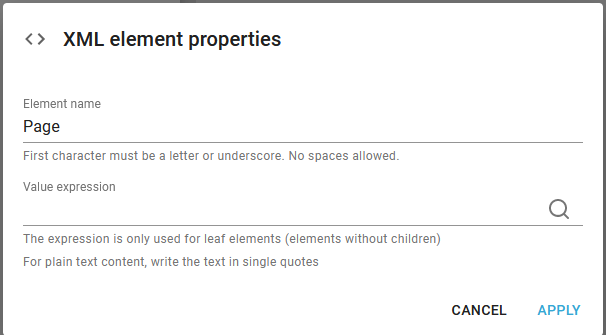
3.Inside the Page node we also insert a Header and Address node in the same manner.
4.Inside the Address node we can map fixed lines/positions into an XML node like below. Here we click the magnifying glass on the right to select the area in the spooled file:
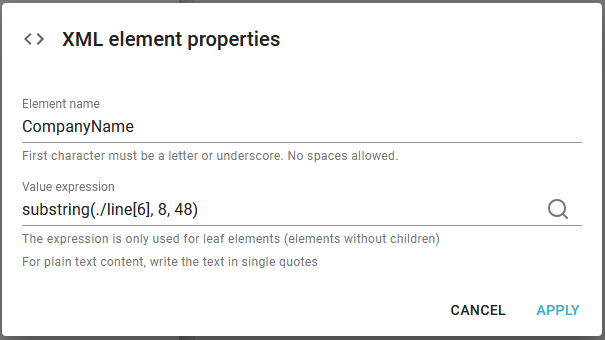
5. The other address nodes are inserted in the same manner.
6.We add another node called DetailNodes into which we want to insert the detail lines of the spooled file similar to above.
7.Inside the DetailNodes node we insert a repeat, that is to repeat over spooled file lines, that potentially can contain a detail line:
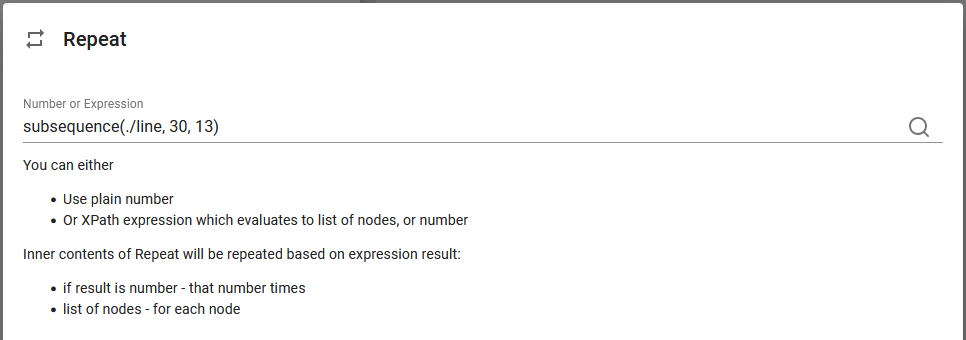
We can select the spooled file lines with the magnifying glass on the right.
8.Inside the repeat we insert a condition in order to only select the detail lines (and ignore the blank lines):

Here you can consider to select Relative mode when you select the magnifying glass. Then you should also select the reference spooled file line. With this you can inside the condition refer to relative spooled file lines, when you map the spooled file contents:
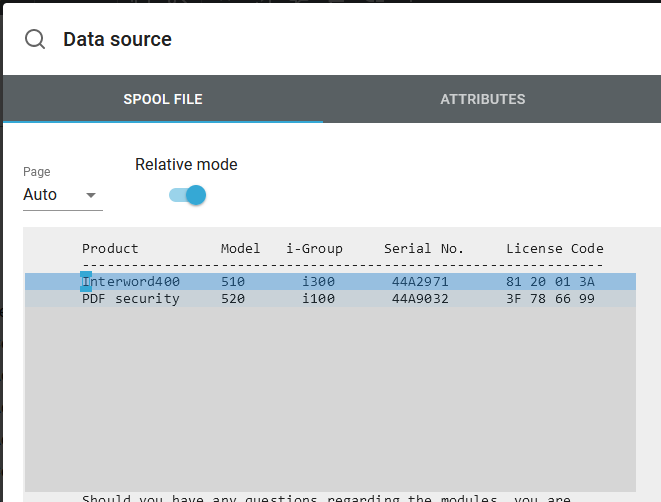
(You may also notice, that the spooled file lines handled by the repeat for the spooled file lines are marked in grey.)
The condition above tests if position 8 of the current spooled file line is not empty.
9.Inside the condition above we choose to insert a node called DetailLine.
10. Now we can map an interval of positions of the relative spooled file line, when we insert the detail nodes similar to this:
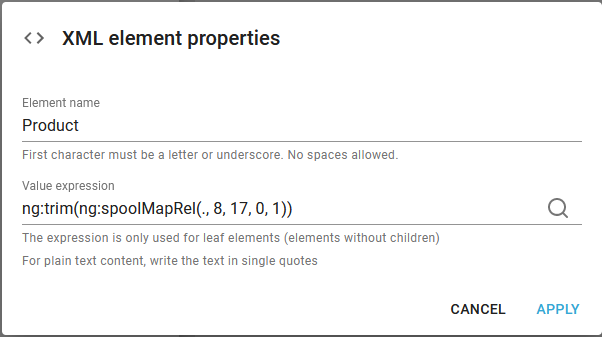
11.The next step is to implement this in the workflow. This is covered here.
Create a header section with header information from page 1, total from last page and convert detail lines of all pages
In this example we refer to a spooled file looking like this:
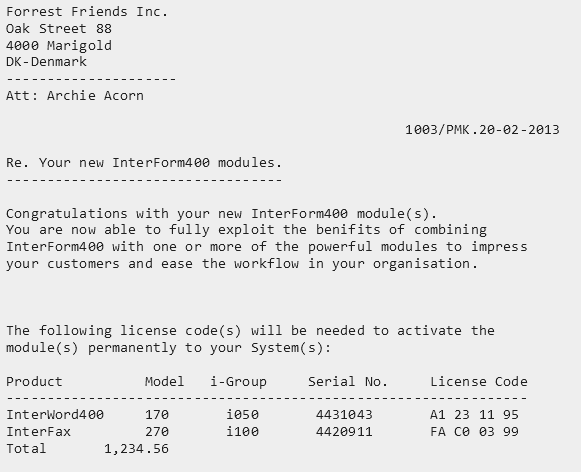
The address is repeated on all pages, but should only appear once in the output. The product lines should be accumulated for all pages and the total from the last page is also to be converted into the output XML.
For the transformation we first map the address like so:
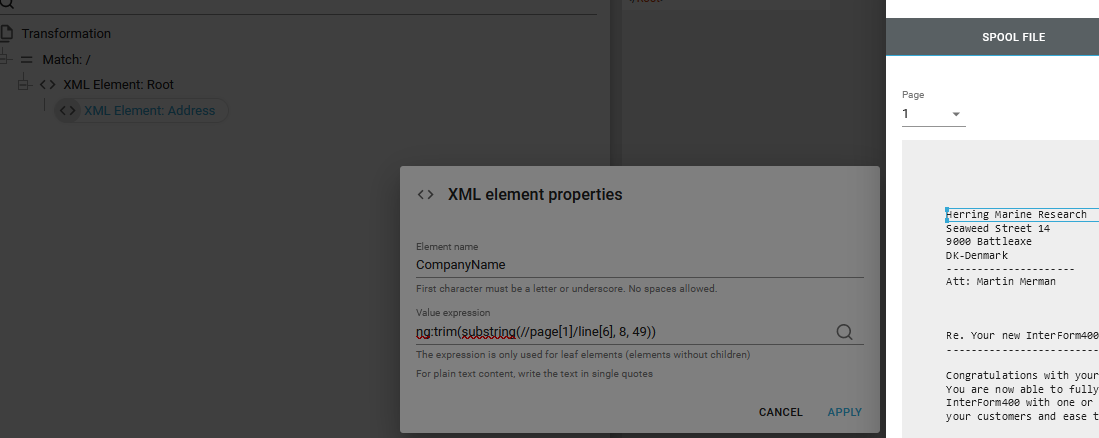
Here you may notice, that in the spooled file extract we specifically have selected page 1, which is reflected in the Xpath expression: ng:trim(substring(//page[1]/line[6], 8, 49))
The ng:trim() function is used for removing any leading and trailing blanks.
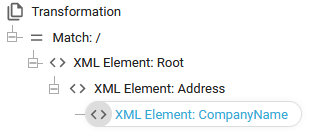
After adding this the transformation looks like this:
We can continue to map the other header texts, but lets jump to the detail lines instead.
Here we need to add a repeat for all spooled file pages and within that repeat we need to add a repeat to cover the spooled file lines, where detail lines are found. This is here implemented as below:
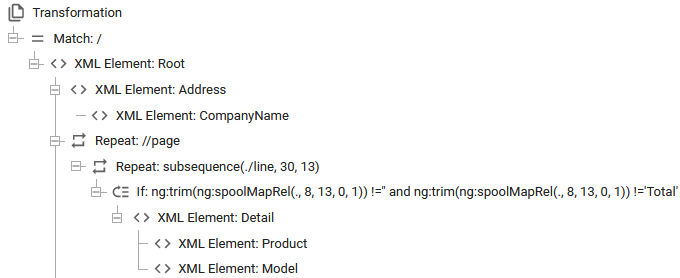
With the definitions above we scan all lines in the interval 30 to 42 (13 lines starting in line 30) and if position 8 to 20 (13 characters long) is empty/blank and the text 'Total' is also not found, then it is a normal detail line which is converted into a new main node named Detail with the sub-nodes Product and Model.
Finally we also need to extract the total value from the spooled file. That can be done in multiple ways.
Here is one example:
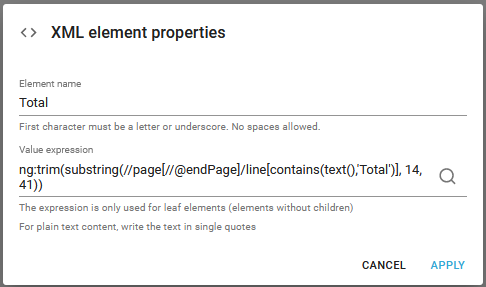
It may look a bit confusing, but not if we pull it apart - starting from the inside.
ng:trim(substring(//page[//@endPage]/line[contains(text(),'Total')], 14, 41))
This selection: line[contains(text(),'Total')] selects the line node of the spooled file which contains the text 'Total' - here we assume, that this is a unique selection.
In front of this we have the selection: //page[//@endPage]. This selects the last page of the spooled file by using the attribute endPage as index or the page number. This can only be used, if we are sure, that the Total really is found only on the last page - and we do not want/need to search in any other page.
The substring() function with the parameters 14,41 selects the value found in the Total line - after the text Total.
Finally we remove leading and trailing blanks with the function ng:trim().
Here is another Xpath expression, that could be used for finding the value:
ng:trim(substring(//page/line[contains(text(),'Total')],14,41))
This expression does not refer to the page number, so it will search all pages for the spooled file line, that contains the text 'Total'.
This is yet another Xpath expression, which also does almost the same:
ng:trim(substring(//page/line[substring(text(),8,5)='Total'],14,41))
The difference here is, that we suspect, that the text 'Total' might appear in other positions, so here we specifically search the spooled file line (in any page) where position 8 to 12 (5 characters long) is 'Total'.
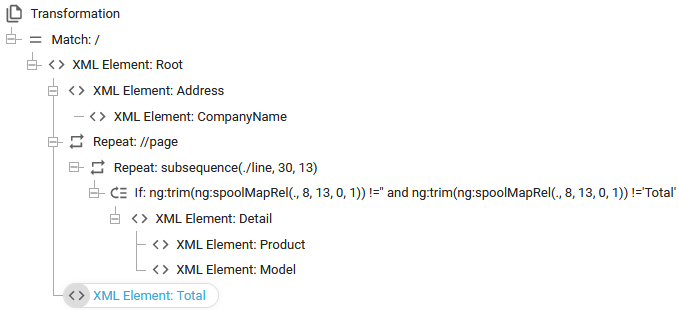
With the elements above the transformation looks like this:
Transform a spooled file into another spooled file
It is possible to transform a spooled file into another spooled file where data has been added, changed or removed. In order to do that you first need to build a generic spooled file transform, which transforms any input spooled file into the same output spooled file and then add the changes to this transformation
The generic spooled file transformation is built up in the section below.
A generic transformation for spooled files
In this section we see how to create a dummy transformation for spooled files, so that we later can use this to change the contents of a spooled file. In order to do this we first need to get hold of a spooled file loaded from the IBM i platform in the format .splf. Here is expected, that you have already loaded a spooled file into the documents Library.
1. Download the spooled file to the PC
First we need to download the .splf file to the local PC. That is done from the Library, where you select Documents and here find a spooled file with the extension .splf like below:
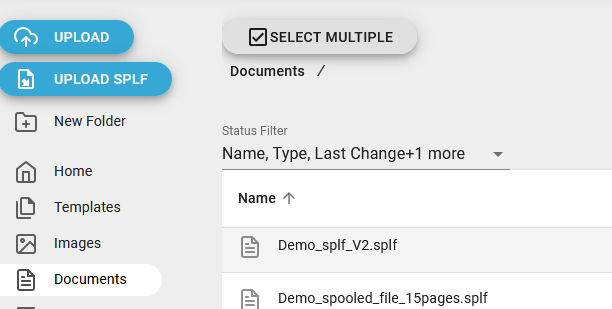
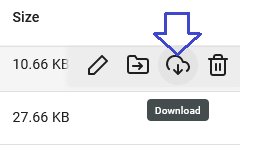
Now you can download the .splf file with this icon on the very right:
2. Add the extension .xml to the file
In the file explorer you now need to select the file, press F2 and add the extension .xml to the file like so:

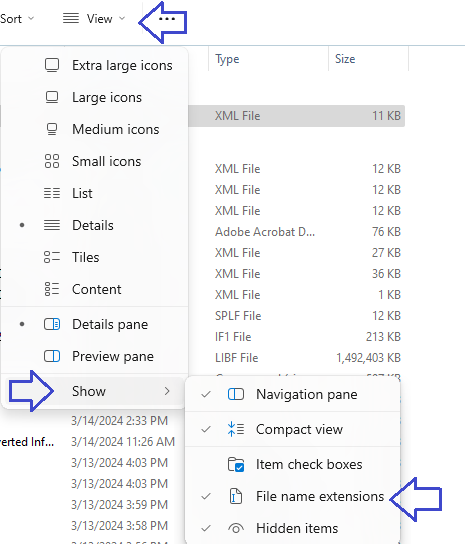
If you are unable to see the current extension, .splf then you will need to enable the view of extensions in File explorer first. Here you need to select View, Show and File name extensions:
2. Upload the spooled file with extension .xml
For InterFormNG2 the spooled file with the extension .xml is now an XML file and actually it is, so now we can upload the file into the Library in the documents folder. For that we click the Upload icon on the top left:
3. Create a transformation
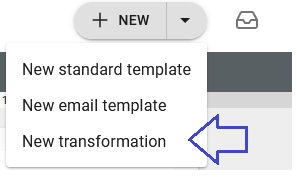
Next we want to create a transformation which outputs a spooled file. To do that we open the designer and click New and New transformation as below:
4. Set the transformation ínput and output to be a spooled file with the extension .xml
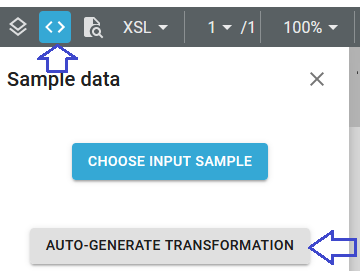
In the transformation we first need to click the <> icon in the top to select the input file and then we click the icon, Auto generate transformation:
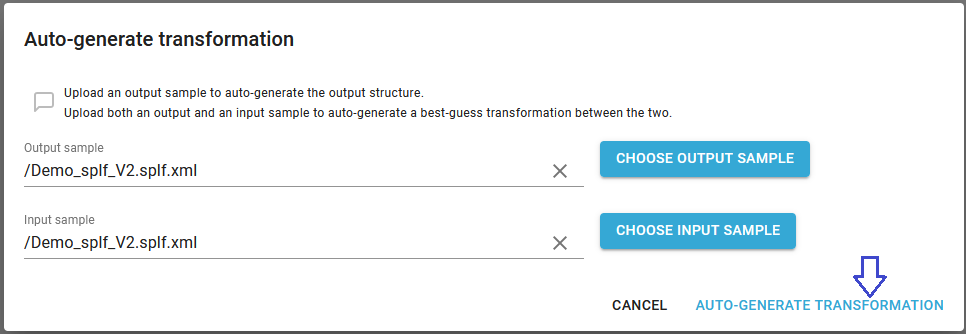
Now we select the same "xml" spooled file as input and output file and then click Auto-generate transformation in the bottom right corner:
5. Correct the transformation
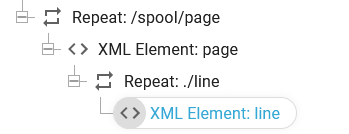
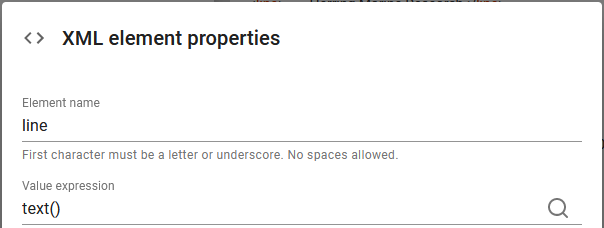
There is one tiny detail missing in the auto-generated transformation and that is the contents of the line nodes. The value of these nodes should of course be the same as the value from the input line node for which three is already a repeat. We correct that by editing the line node in the bottom of the transformation as below:
If we edit this node, then we can see, that no value is specified:
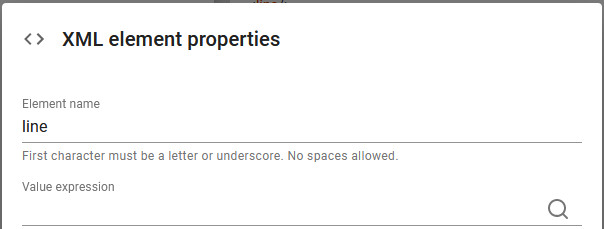
So we solve that by adding the expression text() to retrieve the value from the current line node:
6. Review of the transformation
Now the generic spooled file transformation is done and we can save it as a normal transformation template. The transformation can be used with any spooled file and the output of this transformation is the same spooled file as used for the input.
The contents of the transformation refers to the XML data, that InterFormNG2 use in order to represent a spooled file. The advantage with this approach for the spooled file contents is, that we can add or remove data in the spooled file simply by changing the transformation and the result of the transformation is still a spooled file if we do not change too much.
We can e.g. add an extra attribute in the top of the spooled file XML setup and/or edit the contents of a line node if we insert a condition in the repeat for the line nodes or even add addition nodes and still have InterFormNG2 process and present the data as a spooled file.
7. Activate/test the spooled file transformation
We can test the transformation with a preview in the designer, but you can also activate it in a workflow like below, where the workflow expects a normal spooled file with the extension .splf:

Here the spooled file arrives via a monitored folder, but it could of course also be a monitored output queue or via the command, NG2CMD.
Now you can in this transformation e.g. consider to add SQL data with the ng:databaseLookup built-in function as covered here. This section can also be used as inspiration for other transformations where you want to change the contents of the spooled file.