In this section there are some examples how you use a database in order to find the output queue and output queue library via a database lookup and use that information to either move the input spooled file and/or use this information to select the output printer (or output queue) for the merged result.
For these examples we will use a file (table) on the IBM i platform, which match up a user profile with an output queue and output queue library.
The intention is to use the user profile, that created the input spooled file to decide the target output queue.
This section is related to the section, Use translation file to link users with an output queue.
A prerequisite for this is, that a database connection already has been setup and that we are processing a spooled file in a workflow e.g. via monitoring an output queue or via IBM i command input.
For this example we will use a file/table, which is used in InterForm400 for matching users with an output queue.
The file/table is placed in the library, APF3812 and is called USRQUEP. This file has this layout:
USER |
OUTQ |
OUTQL |
USRPTP |
|---|---|---|---|
KSE |
OUTQKSE |
QUSRSYS |
*COLOR |
KSE2 |
OUTQKSE2 |
QUSRSYS |
*COLOR |
So as you can see the file has these 4 fields:
(All fields are 10 characters long - 10A)
USER
The user profile, that created the input spooled file.
OUTQ
The output queue to use for this user profile
OUTQL
The library of the output queue specified in OUTQ.
USRPTP
The InterForm400 printer type. This field is not used here.
First of all we need to setup an SQL expression via the built-in function, ng:databaseLookup().
Here is an example of how this function can be called in this case:
ng:databaseLookup('PROD','select OUTQ from APF3812/USRQUEP where "USER"=?','KSE')/result/row[1]/OUTQ
In this example the database connection referenced is PROD. Double quotes are added around the USER field as this is a reserved word.
The result of this lookup in OUTQKSE with the data shown above.
We intend to use the owner of the input spooled file in the workflow instead of the fixed value, 'KSE' so the expression above is changed into this in the workflow to return the OUTQ field matching the spooled file owner of the input spooled file, that triggered the workflow:
ng:databaseLookup('PROD','select OUTQ from APF3812/USRQUEP where "USER"=?',$interform.input.spooled.user)/result/row[1]/OUTQ
And the output queue library is found via this expression:
ng:databaseLookup('PROD','select OUTQL from APF3812/USRQUEP where "USER"=?',$interform.input.spooled.user)/result/row[1]/OUTQL
In both cases we use the variable, interform.input.spooled.user with is one of the predefined variable for spooled files and this contains the user profile of the spooled file, that triggered the workflow.
With these expressions we can now use them in these examples:
Example 1: Move input spooled file to the user output queue.
Example 2: Print to the printer specified by the users output queue.
Example 3: Print to a dynamic output queue specified by the users output queue and library.
Example 1: Move input spooled file to the user output queue
In this example we want to move the input spooled file to the output queue and library found for the user, that created the spooled file. This is done with the workflow component, Post process spooled file and is done with this setup:

Example 2: Print to the printer specified by the users output queue
If you make sure, that your InterFormNG2 printers are named the same as the target output queues then you can use the table/file above to select the printer in this manner:
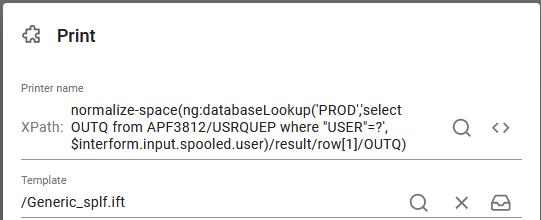
Here this expression is used:
normalize-space(ng:databaseLookup('PROD','select OUTQ from APF3812/USRQUEP where "USER"=?',$interform.input.spooled.user)/result/row[1]/OUTQ)
With the normalize-space() function any trailing blanks are removed from the retrieved value to ensure that the trailing blanks does not prevent a match with the printer name.
Instead of the function, normalize-space() the functions, ng:trim() and ng:trimRight() could also have been used.
Example 3: Print to a dynamic output queue specified by the users output queue and library
If you have a license key for InterFormNG2 which allows unlimited number of printers, then you can consider the solution below as a way to avoid creating a lot of printers in InterFormNG2, but instead place the merged spooled file on an output queue and let the operating system handle the printing. Here we are using unregistered printers.
In order to do this we need to create the required print data stream and then copy that to a spooled file in an output queue of our choice.
This is done with a workflow like below:

The three workflow components are setup like below:
Step1
The Set multiple workflow variables is setup like shown here:
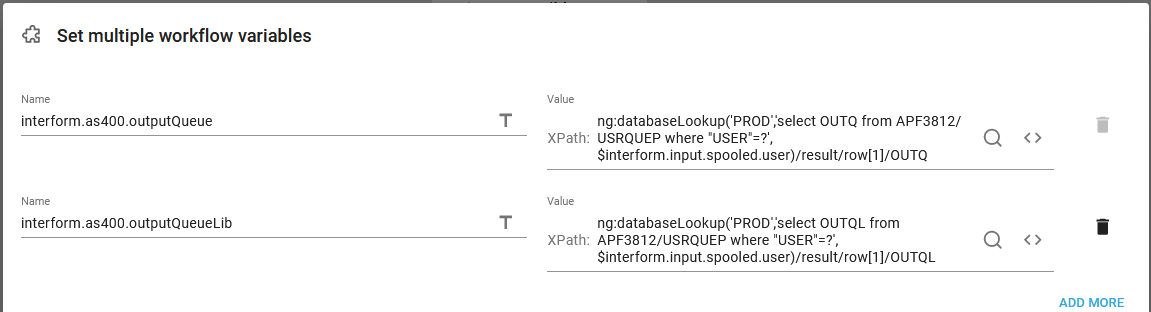
In that way the predefined variables, interform.as400.outputQueue and interform.as400.outputQueueLib are used for setting the target 'printer' by referring to the target output queue instead of a registered printer.
Step2
The second element generates the print data stream, that we want to send to the printer. In this case it is PCL, but it could also be ZPL, Direct protocol or PDF. For PCL output we want the payload to change into PCL and that is done with the workflow component, Create PCL document like below:
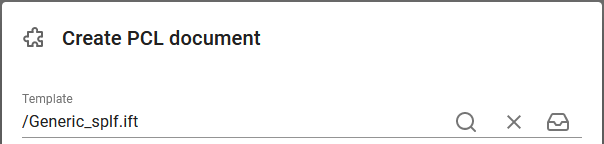
We refer to a template and the result of the merge with this template is the PCL output, which can later be sent to the printer.
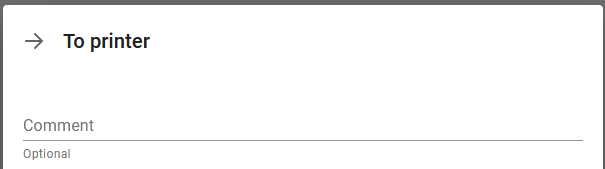
Step3
Now it is time to send the new PCL payload to the printer, that was previously selected. That is done with the workflow component, To printer, which has no parameters:
If you want to set additional attributes of the merged spooled file, then you can consider to also insert the component, IBM i print attribute options before the payload is sent to the printer.